Posted on

Better Than Takeout: How to Make Incredible Homemade Pizza

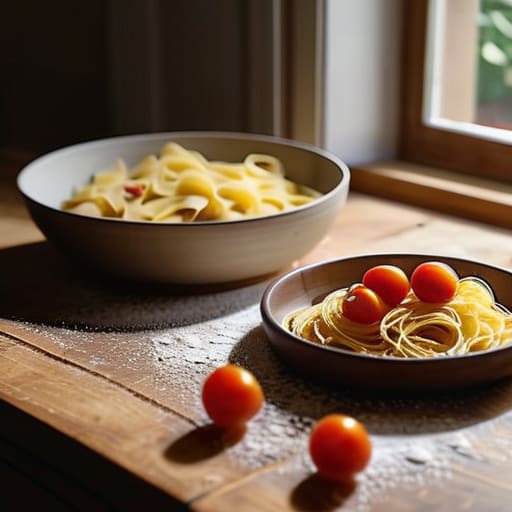
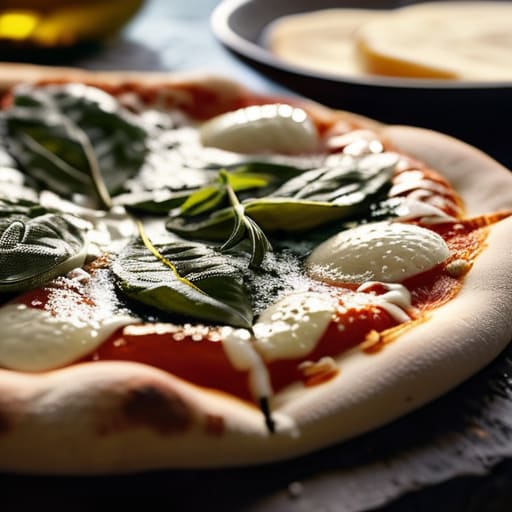
Learn how to make homemade pizza.

I used to think that mastering how to make homemade pizza required a $1,000 wood-fired oven and a degree in culinary arts, but I was dead wrong. For years, I wasted money on overpriced specialty flour and high-end gadgets, only to end up with a soggy, lukewarm mess that tasted more like a sad cracker than a meal. It wasn’t a lack of expensive gear that was the problem; it was a lack of a decent system. I was treating it like a chaotic experiment rather than a process that could be optimized.

I’m not here to sell you on some gourmet fantasy or tell you that you need a pizza stone made of volcanic rock. Instead, I want to show you how to strip away the unnecessary friction and focus on the variables that actually matter—temperature, hydration, and timing. I’ve spent enough late nights cleaning flour off my counters to know where the bottlenecks are. I’m going to walk you through a streamlined approach that turns your kitchen into a reliable production line, so you can stop fighting the dough and actually enjoy the result.

Table of Contents

Recipe Details

Total Time: 32 minutes
Difficulty: Medium

Ingredients

  • 2 cups all-purpose flour
  • 1 teaspoon active dry yeast
  • 3/4 cup warm water
  • 1 teaspoon salt
  • 1/2 cup marinara sauce
  • 1.5 cups shredded mozzarella cheese
  • 1/4 cup sliced pepperoni

Recipe Instructions

Step 1

First, we need to handle the dough. I’ve learned the hard way that rushing this is a recipe for a brick-like crust, so don’t skip the prep. Mix your flour, yeast, water, and a pinch of salt in a bowl until it forms a shaggy mass, then let it sit. If you have the time, let it undergo a slow rise in the fridge overnight; it develops a much deeper flavor and makes the texture significantly better than a quick 30-minute rush.

Step 2

Once your dough is ready, it’s time to prep your workspace. Clear off a decent chunk of your counter—clutter is the enemy of a good cooking flow. Sprinkle some semolina or flour down so nothing sticks, and gently press your dough ball out into a circle. Avoid using a rolling pin if you can; you want to preserve those air bubbles in the crust to ensure it stays light and airy rather than dense and compressed.

Step 3

Now, let’s talk about the sauce. I’m a big believer in the “less is more” philosophy here. Don’t drown your dough in heavy, cooked-down marinara, or you’ll end up with a soggy middle that falls apart the moment you lift a slice. Use a high-quality canned crushed tomato, add a tiny bit of salt and maybe some dried oregano, and spread it thinly and evenly across the base.

Step 4

Layering the toppings is where most people overcomplicate things and ruin the bake. I like to keep it simple: a light layer of fresh mozzarella and maybe a few slices of pepperoni or some basil. The goal is to avoid “topping overload,” which prevents the heat from reaching the dough effectively. You want a crispy foundation, not a heavy pile of ingredients that slides off in one go.

Step 5

Finally, get that oven as hot as it can possibly go. If you have a pizza stone or a steel, get it preheating for at least 45 minutes. Slide your pizza onto the hot surface and watch it closely. You’re looking for those charred leopard spots on the crust and bubbling cheese. Once it’s done, let it sit on a wire rack for sixty seconds before slicing—this prevents the steam from making the bottom mushy.

Mastering the Best Pizza Dough Recipe and Yeast Fermentation

Mastering the Best Pizza Dough Recipe and Yeast Fermentation

If you want to move from “decent” to “restaurant-quality,” you have to stop treating the dough like a chore and start treating it like a process. The secret isn’t some expensive Italian flour; it’s all about yeast fermentation for pizza dough. I used to rush this part, thinking a quick rise was enough, but that’s how you end up with bread that tastes like cardboard. If you can, let your dough sit in the fridge overnight. This cold fermentation allows the flavors to develop deeply and creates those beautiful, airy bubbles in the crust that you usually only see in wood-fired ovens.

When it comes to the actual bake, most people struggle with baking pizza in a home oven because our kitchen appliances just aren’t built for extreme heat. To compensate, I always preheat my stone or steel for at least forty-five minutes. You want that surface screaming hot to ensure you get those crispy pizza crust tips without drying out the center. It’s a small adjustment in your workflow, but it’s the difference between a soggy mess and a crust that actually has some structural integrity. Stick to the system, respect the timing, and the results will follow.

Simple Homemade Pizza Sauce Ingredients and Easy Pizza Toppings Ideas

Once you’ve nailed the dough, the sauce is where you can really minimize the friction between “okay” and “incredible.” I’ve learned the hard way that overcomplicating your homemade pizza sauce ingredients is a quick path to a soggy mess. You don’t need a simmering pot of complex herbs for an hour; in fact, I prefer a “no-cook” method. Just grab a can of high-quality San Marzano tomatoes, a pinch of sea salt, a splash of olive oil, and maybe some fresh basil. Crush them by hand or with a quick pulse of a blender. This keeps the flavor bright and prevents the sauce from becoming too watery, which is crucial when you’re baking pizza in a home oven where heat distribution isn’t quite as precise as a professional stone deck.

As for the rest, don’t let “decision fatigue” kill the vibe. I like to keep a few easy pizza toppings ideas on standby in my mental spreadsheet. Think beyond just pepperoni: try thin slices of prosciutto with arugula, or even a simple combination of hot honey and spicy salami. The trick is to not overload the pie. If you pile on too much, you’ll end up with a heavy, limp center. Keep it lean, keep it high-quality, and let the crust do the heavy lifting.

Optimizing Baking Pizza in a Home Oven for Crispy Pizza Crust Tips

Optimizing Baking Pizza in a Home Oven for Crispy Pizza Crust Tips

The biggest hurdle when you’re baking pizza in a home oven is the temperature gap. Professional pizza ovens hit 800°F or higher, while most residential units tap out around 500°F. To bridge that gap, you need to treat your oven like a heat reservoir. I’ve found that preheating a heavy baking stone or a cast-iron skillet for at least forty-five minutes is non-negotiable. This builds up enough thermal mass to transfer heat directly into the dough the second it hits the surface, which is one of the most effective crispy pizza crust tips I can give you. If you don’t have a stone, a clean inverted baking sheet works in a pinch, but don’t skip the long preheat.

Another trick I use to optimize the bake is positioning. I usually move my rack to the highest possible setting to get the crust closer to the top heating element. This helps mimic that intense radiant heat found in wood-fired ovens. If you notice your toppings are burning before the crust is set, try the “hybrid method”: bake your dough with just the sauce for a few minutes first, then pull it out, add your cheese and other easy pizza toppings ideas, and finish the bake. It prevents that dreaded soggy middle and ensures every bite has the structural integrity it deserves.

Small Adjustments for a Professional-Grade Pizza Night

Small Adjustments for a Professional-Grade Pizza Night
  • Stop overloading your toppings. I’ve learned the hard way that too much cheese or heavy meat turns your crust into a soggy mess; keep it light so the heat can actually crisp the dough.
  • Invest in a pizza stone or steel if you can. It’s one of those one-time costs that completely changes the game by mimicking the thermal mass of a commercial deck oven.
  • Room temperature is your friend. If you’re working with dough straight from the fridge, give it at least an hour to relax, or you’ll spend the whole time fighting it as it snaps back.
  • Pre-heat your oven longer than you think you need to. Even if it says it’s ready in fifteen minutes, give that stone or steel another twenty to ensure it’s holding enough heat to sear the bottom instantly.
  • Use semolina flour for dusting your peel. It acts like tiny ball bearings, making sure your pizza slides off onto the stone without that frustrating moment where it gets stuck and tears.

## The Philosophy of the Perfect Slice

“Making pizza at home isn’t about mimicking a professional wood-fired oven; it’s about mastering the variables you actually control. Once you stop fighting the dough and start respecting the fermentation, you realize the best part isn’t just the taste—it’s the efficiency of a process that actually works.”

Nathaniel 'Nate' Brooks

Final Thoughts on Your Pizza System

Final Thoughts on Your Pizza System.

At the end of the day, making great pizza isn’t about having a professional-grade wood-fired oven or a culinary degree; it’s about managing the variables. We’ve covered the essentials: mastering that slow fermentation for the dough, sourcing quality sauce ingredients, and leveraging your home oven’s heat to get that elusive crunch. If you can control the temperature and the timing, you’ve already won half the battle. Don’t get discouraged if your first few pies aren’t Instagram-ready. Treat it like any other system—analyze what went wrong, adjust your parameters, and try again next weekend.

My goal isn’t to turn you into a professional pizzaiolo, but to help you reclaim a bit of joy from your evening routine. There is something deeply satisfying about bypassing the delivery apps and knowing exactly what went into your meal. It’s about the small win of a perfectly crispy crust and the ability to customize every slice to your exact specifications. Stop worrying about being perfect and just start building your routine. Once you find your rhythm, you’ll realize that the best part of the process isn’t just the food—it’s the confidence that comes from mastering a new skill.

Frequently Asked Questions

Can I prep the dough a day in advance, or does it need to be baked immediately after rising?

Actually, prepping the dough a day in advance is a total game-changer. If you let it cold-ferment in the fridge overnight, you’re not just saving time later; you’re actually building better flavor and a more complex texture. Think of it as optimizing your workflow. Just pull it out about an hour before you’re ready to stretch it so it hits room temperature. It turns a rushed chore into a much smoother process.

My crust always comes out gummy in the middle—how do I fix that without buying a professional pizza oven?

The “gummy center” is usually a heat distribution problem, not a recipe failure. Since we aren’t using a $1,000 Ooni, you need to bridge the gap. My go-to fix? Get a pizza steel or a heavy baking stone. Preheating it for at least 45 minutes is non-negotiable; it creates that instant thermal shock needed to set the crust before the toppings turn the dough into a sponge. Also, less is more with your sauce—don’t drown it.

Is there a way to make this recipe work if I’m using a gluten-free flour blend?

You can definitely make this work, but you have to treat gluten-free flour differently. Since you’re missing the structural integrity of gluten, I highly recommend using a blend that includes xanthan gum—it acts as the “glue” to keep your crust from crumbling. Also, expect the dough to feel more like a thick batter than traditional dough; don’t try to knead it like a normal loaf. Just spread it out, let it rise, and keep going.

How do I prevent my toppings from making the dough soggy during a long bake?

The “soggy middle” is the ultimate system failure in pizza making. To fix it, you need to manage moisture like a pro. First, pre-cook any veggies that hold water—like mushrooms or peppers—to cook off that excess liquid. If you’re using fresh mozzarella, slice it and let it drain on a paper towel for twenty minutes first. Finally, don’t overload the center; keep the toppings light so the heat can actually reach the dough.

Posted on

Simple Recipes That Anyone Can Master

Easy meals for beginners simple recipes.

I remember my early twenties like it was yesterday—mostly because I spent most of it staring blankly into a fridge full of expired condiments, wondering why eating felt like a second job. Between long shifts and the mental drain of trying to “adult,” the sheer friction of deciding what to eat often led me straight to overpriced takeout. I realized then that cooking shouldn’t be a high-stakes performance; it’s just another system that needs optimizing. If you’re feeling overwhelmed by the complexity of recipes and grocery lists, you aren’t alone. Finding easy meals for beginners isn’t about mastering French technique; it’s about reducing the decision fatigue that kills your motivation before you even turn on the stove.
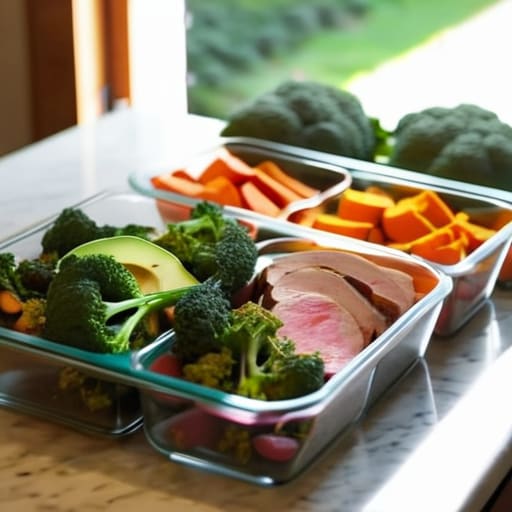
In this guide, I’ve stripped away the fluff to give you eight reliable, low-effort options that actually taste good. I’m not talking about gourmet feasts that require a chemistry degree; I’m talking about streamlined, repeatable wins that fit into a busy schedule. These eight items are designed to help you build a foundation of sustainable kitchen habits without the burnout. By the end of this list, you’ll have a toolkit of meals that take the guesswork out of your evenings, leaving you with more time to actually enjoy your life.

Table of Contents

The Sheet Pan Savior

Sheet pan meal with The Sheet Pan Savior.

If you’re like I was when I first started living on my own, you probably view cleaning dishes as a personal insult. The sheet pan method is the ultimate hack for anyone who wants to eat well without the mountain of cleanup afterward. You just toss some protein—think chicken thighs or sausages—along with chopped veggies like broccoli or bell peppers onto a single tray, drizzle with olive oil and salt, and let the oven do the heavy lifting.

One-Pot Pasta Logic

Creamy meal using One-Pot Pasta Logic.

There is a specific kind of chaos that comes with managing three different boiling pots while trying not to burn your garlic. I’ve learned to bypass that entirely by leaning into the one-pot pasta philosophy. You essentially throw your dry pasta, aromatics, broth, and a few pantry staples into a single deep pan and let it simmer together. The starch from the pasta stays in the pot, which creates a naturally creamy sauce that tastes way more expensive than it actually is.

The Breakfast-for-Dinner Pivot

The Breakfast-for-Dinner Pivot with scrambled eggs.

We’ve all had those days where the idea of prepping a “real” dinner feels insurmountable. That is exactly when I lean into the breakfast-for-dinner pivot. Scrambled eggs, some avocado toast, or even a quick omelet can be a nutritionally complete meal if you do it right. It’s fast, the ingredients are almost always in your fridge, and there is zero decision fatigue involved.

Grain Bowls and Assembly Lines

Modular Grain Bowls and Assembly Lines.

I like to think of grain bowls as a modular system rather than a recipe. Instead of following a strict set of instructions, you build an assembly line: a base of grains (like quinoa or rice), a protein, some roasted veggies, and a sauce. This approach is incredibly resilient to change because if you’re out of spinach, you just grab kale, or if you’re tired of chicken, you swap in canned chickpeas.

ITEM_HEADING: Tacos Without the Tension

Tacos are arguably the most forgiving meal in the culinary world. You don’t need to master complex techniques; you just need to get some seasoned protein into a tortilla. Whether you’re using ground beef, black beans, or even leftover rotisserie chicken, the flavor profile is almost impossible to mess up as long as you have some decent spices and a bit of lime juice.

The Rotisserie Chicken Shortcut

If you want to cheat the system, go buy a pre-cooked rotisserie chicken from the grocery store. It is arguably the highest ROI ingredient in the entire supermarket. You can shred it for salads, toss it into pasta, use it for tacos, or just eat it with some steamed greens. It’s a pre-made foundation that saves you an hour of prep and cook time.

Loaded Baked Potatoes

A baked potato is essentially a blank canvas for whatever you have lying around in your pantry. Once you get the potato in the oven, the passive cooking time is your friend. While it’s roasting, you aren’t standing over a stove; you’re just waiting for the timer to go off. It’s a very low-maintenance way to get a hearty, comforting meal.

Stir-Fry Efficiency

Stir-frying is the fastest way to get a high volume of vegetables into your diet without feeling like you’re eating a bowl of plain salad. The goal here is high heat and rapid movement. You want to chop your ingredients into uniform pieces so they cook at the same rate, then toss them in a pan with a bit of soy sauce, ginger, and garlic.

The Philosophy of the Plate

“Cooking shouldn’t feel like a second job. You don’t need a gourmet pantry or a culinary degree to eat well; you just need a repeatable system that gets you fed without draining your mental battery by 7:00 PM.”

Nathaniel 'Nate' Brooks

Streamline Your Kitchen, Save Your Sanity

At the end of the day, cooking doesn’t need to be a high-stakes production or a source of constant stress. Whether you’re leaning on the efficiency of a sheet-pan dinner, mastering the versatility of grains, or just keeping a few high-quality frozen staples on hand, the goal is the same: reducing the friction between being hungry and being fed. You don’t need a pantry full of exotic spices or a professional-grade knife set to get this right. Just focus on building a few reliable systems that work with your schedule rather than against it. Once you have these baseline meals down, you’ll realize that most of the “work” is just about having a solid plan in place before the hunger hits.

I know how it feels to stare at a fridge full of random ingredients and just decide it’s easier to order takeout again. We’ve all been there. But I promise you, the moment you stop viewing cooking as a chore and start seeing it as a small life optimization, everything changes. You aren’t trying to win a Michelin star; you’re just trying to fuel your body without draining your bank account or your mental energy. Start small, keep your tools simple, and don’t sweat the occasional burnt edge. We aren’t aiming for perfection here—we’re just aiming for a better, more efficient way to live.

Frequently Asked Questions

I don't have much time on weeknights; how can I prep these without spending my entire Sunday in the kitchen?

Look, I get it. I’ve spent too many Sundays staring at a mountain of Tupperware feeling like I’d wasted my entire weekend. You don’t need a marathon session; you need “micro-prepping.” Instead of cooking full meals, just prep components. Roast a big batch of chicken or some veggies while you’re already using the oven, or chop your onions once. It’s about reducing friction during the week, not turning your Sunday into a second job.

Is it worth investing in specialized kitchen gadgets right away, or should I just stick to the basics?

Stick to the basics. I spent way too much of my twenties buying “as seen on TV” gadgets that just ended up gathering dust in a cabinet. Most specialized tools are just friction in disguise—more things to wash, more things to store. If you can’t cook a decent meal with a sharp knife, a heavy pan, and a decent pot, a garlic press isn’t going to save you. Master the fundamentals first.

How do I keep these meals from getting boring if I'm eating similar things throughout the week?

The trick is to stop viewing a recipe as a final destination and start seeing it as a base layer. I call it “modular eating.” Keep your core proteins and grains the same, but swap the friction points: change the sauce, switch the spice profile, or throw in a different crunch. One night it’s a Mediterranean bowl with feta; the next, it’s the same base but with sriracha and lime. Same effort, totally different vibe.

What’s the most efficient way to grocery shop for these recipes so I don't end up with a fridge full of wasted ingredients?

The secret isn’t a better list; it’s a better system. Before you hit the store, audit what you actually have. I use a “component-based” approach: I shop for versatile staples—like a bag of spinach or a carton of eggs—that can pivot between several of these recipes. If a recipe calls for half an onion, make sure another meal uses the other half. If you can’t find a use for it by Thursday, don’t buy it.

Posted on

Batch Cooking 101: Cook Once and Eat Well All Week

Batch cooking for beginners meal prep guide.

I remember standing in my kitchen at 7:00 PM on a Tuesday, staring blankly into a fridge full of half-used vegetables and feeling that familiar, heavy sense of defeat. I was exhausted from a day of troubleshooting system errors, and the last thing I wanted to do was play chef. Most “expert” advice on batch cooking for beginners makes it sound like you need a professional-grade kitchen and four hours of uninterrupted focus to succeed. They tell you to spend your entire Sunday measuring out grams of quinoa and prepping twenty identical plastic containers, which is a fast track to burnout, not a solution for it.
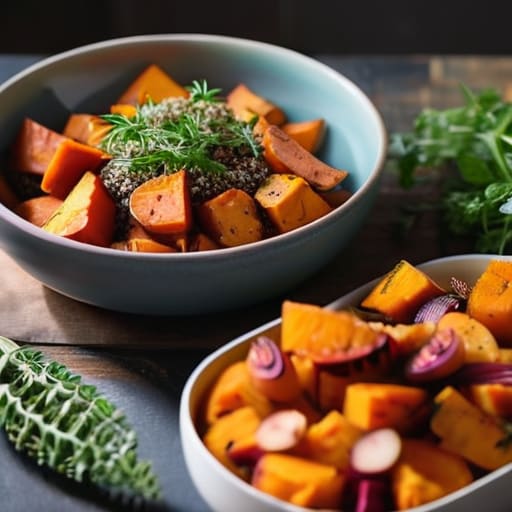
I’m not here to sell you on a lifestyle overhaul or some Pinterest-perfect aesthetic that requires a degree in culinary arts. My goal is to help you build a functional system that actually works when your energy is low. I’m going to show you how to use a few simple, repeatable methods to prep food that tastes good on Thursday, not just Monday. We aren’t aiming for a gourmet buffet; we’re just aiming to eliminate the decision fatigue that ruins your evenings.

Table of Contents

Smart Weekly Meal Planning Tips That Actually Stick

Smart Weekly Meal Planning Tips That Actually Stick

The biggest mistake I see people make is trying to plan a gourmet five-course menu every Sunday. That’s a recipe for burnout, not efficiency. Instead, I treat my planning like a systems audit: look at what you already have in the pantry before you even touch a grocery app. I find that the most effective weekly meal planning tips involve picking just two proteins and three versatile vegetables to rotate through the week. This reduces decision fatigue and keeps your grocery bill from spiraling. If you try to cook something entirely new every single night, you’ll eventually give up and order takeout.

Once you have the plan, you need the right hardware to make it sustainable. Don’t bother with cheap, flimsy plastic that stains the second you put tomato sauce in it; invest in a few decent meal prep containers for beginners that actually seal tight and stack neatly in the fridge. I’m a big believer in the “component method”—prepping ingredients like roasted sweet potatoes, shredded chicken, or sautéed greens separately rather than making finished meals. This gives you the flexibility to mix and match flavors throughout the week so you don’t feel like you’re eating the exact same thing every single day.

Simple Batch Cooking Meal Ideas to Get Started

Simple Batch Cooking Meal Ideas to Get Started

If you’re staring at a blank meal plan, don’t try to reinvent the wheel with complex recipes. Start with “component cooking”—it’s much more flexible. Instead of making five identical containers of chicken and broccoli, just roast two trays of seasoned vegetables and a large batch of a versatile protein like pulled pork or seasoned ground turkey. This gives you a base you can pivot between different flavors throughout the week. One night it’s a burrito bowl, the next it’s a quick Mediterranean salad. It’s one of my favorite time saving kitchen hacks because it prevents the “food fatigue” that usually kills my motivation by Wednesday.

Another solid approach is leaning into one-pot wonders like hearty chili, lentil soup, or a big tray of roasted root vegetables and sausage. These are perfect batch cooking meal ideas because they actually taste better the next day after the flavors have had time to settle. If you find yourself making more than you can eat in a single week, don’t let it clutter your fridge; use a simple freezing cooked meals guide approach by portioning the extras into airtight bags immediately. It turns your Sunday effort into a “safety net” of easy dinners for those inevitable nights when you’re too drained to even think about cooking.

Five Ways to Keep Your Batch Cooking From Becoming a Chore

Five Ways to Keep Your Batch Cooking From Becoming a Chore
  • Don’t try to be a Michelin-star chef on a Sunday afternoon. Start with one “anchor” protein—like a big batch of shredded chicken or seasoned ground beef—and use it across three different meals. It keeps the cooking window short and prevents you from feeling like you’re working a double shift in your own kitchen.
  • Invest in decent, stackable containers. I learned this the hard way after a week of digging through mismatched Tupperware that wouldn’t seal. If your containers are uniform and clear, you can see exactly what you have at a glance, which stops you from overbuying groceries or letting things rot in the back of the fridge.
  • Embrace the “component” method instead of full recipes. Instead of making five identical heavy casseroles that make you feel sluggish by Wednesday, prep individual components: a big bowl of roasted veggies, a pot of grains, and a couple of proteins. It gives you the flexibility to mix and match flavors so you don’t get “food fatigue.”
  • Keep your spice cabinet organized and accessible. If you have to hunt through a cluttered pantry every time you need cumin, you’ll lose momentum. Having a streamlined setup makes the actual assembly phase of batch cooking feel like a quick system update rather than a scavenger hunt.
  • Leave a little room for error. Don’t plan a meal prep that takes up your entire Sunday. Aim for a 90-minute window. If you try to prep every single calorie for the week in one sitting, you’ll burn out by week two and go right back to ordering takeout. Build in some margin so the system actually stays sustainable.

The Philosophy of the Prep

“Batch cooking isn’t about becoming a gourmet chef on a Sunday afternoon; it’s about building a system that buys you back your sanity on a Tuesday night when you’re too tired to think.”

Nathaniel 'Nate' Brooks

Stop Overthinking It and Just Start

Stop Overthinking It and Just Start cooking.

At the end of the day, batch cooking isn’t about becoming a Michelin-star chef or spending your entire Sunday hunched over a cutting board. It’s about the systems we discussed: picking a few versatile recipes, planning your week before the chaos hits, and leaning into the simplicity of prepared ingredients. You don’t need to prep twenty different meals to see a difference; even just having a batch of seasoned protein or a large pot of grains ready in the fridge can drastically reduce the mental load of deciding what’s for dinner when you’re exhausted at 6:00 PM.

Look, I know the idea of changing your routine feels like just another chore on an already overflowing to-do list. But I promise you, the friction you feel every single evening is much more draining than the hour you spend prepping on a Sunday. Don’t aim for a perfectly organized, aesthetic fridge like you see on Instagram. Just aim for a system that works for your life and your schedule. Once you get those first few wins under your belt, you’ll realize that you aren’t just saving money or food—you’re actually reclaiming your time for the things that actually matter.

Frequently Asked Questions

How do I keep the food from tasting like it’s been sitting in the fridge for five days?

The “fridge fatigue” is real, and it usually comes down to two things: moisture and texture. If you’re throwing everything into one big container, the sauces turn everything into mush. Instead, treat your containers like a system. Keep your proteins and grains separate, and never dress a salad or add sauce until the moment you’re actually eating. Also, invest in decent glass containers; they hold temperature better and don’t hold onto those weird plastic smells.

Do I really need to buy a bunch of expensive matching containers, or can I just use what I have?

Look, I get the temptation. Those sleek, glass sets look great on Instagram, but let’s be real: they’re an unnecessary friction point. If you’re waiting for a perfect matching set to start, you’ll never actually start. Just use what you have—mismatched Tupperware, old deli containers, even glass jars. The goal is to streamline your week, not curate a kitchen museum. As long as they’re airtight and stackable, they’re doing their job.

What’s the best way to freeze things without ending up with a block of ice that's impossible to portion out?

The biggest mistake I see is tossing a giant mass of food into a single bag and hoping for the best. You end up with a frozen brick that’s useless unless you thaw the whole thing.

How much time am I actually going to spend in the kitchen on a Sunday versus the time I'm saving during the week?

Look, I get it. You’re staring at a mountain of Tupperware wondering if this is actually worth the Sunday afternoon sacrifice. Here’s the math: you’ll likely spend two to three hours in the kitchen on Sunday. But in exchange, you’re reclaiming about 30 to 45 minutes every single weeknight. You aren’t just saving time; you’re eliminating the “decision fatigue” of staring blankly at a fridge at 6:00 PM. That’s a massive win for your mental bandwidth.

Posted on

Creative Ways to Transform Your Leftovers Into Fresh Meals

Creative ways on how to use leftovers.

I used to stare at the Tupperware graveyard in the back of my fridge every Sunday night, feeling that familiar sting of wasted money and wasted effort. There is this pervasive, annoying myth that knowing how to use leftovers requires some kind of culinary degree or an endless supply of niche ingredients you’ll only use once. Honestly, that’s just bad systems design. I spent my twenties throwing away perfectly good protein because I didn’t have a plan, treating my groceries like a disposable resource rather than the investment they actually are.
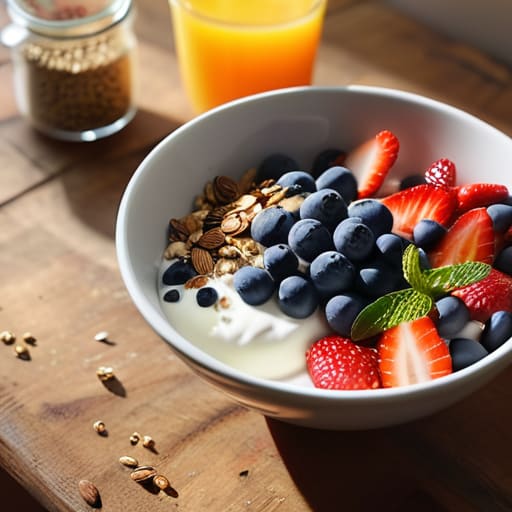
I’m not here to give you a list of “gourmet transformations” that take an hour to prep. Instead, I want to show you how to build a repeatable framework for your kitchen. I’m going to share the specific, low-friction methods I use to turn last night’s roasted chicken or half a bag of wilted spinach into a functional meal in under fifteen minutes. We aren’t aiming for a Michelin star here; we are just aiming to stop the bleed in your grocery budget and reclaim your evening.

Table of Contents

Smart Food Waste Reduction Tips for Busy People

Smart Food Waste Reduction Tips for Busy People

If you’re like I was in my early twenties, you probably treat the fridge like a graveyard for expensive groceries. We’ve all been there—buying a massive pack of chicken breasts with the best intentions, only to watch them turn into science experiments by Friday. To break this cycle, you need to stop viewing leftovers as “old food” and start seeing them as pre-processed ingredients. One of my favorite food waste reduction tips is to dedicate a specific container in your fridge—I call it the “Use Me First” bin—for anything that’s nearing its expiration date. It’s a simple visual cue that removes the decision fatigue when you’re tired after a long shift.

Another way to reclaim your time is through repurposing cooked proteins. Instead of trying to eat the exact same meal three nights in a row (which is a one-way ticket to burnout), shift the format. That roasted salmon from Tuesday? Flake it into a quick grain bowl with some avocado on Wednesday. That batch of ground beef? Toss it into a taco shell or a quick pasta sauce. By focusing on creative kitchen hacks rather than rigid meal plans, you turn your kitchen into a high-efficiency system that actually works with your schedule, not against it.

Mastering the Art of Storing Leftovers Safely

Mastering the Art of Storing Leftovers Safely

Look, there is no point in being efficient if you end up throwing half your groceries in the trash because something turned fuzzy in the back of the fridge. Storing leftovers safely is the foundation of any good system; if the storage fails, the whole plan collapses. I’ve learned the hard way that the “toss it in a Tupperware” method is too vague. You need to invest in a set of high-quality, airtight glass containers. They don’t stain, they don’t hold onto old smells, and they actually seal properly, which is the difference between a meal lasting three days or becoming a science project.

When it comes to repurposing cooked proteins, timing is everything. I try to get everything into the fridge within two hours of cooking. If you’re planning a larger meal prep with leftovers for the week ahead, don’t just stack everything in one massive pile. Portion things out into individual servings immediately. It’s much easier to grab one container for lunch than to fight with a giant, lukewarm pot of chili every morning. Also, a quick tip from my own kitchen: label your containers with a piece of masking tape and a sharpie. It feels a little overkill, but knowing exactly when that roasted chicken was cooked takes the guesswork—and the anxiety—out of your meal planning.

The "Component Method": Turning Ingredients into New Meals

  • Stop viewing leftovers as “old meals” and start seeing them as pre-prepped components. That roasted chicken isn’t just dinner from Tuesday; it’s the protein base for a quick pesto pasta or a hearty chicken salad on Wednesday.
  • Build a “base” mindset for your grains and starches. If you have extra quinoa, rice, or roasted sweet potatoes, don’t just reheat them in a bowl. Throw them into a breakfast hash or a grain bowl with a fresh egg to change the texture and flavor profile entirely.
  • Master the “Transformative Sauce” trick. A heavy, creamy pasta sauce might feel unappealing the next day, but if you thin it out with a little broth or coconut milk, it becomes a base for a different soup or a dipping sauce for roasted veggies.
  • Keep a “Rescue Kit” in your pantry. Having high-impact items like soy sauce, sriracha, feta cheese, or toasted nuts on hand allows you to pivot a boring leftover into something that feels intentional rather than just “reheated.”
  • Use the “One-New-Ingredient” rule. To prevent leftover fatigue, always add one fresh, crunchy, or acidic element to your repurposed meal—like a squeeze of lime, some fresh cilantro, or sliced radish. It breaks the monotony and makes the meal feel new.

The Philosophy of the Reused Meal

The Philosophy of the Reused Meal photograph.

“Leftovers shouldn’t feel like a chore or a compromise; they’re just ingredients that have already been paid for. When you view them as a head start on your next meal rather than a relic of your last one, you stop wasting money and start reclaiming your time.”

Nathaniel 'Nate' Brooks

Streamlining Your Kitchen Routine

Streamlining Your Kitchen Routine with leftovers.

At the end of the day, managing leftovers isn’t about becoming a gourmet chef or a master of food preservation; it’s about building a better system for your kitchen. We’ve covered how to shop with intention to reduce waste, the right way to store your meals so they actually stay fresh, and how to transform yesterday’s dinner into a brand-new meal without much effort. When you stop viewing leftovers as “old food” and start seeing them as pre-prepped ingredients, you reclaim both your time and your grocery budget. It’s a small shift in perspective, but it’s one that eliminates the daily decision fatigue that usually hits right around 6:00 PM.

I know it can feel like just another chore on an already overflowing to-do list, but I promise you that the payoff is worth the initial setup. You don’t need to overhaul your entire life or buy a dozen specialized containers to see the benefits. Just start small—maybe it’s just committing to one “repurpose night” a week or finally investing in some decent airtight glass containers. My goal isn’t to help you achieve a perfect, zero-waste lifestyle; I just want to help you remove the friction from your evening routine. Once you get these systems running in the background, you’ll find you have more mental energy for the things that actually matter.

Frequently Asked Questions

How long can I actually keep leftovers in the fridge before they become a safety risk?

Look, I’m a big believer in systems, but I’m not a fan of playing food roulette. Generally, you’ve got a three-to-four-day window for most cooked meals before things get dicey. If it’s seafood or something heavy on the cream, aim for the shorter end of that scale. My rule of thumb? If you can’t remember when you actually cooked it, or if the texture feels “off,” just toss it. It’s not worth the risk.

Are there specific containers I should be using to keep food from getting soggy or tasting like the fridge?

If you’re tired of your leftovers tasting like whatever onion soup is sitting in the back of the fridge, ditch the cheap, thin plastic. Invest in glass containers with airtight silicone seals—they don’t absorb odors and they won’t stain. For anything crispy, like roasted veggies or fried proteins, avoid sealing them completely while they’re still warm. Use a paper towel at the bottom of a shallow container to absorb excess moisture and prevent that dreaded sogginess.

How do I reheat things so they don't end up dry or rubbery?

The biggest mistake people make is treating the microwave like a magic wand. If you want to avoid that rubbery, sad texture, stop blasting it on high. Use medium power and add a splash of water or broth to create steam—it’s a game changer for rice and pasta. For proteins like chicken, I actually prefer a skillet with a lid on low heat. It keeps the moisture locked in so you aren’t chewing on leather.

What’s the best way to freeze leftovers without losing all the texture and flavor?

The trick is to stop thinking about leftovers as “old food” and start thinking about them as ingredients. If you want to preserve texture, avoid freezing things with high water content like delicate greens or creamy sauces—they’ll turn into a sad, separated mess once thawed. Instead, flash-freeze components separately. For proteins, use airtight vacuum bags to prevent freezer burn. It’s all about minimizing air contact and managing moisture.

Posted on

Nutritious Breakfasts You Can Whip Up in Minutes

Quick and nutritious healthy breakfast ideas.

I spent most of my early twenties running on nothing but black coffee and sheer willpower, thinking that skipping breakfast was just another way to optimize my time. I was wrong. By 10:30 AM, my brain would turn into mush, and I’d find myself spiraling into a cycle of sugar cravings and mid-morning crashes that absolutely tanked my productivity. Most people think finding healthy breakfast ideas requires a culinary degree or an hour of prep time, but that’s just a recipe for failure. In reality, the goal isn’t to cook a five-course meal; it’s to eliminate the morning friction that leaves you feeling depleted before your first meeting even starts.
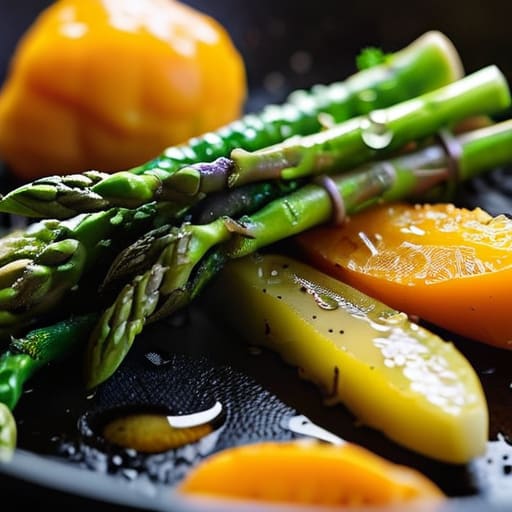
I’ve spent years testing different systems to see what actually sticks when life gets chaotic. In this guide, I’m breaking down eight specific options that prioritize high nutritional ROI with minimal effort. You aren’t going to find any complicated recipes here—just low-maintenance, high-impact fuel designed to keep your blood sugar steady and your focus sharp. If you’re ready to stop fighting your mornings and start actually fueling your day, these are the eight shifts that will make all the difference.

Table of Contents

Overnight Oats: The Ultimate Set-and-Forget System

Overnight Oats: The Ultimate Set-and-Forget System

If you’re like me and tend to stare blankly at the fridge while your brain is still buffering, overnight oats are your new best friend. You just throw some rolled oats, milk (or a plant-based alternative), and a bit of chia seeds into a jar the night before. It’s a zero-effort morning once the prep is done, and it removes that decision fatigue that usually kills my productivity before 9:00 AM.

Avocado Toast with a Protein Upgrade

Avocado Toast with a Protein Upgrade.

We’ve all seen the aesthetic photos, but let’s talk about the actual utility of avocado toast. On its own, it’s mostly just healthy fats and carbs, which might leave you feeling hungry by mid-morning. To make this a sustainable fuel source, you need to stop treating it like a snack and start treating it like a meal by adding a solid protein component.

The High-Protein Greek Yogurt Bowl

The High-Protein Greek Yogurt Bowl breakfast.

When I’m in a massive rush and even making toast feels like too much friction, I go for the Greek yogurt bowl. It is arguably the most efficient breakfast in my entire rotation. You aren’t cooking anything, you aren’t cleaning pans, and you’re getting a massive hit of protein that keeps your blood sugar from spiking and crashing.

Savory Breakfast Burritos (Batch Cooked)

Savory Breakfast Burritos (Batch Cooked) for mealprep.

This is where my obsession with optimization really kicks in. I don’t make a breakfast burrito every morning; I spend about forty minutes on a Sunday morning making a dozen of them and freezing them. It’s a systematic approach to breakfast that ensures you always have a hot, nutritious meal ready in the microwave.

Chia Seed Pudding for Brain Power

I started experimenting with chia pudding when I realized I needed more fiber in my diet to avoid that mid-morning brain fog. It’s essentially the same concept as overnight oats, but the texture is much lighter. It’s a great option if you prefer something a bit more refreshing and cool rather than something heavy or dense.

The "No-Brainer" Green Smoothie

Smoothies are a bit of a gamble; if you do them wrong, you’re just drinking a cup of sugar. But if you treat them like a nutritional formula, they are an incredible way to get your greens in before the day gets chaotic. I keep a bag of frozen spinach in the freezer specifically for this purpose.

Scrambled Eggs and Sautéed Greens

Sometimes, you just need a real meal to feel human. If you have ten minutes to spare, a simple scramble with some wilted spinach or kale is a fantastic way to ground yourself. It’s a minimalist approach to cooking that delivers high-quality nutrients without requiring a culinary degree.

Cottage Cheese and Fruit Parfait

If you think cottage cheese is just something your parents ate, you’re missing out on one of the most underrated protein hacks available. It’s incredibly high in casein protein, which digests slowly and keeps you full for a long time. It’s much more efficient than most cereal-based breakfasts that leave you hungry an hour later.

The Breakfast Philosophy

A good breakfast isn’t about following a complex recipe or hitting every single macro on a spreadsheet; it’s about building a system that removes the decision fatigue from your morning so you can actually show up for your day.

Nathaniel 'Nate' Brooks

The Bottom Line

Look, the goal here wasn’t to turn you into a gourmet chef or force you into a rigid, unsustainable diet. Whether you’re leaning into the grab-and-go simplicity of Greek yogurt or taking the extra five minutes to prep overnight oats, the common thread is reducing morning friction. We covered everything from high-protein savory options to quick, fiber-rich fruit bowls, all designed to keep your blood sugar stable so you aren’t crashing by 10:00 AM. The point isn’t to find the “perfect” meal; it’s about finding a repeatable system that works for your specific schedule and prevents that mid-morning energy slump.

At the end of the day, your breakfast is just one piece of the larger optimization puzzle. Don’t let the pursuit of a “perfectly healthy” morning become another source of stress in an already busy life. If you start with just one of these ideas tomorrow, you’re already ahead of where you were yesterday. Stop overthinking the nutrition labels and just start building better habits one small, manageable meal at a time. Life is complicated enough; your breakfast shouldn’t be. Just pick one, make it happen, and keep moving forward.

Frequently Asked Questions

I'm short on time during the week; can I prep these on Sunday and still have them taste good by Wednesday?

Short answer: Yes, but don’t treat them all the same. For things like overnight oats or chia pudding, Sunday prep is a lifesaver—they actually improve by Tuesday. For things involving eggs or fresh fruit, I’d wait until the night before to avoid that “reheated” texture. My rule of thumb? If it’s wet or fermented, prep it early. If it’s delicate or prone to getting soggy, keep the components separate and assemble on the fly.

How much protein do I actually need in the morning to avoid that mid-morning energy crash?

Look, I’m not a nutritionist, but I am a guy who obsesses over systems, and the “blood sugar roller coaster” is a massive system failure. To avoid that 10:30 AM brain fog, aim for about 25 to 30 grams of protein. That’s the sweet spot that triggers satiety and stabilizes your energy. Don’t just guess; track it for a few days. Once you hit that number, you’ll stop reaching for the third coffee.

Are there ways to make these options more budget-friendly if I'm trying to keep my grocery bill down?

Look, I get it. Optimization shouldn’t mean draining your bank account. To keep these costs down, stop buying the pre-cut stuff and the branded “health” snacks—you’re paying a massive premium for convenience. Buy oats, eggs, and frozen fruit in bulk; they’re nutritional heavyweights that cost pennies per serving. Also, stick to store brands for staples like Greek yogurt. If it’s packaged in a fancy box with “superfood” on the label, skip it.

What are some good low-carb or savory alternatives if I'm not a fan of sweet breakfasts like yogurt or fruit?

Look, I get it. Not everyone wants to start their day with a sugar spike or a bowl of fruit. If you’re more of a savory person, lean into proteins and fats to keep your energy stable. Try soft-scrambled eggs with avocado, or even some leftover smoked brisket from last night—seriously, it’s a game changer. If you need something portable, a couple of hard-boiled eggs and some deli turkey slices work perfectly.

Posted on

How to Cook Vegetables So They’re Actually Delicious

Tips on how to cook vegetables delicious.

I used to think that learning how to cook vegetables meant buying a dozen specialized gadgets and following recipes that required ingredients I couldn’t pronounce. I spent my early twenties eating mushy, overboiled broccoli that tasted like nothing but sadness, mostly because I was following “healthy” guides that were way too complicated for a Tuesday night. Most of the advice out there is just noise—either it’s too high-end for a regular person or it’s so vague it’s useless. I’m tired of seeing people turn nutritious food into a chore just because they haven’t mastered the basic mechanics of heat and seasoning.
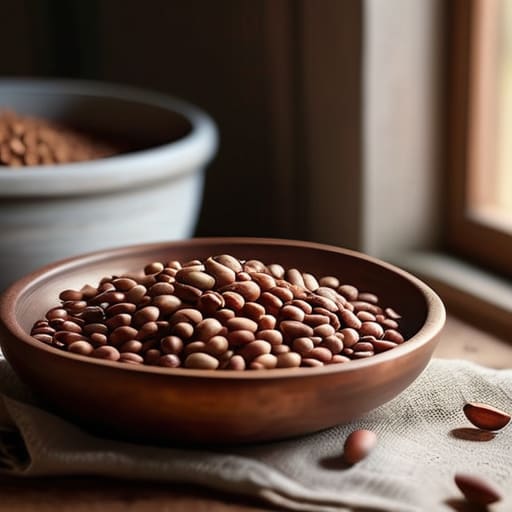
I’m not here to give you a culinary masterclass or tell you to buy a $400 sous-vide machine. My goal is much simpler: I want to show you how to strip away the friction and get decent, flavorful results with minimal effort. I’ll be sharing the specific, repeatable methods I use to keep my weeknight meals from feeling like a massive waste of time. We aren’t aiming for Michelin stars here; we are just aiming for consistent, delicious results that actually fit into a busy life.

Table of Contents

Smart Healthy Vegetable Preparation Methods

Smart Healthy Vegetable Preparation Methods.

When it comes to actually getting food on the table without losing all the goodness in the process, you have to look at your method first. Most people default to boiling because it’s easy, but you’re essentially just making a lukewarm soup out of your nutrients. If you want to prioritize retaining nutrients in vegetables, I usually lean toward steaming or quick sautéing. Steaming is great for delicate greens, but if you want actual flavor, you need to look at steaming vs roasting vegetables. Roasting is my go-to for root veggies; that high-heat caramelization does more for your taste buds than any heavy sauce ever could.

The real secret to making this a sustainable habit, though, is simplifying your seasoning. Don’t get bogged down in complex recipes. For me, the best seasoning for vegetables is almost always just high-quality olive oil, flaky sea salt, and a crack of black pepper. If you’re feeling adventurous, a squeeze of lemon or a dash of red pepper flakes goes a long way. The goal here isn’t to become a Michelin-star chef; it’s to create quick vegetable side dishes that don’t require a mental breakdown to execute. Keep it simple, keep it hot, and stop overthinking the process.

A Practical Vegetable Cooking Times Guide

A Practical Vegetable Cooking Times Guide infographic.

Look, I’m not a fan of guesswork. In my line of work, if the timing is off, the whole system crashes; cooking is exactly the same. If you leave broccoli in the pan for three minutes too long, you’re left with a mushy, grey mess that’s lost its structural integrity. To avoid that, I keep a mental vegetable cooking times guide categorized by texture. Think of it in tiers: quick-hit greens like spinach or bok choy only need a minute or two of heat, while denser roots like carrots or sweet potatoes need that slow, steady application of energy to break down their fibers without turning into sludge.

When I’m deciding between steaming vs roasting vegetables, my choice usually depends on how much time I actually have in the evening. Roasting is my go-to for flavor; it’s the ultimate way to maximize caramelization, but it requires a higher time commitment. If I’m running low on bandwidth, steaming is the more efficient route for retaining nutrients in vegetables and keeping things light. Regardless of the method, the goal is consistency. Once you master these basic intervals, you stop reacting to your food and start actually controlling the process.

Five Small Tweaks for Better Veggies

Five Small Tweaks for Better Veggies guide.
  • Stop drowning your vegetables in water. Boiling is the fastest way to leach out all the flavor and nutrients; if you want actual taste, stick to roasting or sautéing where you can actually develop some color and texture.
  • Invest in a decent chef’s knife and actually learn to use it. If you’re hacking away at a carrot with a dull blade, you’re getting uneven pieces that cook at different rates, leaving you with some mushy bits and some raw ones.
  • Salt your water like the sea. If you do decide to boil or blanch, don’t be shy with the salt. It’s not just about seasoning the final dish; it’s about seasoning the vegetable from the inside out while it cooks.
  • Don’t fear the high heat. A lot of people play it too safe and end up with limp, sad vegetables. A hot pan creates that slight char and caramelization that makes a simple side dish actually feel like a real meal.
  • Dry your greens thoroughly after washing. If you toss wet vegetables into a hot pan, they’re going to steam instead of sear. If you want that crisp texture, make sure they’re bone-dry before they hit the oil.

The Philosophy of the Pan

Cooking vegetables isn’t about following a rigid recipe to the letter; it’s about managing heat and timing so you actually enjoy what’s on your plate instead of just forcing yourself to eat it.

Nathaniel 'Nate' Brooks

Streamlining Your Veggie Routine

Streamlining Your Veggie Routine through efficient prep.

At the end of the day, mastering vegetables isn’t about following a rigid, complicated recipe every single night. It’s about understanding the fundamental mechanics of heat and timing. Whether you’re opting for the high-heat efficiency of a quick stir-fry or the slow, mellow sweetness of roasting in the oven, the goal is to eliminate the guesswork that usually leads to mushy, uninspired meals. Once you have a handle on your prep methods and a basic idea of how long different textures take to reach their peak, you’ve effectively removed the friction from your evening meal prep. You aren’t just cooking; you’re optimizing a core part of your daily survival system.

Don’t feel like you need to overhaul your entire kitchen or buy every specialized gadget on the market to make this work. Start small. Pick one vegetable this week and experiment with a different heat level or a slightly different seasoning. The beauty of these small, actionable adjustments is that they compound over time. You’ll find yourself spending less time staring at a cutting board and more time actually enjoying the food you’ve prepared. We aren’t looking for a Michelin-star transformation here; we’re just looking to make dinner easier and a whole lot more delicious. Just keep it simple, stay consistent, and let the heat do the heavy lifting.

Frequently Asked Questions

How do I keep my vegetables from turning into mush when I'm cooking them in bulk for the week?

The secret to bulk prepping without the mush is simple: undercook them slightly. If you’re prepping for the week, aim for “al dente”—that slight bite in the middle. When you reheat them in the microwave or a pan later, that residual heat finishes the job. Also, let them cool completely on a wire rack before hitting the containers. If you trap steam in a closed lid, you’re basically steaming them into oblivion.

Is there a way to prep my veggies ahead of time without them losing their crunch or getting slimy in the fridge?

Look, the “prepping ahead” trap is real. If you chop everything Sunday night, you’re basically eating mush by Wednesday. My rule of thumb? Keep things dry and separate. For crunchy stuff like carrots or bell peppers, store them in airtight containers with a paper towel to soak up excess moisture. If you’re prepping greens, wash them, spin them bone-dry in a salad spinner, and line the container with more paper towels. Moisture is the enemy.

I hate cleaning a million pots and pans; what’s the most efficient, one-pan way to get a good sear on greens or roots?

Look, I get it. I’ve spent enough time staring at a sink full of crusty pans to know that nobody actually enjoys the cleanup. If you want a solid sear without the mountain of dishes, go with a heavy cast iron skillet. It holds heat like a dream. Toss your roots in with a bit of oil and salt first; once they’re tender, throw the greens right on top. One pan, minimal friction, maximum flavor.

How do I know if I've actually overcooked them versus just getting that perfect tender-crisp texture?

The easiest way to tell? Use the fork test, but don’t rely on it blindly. If a fork slides in with almost zero resistance—like it’s hitting mush instead of structure—you’ve crossed the line into overcooked territory. You want that slight “snap” when you bite down. If the vegetable loses its vibrant color and turns a dull, translucent grey or brown, you’ve stayed on the heat too long. Aim for color and structural integrity.

Posted on

The Easy Way to Cook Beans and Lentils on a Budget

Easy guide on how to cook beans and lentils.

I used to think that if I wanted decent legumes, I had to buy those overpriced, pre-cooked vacuum-sealed pouches that cost a fortune and taste like wet cardboard. I wasted way too much time and money chasing “convenience” when the reality was much simpler. Most recipes out there make learning how to cook beans and lentils feel like a high-stakes chemistry experiment involving precise timing and obscure equipment. Honestly, it’s a massive system failure in the kitchen when something as fundamental as a bowl of lentils feels intimidating or unnecessarily complicated.
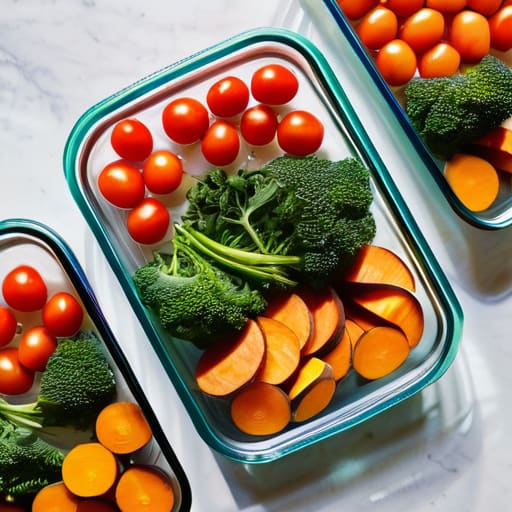
I’m not here to give you a culinary lecture or a list of gourmet fluff you’ll never use. Instead, I’m going to show you how to master the basics by applying a little bit of logic to your prep work. I’ll share the exact, streamlined workflow I use to ensure they come out creamy rather than mushy, every single time. We aren’t aiming for a Michelin star here; we’re just aiming for reliable, delicious results that fit into a busy life without the friction.

Table of Contents

Soaking Dried Beans vs No Soak Choosing Your Routine

Soaking Dried Beans vs No Soak Choosing Your Routine

This is where most people hit a fork in the road, and honestly, your choice depends entirely on how much friction you’re willing to tolerate in your kitchen. If you have the foresight to prep the night before, soaking dried beans vs no soak becomes a simple matter of texture and time. Soaking is my go-to for larger varieties like kidney or chickpeas; it hydrates the core of the bean, ensuring you don’t end up with that annoying “chalky center” where the outside is mushy but the inside is still hard. Plus, if you’re looking into preventing gas when eating legumes, a long soak helps break down those complex sugars that cause the most digestive drama.

On the flip side, if you’re a “I need dinner now” kind of person, you can skip the soak, but you have to adjust your systems. You’ll need to account for significantly longer cooking times for different legumes, and I highly recommend using a pressure cooker to bridge that gap. If you’re working with lentils, though, don’t bother with the soak at all—they’re small enough that they cook through perfectly on their own. For me, it’s all about matching the method to the legume so I’m not standing over a stove longer than I have to be.

Mastering Cooking Times for Different Legumes Without the Guesswork

Mastering Cooking Times for Different Legumes Without the Guesswork

The biggest mistake I see people make is treating every legume like it’s the same. If you try to cook a dried kidney bean and a red lentil in the same pot at the same time, you’re going to end up with a tragic mess of some stones and some mush. You need a mental cheat sheet for cooking times for different legumes so you aren’t hovering over the stove with a stopwatch. Generally, split lentils and red lentils are the “fast lane” group—they can be done in 15 to 20 minutes. Dried beans like chickpeas or black beans are the “long haul” group, often requiring an hour or more depending on their age and whether you opted for the soak.

If you’re short on time and hate the waiting game, a pressure cooker is your best friend. I use mine constantly to bypass the traditional soak-and-simmer marathon. Just keep in mind that pressure cooker bean instructions vary wildly; a single bean can go from perfect to a puree in a matter of minutes if you aren’t careful with the timing. Regardless of the method, my rule of thumb is to always test a single bean about ten minutes before you think it should be done. It’s the only way to ensure you actually hit that sweet spot of creamy on the inside without the skin falling apart.

Five Small Tweaks for Better Beans

Five Small Tweaks for Better Beans guide.
  • Salt early, not late. I used to wait until the end to season, thinking it would keep the skins from getting tough, but that’s a myth. Adding salt to the soaking water or the initial pot actually helps season the bean all the way to the core.
  • Ditch the “flavoring” myths. You’ll hear people say you shouldn’t salt beans or add acidic things like tomatoes too early because it toughens them up. Honestly? If you’re using a modern stovetop and decent beans, just cook them. Don’t overcomplicate the chemistry; just focus on the texture.
  • Use aromatics, not just salt. If you want your beans to actually taste like something instead of just “boiled,” throw a smashed garlic clove, a bay leaf, or half an onion into the pot. It’s zero extra effort and makes a massive difference in the final profile.
  • Keep an eye on the “mush factor.” Lentils, especially red ones, go from perfect to literal sludge in about sixty seconds. If you’re using lentils, treat them like a precision task—check them five minutes before you think they’re done.
  • Save your liquid. If you’re making a stew or a soup, don’t dump all that bean cooking liquid down the drain. It’s full of starch and flavor. Use it as a base for your next dish to add instant body and depth without needing extra thickeners.

The Philosophy of the Slow Simmer

“Cooking beans isn’t about following a rigid timer; it’s about respecting the process. If you try to rush a legume, you end up with a mushy, inconsistent mess. Give them the time they need to transform, and you’ll get a result that actually makes the prep work worth it.”

Nathaniel 'Nate' Brooks

Streamlining Your Legume Game

Streamlining Your Legume Game with prep methods.

At the end of the day, mastering beans and lentils isn’t about following a rigid, scientific formula; it’s about understanding the basic mechanics so you can stop second-guessing yourself. Whether you decide that a long soak is worth the extra time or you opt for the quick-soak method to save your evening, the goal is consistency. Remember to respect the different cooking timelines—don’t treat a red lentil like a kidney bean unless you want a pot of mush. Once you’ve dialed in your timing and prep methods, you’ve effectively removed the biggest variables that lead to kitchen frustration.

My philosophy has always been that small, repeatable systems are what actually make a lifestyle sustainable. You don’t need to be a professional chef to make a killer batch of dal or a hearty bean chili; you just need to eliminate the friction that keeps you from starting. Don’t let the fear of a ruined pot keep you from experimenting with these pantry staples. Start small, keep your workspace organized, and let the process become second nature. Life is far too busy to worry about whether your beans are undercooked—get the system right once, and then get back to enjoying the meal.

Frequently Asked Questions

Should I add salt to the water at the beginning, or will that make the skins tough?

Add the salt early. That’s a common myth, and honestly, it’s one of those “rules” that just creates unnecessary friction. Salting the water from the start doesn’t toughen the skins; it actually seasons the bean all the way to the core. If you wait until the end, you’re just seasoning the surface. Think of it like seasoning a brisket—you want that flavor integrated, not just sitting on top. Salt away.

How can I tell if a batch of beans is actually done without constantly checking them?

Look, I get it. Standing over a pot for forty minutes waiting for a sign is a massive waste of time. My rule of thumb? Stop checking for “softness” and start checking for texture. Once you hit the target time, pull one out, let it cool for a second, and press it between your thumb and forefinger. If it yields easily without a grainy, mealy center, you’re golden. If it fights back, give it ten more minutes.

Is it worth it to use a pressure cooker, or am I better off sticking to the stovetop?

Look, if you’re asking because you want to shave forty minutes off your evening, the pressure cooker wins every single time. It’s the ultimate hack for busy weeknights. But if you’re a “set it and forget it” person who enjoys the ritual of a slow simmer, stick to the stovetop. For me? I use the pressure cooker for bulk prep on Sundays, but I’ll always go stovetop for a slow-cooked stew where texture is everything.

How do I store leftover beans so they don't turn into a mushy mess in the fridge?

Stop Letting Your Leftovers Turn Into Mush

Posted on

A Beginner’s Guide to Successful Weekly Meal Prepping

Beginner's guide on how to meal prep.

If you’ve ever scrolled through social media and seen those “meal prep” influencers with their perfectly color-coordinated glass containers and fifteen different organic superfood bowls, I have a message for you: it’s mostly nonsense. Most of that stuff is a recipe for burnout, not efficiency. I spent my early twenties thinking I had to spend my entire Sunday in a kitchen frenzy just to “optimize” my nutrition, only to end up staring at a fridge full of sad, soggy kale by Wednesday. Learning how to meal prep shouldn’t feel like a second full-time job or a high-stakes culinary competition; it should be about removing the friction from your Tuesday night so you can actually relax.
I’m not here to sell you on a lifestyle overhaul or a list of expensive gadgets you don’t need. Instead, I’m going to show you my systematic approach to prepping food that actually fits into a real, busy life. We’re going to focus on small, repeatable adjustments—like batch-cooking versatile proteins and mastering the art of the “component” meal—to help you save time and stop wasting money on mediocre takeout. We aren’t aiming for a Pinterest-perfect kitchen; we’re just aiming for a better, smoother week.

Table of Contents

Smart Weekly Meal Planning Tips for Busy People

Smart Weekly Meal Planning Tips for Busy People

The biggest mistake I see people make is trying to plan a gourmet seven-course menu for every single night of the week. That’s a one-way ticket to burnout. Instead, I rely on a few batch cooking techniques that actually scale. My system is simple: pick two proteins, two grains, and three versatile vegetables. If I’m roasting a large tray of chicken thighs and a massive pot of quinoa on Sunday, I’ve already done 80% of the heavy lifting for the week. You aren’t just making individual meals; you’re building a modular pantry of prepared ingredients that you can mix and match so you don’t feel like you’re eating the exact same thing every day.

To keep this from becoming a chaotic mess in your fridge, you need to invest in decent meal prep containers for storage. I’m a bit of a minimalist, so I avoid anything with unnecessary dividers that take up too much space. Get a set of uniform, glass containers that are actually airtight; there is nothing more frustrating than opening a container only to find your greens have turned into a soggy disaster. Once you have the right gear and a repeatable framework, the mental load of “what’s for dinner?” basically disappears.

Healthy Meal Prep Ideas That Actually Taste Good

Healthy Meal Prep Ideas That Actually Taste Good

The biggest mistake I see people make is treating meal prep like a bland chore. If your entire week consists of unseasoned chicken and mushy broccoli, you’re going to fail by Wednesday. To actually enjoy what you’re eating, you need to lean into batch cooking techniques that prioritize texture and flavor. Instead of cooking one massive, monolithic pot of something, try prepping components. Roast two different trays of vegetables with distinct seasonings—maybe something spicy like smoked paprika and cumin, and something brighter like lemon and garlic. This way, you can mix and match them throughout the week so you aren’t eating the exact same flavor profile five days in a row.

Another thing that keeps me sane is investing in the right gear. I’m a bit of a minimalist, so I don’t want a cluttered pantry, but having a decent set of meal prep containers for storage is a non-negotiable. I personally stick to glass containers because they don’t retain smells and they actually hold up in the microwave without turning your food into a gummy mess. When you have a system where everything is portioned and clearly labeled, the friction of “what’s for dinner” basically disappears. It turns a chaotic evening into a simple, five-minute assembly job.

My Five Non-Negotiable Rules for Stress-Free Prep

My Five Non-Negotiable Rules for Stress-Free Prep
  • Don’t try to be a Michelin chef on Sunday. If you attempt five complex recipes at once, you’ll burn out by Tuesday and end up ordering pizza. Start with two big batches of protein and a few versatile grains.
  • Invest in decent, airtight containers. I learned this the hard way when my “optimized” meal prep turned into a soggy mess in cheap plastic tubs. Glass containers are worth the extra cash; they keep things fresh and actually look decent when you pull them out of the fridge.
  • Use the “Component Method” instead of full meals. Instead of portioning out identical Tupperware boxes, prep individual ingredients—roasted sweet potatoes, grilled chicken, washed greens, a jar of dressing. It gives you the flexibility to mix and match so you don’t get bored.
  • Clean as you go. This sounds like something a mom would say, but it’s pure systems logic. If you leave a mountain of dishes for the end of your prep session, you’ll start associating meal prepping with dread rather than efficiency.
  • Always have a “low-effort” backup. Even the best systems fail sometimes. Keep a few high-quality frozen meals or pantry staples like canned beans and pre-cooked quinoa on hand for those nights when your plan falls apart and you’re too exhausted to even reheat something.

The Goal of the System

“Meal prepping isn’t about spending your entire Sunday in a kitchen frenzy or eating nothing but bland chicken and broccoli; it’s about building a system that buys you back your sanity on a Tuesday night when you’re too tired to think.”

Nathaniel 'Nate' Brooks

Streamlining Your Success

Streamlining Your Success through meal planning.

Look, I’m not telling you to spend your entire Sunday in a kitchen trance, surrounded by Tupperware and steam. That’s a recipe for burnout, not efficiency. The goal here is to build a system that actually works for your specific lifestyle—whether that means batch-cooking a massive pot of chili, prepping versatile proteins, or just getting your grocery list sorted before you hit the store. Remember, it’s about minimizing the decision fatigue that hits you at 6:00 PM when you’re exhausted. If you can nail down a solid plan and keep your ingredients organized, you’ve already won half the battle. Focus on the small, repeatable wins rather than trying to cook a five-star feast every single week.

At the end of the day, meal prepping isn’t about being a culinary expert or a fitness fanatic; it’s about reclaiming your time and your sanity. When you stop wrestling with the “what’s for dinner” dilemma every night, you suddenly find you have more mental bandwidth for the things that actually matter—like catching up on a hobby, relaxing, or just decompressing after a long shift. Don’t aim for a perfect, aesthetic fridge that looks like a Pinterest board. Just aim for a system that reduces friction. Start small, tweak the process as you go, and stop letting your schedule run you.

Frequently Asked Questions

How do I keep my prepped meals from getting soggy or tasting like they've been sitting in the fridge for a week?

The “fridge funk” is real, and it’s usually a moisture management problem. First, let your food cool completely before sealing the lids—trapped steam is the enemy of crispiness. Second, stop mixing everything in one container. Keep your proteins, grains, and greens separate. If you’re prepping salads, put the dressing in a tiny separate jar. It’s a bit more dishes, but it’s the difference between a fresh meal and a soggy mess.

Do I really need to spend my entire Sunday in the kitchen, or is there a way to do this without losing my whole weekend?

Absolutely not. If your meal prep requires a six-hour marathon every Sunday, you’ve built a bad system. That’s not a routine; that’s a second job. Instead, try “component prepping.” Roast a big batch of veggies, cook one grain, and prep two proteins. You can mix and match those throughout the week in under five minutes. It’s less about cooking everything upfront and more about reducing the friction of making a decision when you’re hungry.

What are the best containers to invest in so I'm not just throwing money away on cheap plastic that stains?

Look, don’t fall into the trap of buying those cheap, neon-colored plastic sets. They’re a waste of money because they’ll warp in the dishwasher or turn orange the second you put spaghetti sauce in them. If you want to do this right, invest in borosilicate glass containers with snap-lock lids. They’re indestructible, they don’t stain, and they transition straight from the fridge to the microwave without leaching chemicals. It’s a higher upfront cost, but it’s a one-time fix.

How do I handle meal prepping if I have a picky eater or a partner with completely different dietary needs?

Look, I’ve been there. Trying to cook one meal for a picky partner is a recipe for burnout. Don’t aim for a single, unified dish. Instead, use a “component-based” system. Prep base ingredients—roasted chicken, quinoa, sautéed greens—and keep them separate. That way, you can build a high-protein bowl while they stick to plain pasta or chicken nuggets. It’s slightly more prep, but it eliminates the nightly negotiation.

Posted on

Elevate Your Cooking by Learning How to Season Properly

Learning how to season food properly.

I remember sitting in my cramped apartment during my early twenties, staring down a piece of chicken that looked perfectly cooked but tasted like absolutely nothing. I had followed a recipe to the letter, yet the meal was fundamentally broken. It turns out, most people treat seasoning like a chore or a scientific mystery involving twenty-dollar spice blends, when really, learning how to season food is just about understanding basic chemistry and intuition. You don’t need a pantry full of obscure powders to fix a bland dinner; you just need to stop treating salt and acid like afterthoughts and start treating them like the essential tools they actually are.
I’m not here to give you a culinary lecture or suggest you buy a professional-grade spice rack. My goal is to strip away the fluff and give you a streamlined system for building flavor from the ground up. I’ll show you the small, repeatable adjustments that turn a mediocre meal into something worth eating, focusing on efficiency and impact rather than complexity. We aren’t aiming for a Michelin star here; we’re just aiming to make sure you never have to eat a tasteless meal again.

Table of Contents

Enhancing Natural Flavors Without Overcomplicating Your Life

Enhancing Natural Flavors Without Overcomplicating Your Life

Look, you don’t need a pantry full of exotic powders to make a meal taste professional. Most of the time, you’re just trying to unlock what’s already there. I’ve learned through a lot of mediocre dinners that the real secret isn’t adding more stuff; it’s about enhancing natural flavors by understanding how ingredients interact. If you’re cooking a piece of chicken or a roasted vegetable, your goal shouldn’t be to mask the ingredient under a layer of spice, but to make it taste like the best version of itself.

The quickest way to fix a dish that feels “flat” isn’t actually more salt—it’s often a splash of something bright. I’m talking about balancing salt and acid. If a soup or a sauce tastes heavy or dull, a squeeze of lemon or a teaspoon of vinegar acts like a light switch for your taste buds. It cuts through the richness and makes everything pop.

When you’re building your foundation, don’t get bogged down in complexity. Focus on a few essential spice cabinet staples—think smoked paprika, cumin, and dried oregano—and learn how they behave. Once you master the basics, you stop guessing and start building flavor with intention.

Essential Spice Cabinet Staples Every Busy Kitchen Needs

Essential Spice Cabinet Staples Every Busy Kitchen Needs

Look, you don’t need a spice rack that looks like a professional chef’s pantry to make decent food. In fact, having fifty different jars just creates decision fatigue, which is the last thing you need after a long workday. I like to keep my setup lean. Start with the heavy hitters: Kosher salt, coarse black pepper, smoked paprika, and garlic powder. These are my essential spice cabinet staples because they work in almost any scenario, from a quick Tuesday night stir-fry to a slow-cooked brisket on the weekend.

Once you have the basics, I’d suggest adding a few things to help with balancing salt and acid. If a dish feels heavy or flat, a pinch of dried oregano or some red pepper flakes can shift the profile instantly. It’s also worth understanding the difference between spices and herbs so you aren’t making mistakes; remember that spices come from seeds, bark, or roots and usually need heat to wake them up, while dried herbs are more delicate. If you want to level up without much effort, keep some cumin or coriander on hand. They add depth without requiring you to spend an hour prepping.

My Five Rules for Seasoning Without the Stress

My Five Rules for Seasoning Without the Stress
  • Salt early and often. If you wait until the very end to add salt, you’re just seasoning the surface. By adding it during the cooking process, you actually penetrate the ingredients, building a foundation of flavor rather than just a salty crust.
  • Taste as you go. This sounds obvious, but I see people skip it all the time. You can’t fix a bland meal once it’s already on the plate. Keep a spoon handy and sample your progress; it’s the only way to know if you’re actually getting closer to where you want to be.
  • Don’t fear the acid. If a dish tastes “heavy” or “flat” even after you’ve added salt, it usually doesn’t need more salt—it needs acid. A quick squeeze of lemon or a splash of vinegar acts like a brightener, cutting through fat and waking up the other flavors.
  • Balance your heat. If you’ve gone a little too heavy on the red pepper flakes or cayenne, don’t panic. You can counteract that sting with a bit of fat (like butter or oil) or a touch of sweetness (like honey) to bring the dish back into equilibrium.
  • Use fresh herbs at the finish line. Dried spices are great for the heavy lifting during the cooking process, but fresh herbs are delicate. If you want that vibrant, punchy aroma, stir them in right before you serve so they don’t wilt into nothingness.

The Philosophy of Flavor

“Seasoning isn’t about masking what you’re cooking with a mountain of spices; it’s about building a system that lets the actual ingredients do their job. If you’re constantly fighting the food to make it taste good, your process is broken.”

Nathaniel 'Nate' Brooks

The Bottom Line

The Bottom Line: mastering simple seasoning basics.

At the end of the day, seasoning isn’t about following a complex blueprint or memorizing a hundred different spice ratios. It’s about building a reliable system of basics—salt, acid, heat, and a few versatile pantry staples—that you can lean on when you’re tired or running low on time. Whether you’re just adding a pinch of salt to a steak or using a splash of vinegar to brighten up a heavy stew, the goal is to eliminate the blandness that makes cooking feel like a chore. If you have the right tools in your cabinet and you aren’t afraid to taste as you go, you’ve already won half the battle.

Don’t let the fear of “doing it wrong” keep you from actually enjoying your food. Cooking should be a way to fuel your life, not another high-stakes project that adds to your mental load. Start small, trust your palate, and remember that better is better than perfect. You don’t need a Michelin star to make something that tastes incredible; you just need to stop settling for uninspired meals and start making those small, intentional adjustments. Now, go grab your salt, get in the kitchen, and make something worth eating.

Frequently Asked Questions

How do I know if I've added too much salt without ruining the whole dish?

It’s a classic mistake, and honestly, it happens to the best of us. If you realize you’ve gone overboard, don’t panic and don’t toss the whole thing. If it’s a soup or sauce, try adding a splash of acid—like lemon juice or vinegar—to balance it out, or a bit of starch like a potato to soak up some excess. If it’s a solid dish, just lean into more unseasoned ingredients to dilute the saltiness.

Is there a specific order I should follow when adding spices so they don't burn or clump?

Think of it like debugging code: timing is everything. If you’re using dried herbs or delicate spices like paprika, wait until the end. They’ll burn and turn bitter if they hit high heat too early. For the heavy hitters—think cumin, coriander, or chili flakes—hit them in the oil right after your aromatics (onions, garlic) soften. This “blooming” process wakes up the oils without ruining the flavor. Build the base first, then fine-tune.

Can I use dried herbs instead of fresh ones, or will the flavor be totally different?

Look, it’s not a “yes or no” situation—it’s a “how you use them” situation. Dried herbs are more concentrated, so if you swap them one-for-one, you’re going to end up with a flavor bomb that’s way too intense. My rule of thumb? Use about one-third of the amount of dried herbs compared to fresh. Add them early in the cooking process so they can rehydrate; save the fresh stuff for the very end.

How do I balance a dish if it ends up tasting way too salty or too spicy halfway through cooking?

Look, we’ve all been there. You’re mid-prep and suddenly the dish hits you like a freight train of salt or heat. Don’t panic and don’t throw it out. If it’s too salty, add an acid—like a squeeze of lime or a splash of vinegar—to cut through it, or toss in a potato to soak up the excess. If it’s too spicy, reach for dairy or something sweet. It’s just a system error; we can debug it.

Posted on

Family-friendly Healthy Dinners Even the Pickiest Eaters Will Love

Family-friendly healthy dinner ideas for kids.

We’ve all been there: it’s 6:30 PM, you’re staring blankly into a fridge that contains nothing but half a jar of pickles and some wilted spinach, and the mental load of deciding what to eat feels heavier than a full workday. Most people think that eating well requires a massive time investment or a kitchen full of specialized gadgets, but that’s a recipe for decision fatigue. When you’re exhausted, you don’t need a culinary masterpiece; you need healthy dinner ideas that actually work within the constraints of a real, messy life.

I’m not here to sell you on some unrealistic, three-hour meal prep ritual that falls apart by Tuesday. Instead, I’ve curated eight specific, low-friction options designed to minimize your time in the kitchen without sacrificing nutrition. These are the exact meals I lean on when I want to stop wrestling with my schedule and just fuel my body efficiently. By the end of this list, you’ll have a repeatable system of dinners that are as easy on your brain as they are on your health.

Table of Contents

Sheet Pan Salmon and Roasted Veggies

Sheet Pan Salmon and Roasted Veggies.

If you’re like me, the last thing you want to do after a long day of staring at spreadsheets is scrub a dozen different pots and pans. This is the ultimate low-friction meal because everything lives on a single sheet of parchment paper. You just toss some salmon fillets, broccoli florets, and sliced bell peppers in olive oil and seasoning, then let the oven do the heavy lifting while you decompress.

The "Everything" Grain Bowl

Healthy The "Everything" Grain Bowl ingredients.

I’ve learned that meal fatigue usually comes from a lack of variety, not a lack of ingredients. I keep a rotation of grains—quinoa, farro, or even brown rice—in the pantry to serve as a reliable foundation. Once you have your base, you just layer on whatever is currently in your fridge: some canned chickpeas, a handful of spinach, half an avocado, and maybe a hard-boiled egg for extra protein.

One-Pot Turkey Chili

Nutritious One-Pot Turkey Chili in a bowl.

There is something deeply satisfying about a meal that actually gets better with age. When I make a big batch of turkey chili, I’m not just cooking dinner for tonight; I’m optimizing my future self’s schedule. Using lean ground turkey, canned kidney beans, and crushed tomatoes makes this incredibly fast to assemble, and the nutritional density is top-tier.

Pesto Chicken and Zucchini Noodles

Pesto Chicken and Zucchini Noodles dish.

Sometimes you want something that feels light but doesn’t leave you feeling like you’re eating a bowl of grass. I like to use zucchini noodles—or “zoodles”—as a low-carb alternative to traditional pasta when I want to avoid that heavy, post-dinner lethargy. When you pair them with sliced grilled chicken and a high-quality pesto, you get a massive amount of flavor with very little actual effort.

Slow Cooker Salsa Chicken

Slow Cooker Salsa Chicken

This is my go-to for those days when I know my schedule is going to be completely unpredictable. You literally put two chicken breasts and a jar of your favorite salsa into the slow cooker in the morning, set it to low, and walk away. By the time I’m closing my laptop for the evening, the meat is perfectly shredded and ready to be used.

Mediterranean Chickpea Salad

On the nights when the stove feels like too much work, I lean into the “no-cook” method. A Mediterranean chickpea salad is essentially just a deconstructed pantry raid. You take a can of rinsed chickpeas, chop up some cucumbers and tomatoes, toss in some feta cheese, and hit it with some lemon juice and dried oregano.

Egg Scramble with Sautéed Greens

We tend to relegate eggs to breakfast, but I find they are one of the most efficient protein sources for a quick dinner. A three-egg scramble with a massive pile of sautéed spinach or kale is a powerhouse meal that keeps your blood sugar stable. It’s simple, it’s cheap, and it doesn’t require a complex recipe to be successful.

Beef and Broccoli Stir-Fry

If you’re craving something savory and substantial, a quick stir-fry is the way to go. I keep frozen broccoli florets in my freezer at all times because they are a lifesaver for last-minute meals. Searing some thinly sliced flank steak with ginger, garlic, and a bit of soy sauce takes less than ten minutes if you stay focused on the pan.

The Philosophy of the Weeknight Meal

“A healthy dinner shouldn’t feel like another chore on your to-do list; it’s just about building a repeatable system that feeds you well without draining your mental battery by 6:00 PM.”

Nathaniel 'Nate' Brooks

Streamlining Your Evening Routine

At the end of the day, these eight meal ideas aren’t about following a strict, rigid diet or becoming a gourmet chef overnight. It’s about building a repeatable system that works for you. Whether you’re leaning on the simplicity of sheet-pan salmon or the prep-ahead convenience of a hearty grain bowl, the goal is to reduce the mental load that usually hits around 6:00 PM. By focusing on minimal friction and high-quality ingredients, you’re essentially debugging your evening routine so you can stop scrolling through delivery apps and start actually fueling your body.

Look, I know how it goes. Some nights you’ll nail the meal prep, and other nights you’ll end up eating cereal over the sink because you’re just too drained to function. That’s fine. Don’t let the pursuit of a “perfect” diet derail your progress. Life is messy, and your dinner routine should be able to bend without breaking. Just aim to make one better choice than you did yesterday. If you can optimize even just a few nights a week, you’ll find that you have more energy for the things that actually matter. Keep it simple, keep it consistent, and just keep moving forward.

Frequently Asked Questions

How do I meal prep these without everything tasting like cardboard by Thursday?

The “cardboard effect” usually happens because of two things: moisture loss and overcooking. First, stop reheating everything to a boil; use a splash of water or broth to steam things back to life. Second, undercook your proteins and grains slightly during the initial prep. They’ll finish cooking when you microwave them later. Finally, keep your sauces separate until you’re ready to eat. It keeps the texture intact and the flavor from getting lost in the mush.

What are some healthy swaps for when I'm craving something heavy or comforting?

Look, I get it. Some nights, a salad just feels like a personal insult. When that craving for something heavy hits, don’t fight it—just pivot the ingredients. Instead of a greasy burger, try a turkey or black bean patty on a toasted whole-grain bun. If you’re dying for pasta, swap the heavy cream sauce for a roasted butternut squash puree. It’s about getting that same comfort without the post-meal lethargy.

Can I adapt these recipes for a tighter budget without losing the nutritional value?

Absolutely. Most people think “healthy” has to mean “expensive organic boutique,” but that’s a system failure. You can slash the cost by swapping out pricey proteins for lentils or canned beans, and by leaning heavily into frozen vegetables—they’re often more nutrient-dense than the stuff sitting in your crisper drawer losing its fight against rot. Stick to seasonal produce and buy staples in bulk. It’s not about deprivation; it’s just smarter procurement.

How do I balance these quick meals with my actual cooking skills if I'm a total beginner?

Look, don’t feel like you’re “cheating” by using these quick meals. Think of them as your training wheels. If you’re a beginner, the goal isn’t to master a five-course French dinner; it’s to build a consistent habit of eating well without the stress. Use these low-effort recipes to get comfortable in the kitchen, and once you stop fearing the stove, start swapping one pre-made component for a scratch-made one. Progress over perfection, always.