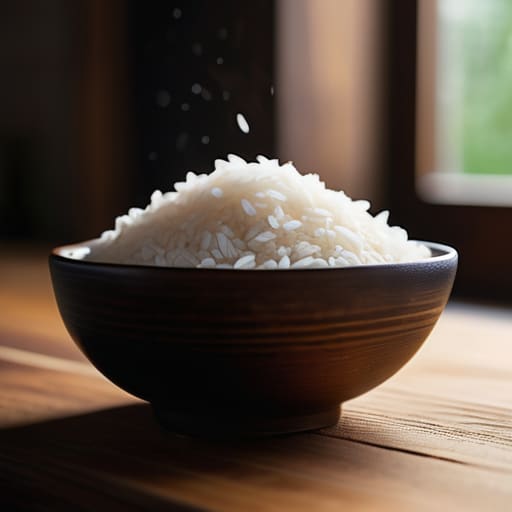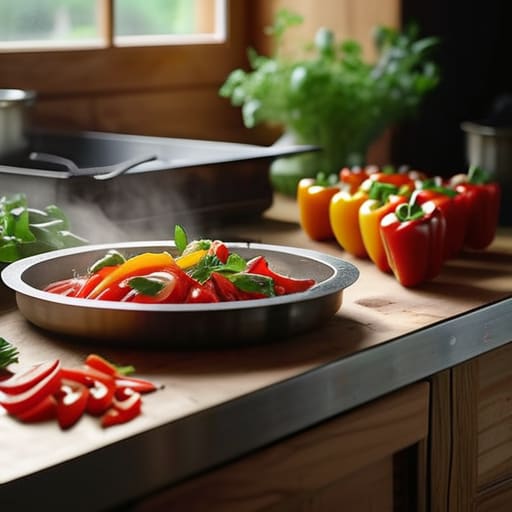
Posted on

Essential Kitchen Hacks to Speed Up Your Cooking

Essential kitchen tips and tricks for cooking.

I used to think that having a “professional” kitchen meant owning every single gadget featured in those glossy, overproduced cooking shows—the vacuum sealers, the specialized herb scissors, the $400 pasta rollers. I spent my early twenties chasing that expensive myth, only to realize I was just creating more clutter and more things to clean. Most of the kitchen tips and tricks you see online are just thinly veiled advertisements for products you don’t actually need to make a decent meal. Honestly, if a piece of equipment doesn’t solve a specific, recurring friction point in your routine, it’s just expensive shelf candy that’s getting in your way.

I’m not here to sell you a lifestyle or a new set of copper pots. My goal is much simpler: I want to help you optimize your space so you can actually enjoy the process of cooking without the usual headache. I’ve spent years refining a set of systematic adjustments—from how you stage your prep area to how you manage your pantry—that prioritize efficiency over aesthetics. We aren’t aiming for a Michelin-star setup; we’re just aiming to eliminate the chaos so you can focus on the food.

Table of Contents

Mastering Knife Skills for Beginners Without the Stress

Mastering Knife Skills for Beginners Without the Stress

Look, I used to treat chopping vegetables like a high-stakes game of Operation, standing there with a dull blade and a prayer, hoping I wouldn’t lose a fingertip. But here’s the truth: most of the “chaos” in the kitchen stems from a lack of basic technique. If you want to actually improve your meal prep efficiency, you have to stop hacking at your food and start focusing on your grip. I always tell people to ditch the “hammer grip” and instead use the pinch grip—holding the blade itself between your thumb and index finger. It gives you way more control and turns a frantic sawing motion into a precise, rhythmic slice.

Once you get the grip down, the real secret to mastering knife skills for beginners is the “claw.” Curl your non-cutting hand into a claw shape, tucking your knuckles inward so your fingertips are safely tucked away. Your blade should rest against your knuckles, guiding the movement without any risk of a nick. It feels awkward for the first twenty minutes, but once it clicks, you’ll realize how much time you were actually wasting. It’s not about speed; it’s about eliminating the friction of constant, hesitant movements. Once your rhythm is steady, the prep work stops feeling like a chore and starts feeling like a system.

Culinary Time Saving Techniques for the Busy Professional

Culinary Time Saving Techniques for the Busy Professional

If you’re like me, you probably spend most of your day solving complex problems at a desk, only to come home and realize you have zero mental bandwidth left to figure out what’s for dinner. The mistake most people make is treating cooking like a creative marathon every single night. Instead, you need to treat it like a system. I’ve found that true meal prep efficiency isn’t about spending your entire Sunday in a cloud of flour; it’s about the small, tactical wins. I’m talking about washing and chopping your aromatics—onions, garlic, ginger—the moment you get home from the store. If those ingredients are already prepped and sitting in a clear container, the barrier to starting a healthy meal drops significantly.

Another way to reclaim your evening is to audit your workflow. I used to lose ten minutes every night just hunting for a lid that fit a specific container or searching for the one whisk that actually works. Investing in some decent food storage solutions—specifically uniform, stackable glass containers—removes that micro-friction. When your fridge is organized and your tools are exactly where they should be, you stop fighting your environment and start actually enjoying the process. It’s not about being a gourmet chef; it’s about building a kitchen that works for you, not against you.

Stop Searching, Start Cooking: Five Small Systems to Fix Your Kitchen Chaos

Stop Searching, Start Cooking: Five Small Systems to Fix Your Kitchen Chaos
  • Stop the “Cabinet Scavenger Hunt” by grouping your tools by task, not by type. Keep your oils, salt, and most-used spices right next to the stove, and keep your prep tools—like peelers and graters—in one dedicated zone. If you have to walk across the kitchen to grab a spatula mid-saute, your system is broken.
  • Optimize your “Mise en Place” for the modern age. I don’t care if you aren’t a professional chef, but prepping every single ingredient into small bowls before you even turn on the heat changes everything. It eliminates that frantic, mid-cook moment where you realize you forgot to mince the garlic while the onions are already burning.
  • Audit your “Prime Real Estate.” The shelves between your waist and eye level are your most valuable assets. If you’re storing heavy Dutch ovens or rarely used holiday platters there, you’re wasting energy. Move the stuff you use every single day to the center, and relegate the “once-a-year” gear to the high or low shelves.
  • Implement a “Clean as You Go” protocol that actually works. Don’t wait until the meal is finished to face a mountain of dishes. I make it a rule to use the “dead time”—the three minutes while the water is boiling or the meat is searing—to wash the cutting board and prep bowls. By the time you sit down to eat, the kitchen is already halfway reset.
  • Stop buying “Single-Use” gadgets that just clutter your drawers. Most of those specialized avocado slicers or garlic presses are just expensive pieces of plastic that take up space. Stick to high-quality, multi-purpose tools like a solid chef’s knife, a heavy-duty skillet, and a reliable microplane. Less gear means less to clean and less to manage.

The Philosophy of a Functional Kitchen

“A kitchen shouldn’t feel like a battlefield you have to prepare for every night; it should be a well-oiled system where the tools are exactly where you need them and the friction is almost zero.”

Nathaniel 'Nate' Brooks

Streamlining Your Way to Better Meals

Streamlining Your Way to Better Meals.

At the end of the day, a functional kitchen isn’t about having the most expensive gadgets or a professional-grade setup; it’s about removing the friction that makes cooking feel like a chore. We’ve talked about sharpening your knife skills to save your hands and your time, and we’ve looked at how high-level time-saving techniques can keep you from feeling like a short-order cook during a hectic work week. If you implement even just one or two of these small adjustments—whether it’s better prep habits or smarter organization—you’ll notice the mental load of mealtime starts to lift. It’s all about optimizing the workflow so the process becomes second nature.

Look, I know how it goes. Some nights you’ll nail the routine, and other nights you’ll end up staring at a pile of dirty dishes, wondering why you even tried. That’s fine. My philosophy has always been that we aren’t aiming for a Michelin-star kitchen; we’re just aiming for a system that actually works for us. Don’t let the pursuit of a “perfect” kitchen stop you from actually enjoying your food. Focus on the small, incremental wins that make your life easier, and eventually, those tweaks will turn your kitchen from a source of stress into a place where you can actually decompress.

Frequently Asked Questions

How do I organize my pantry so I actually know what I have before I head to the grocery store?

Stop playing the guessing game with your groceries. The secret isn’t fancy matching jars; it’s visibility and zones. Group your staples—grains, canned goods, spices—into clear bins so you can see the “stock levels” at a glance. I also swear by a “First In, First Out” system: rotate older items to the front. If you can’t see it, you’ll buy it twice. Keep it simple, keep it visible, and your grocery trips will actually be efficient.

Is it worth investing in high-end kitchen gadgets, or should I just stick to the basics?

Look, I’ve spent enough time analyzing systems to know that more gear rarely equals more efficiency. Most high-end gadgets are just shiny distractions that take up drawer space and add cleaning friction. My rule of thumb? Invest in the “workhorses”—a heavy chef’s knife, a solid cast iron skillet, and maybe a decent digital thermometer. Everything else is usually just marketing. Don’t buy a specialized tool until you’ve mastered the basics with what you have.

What are some realistic ways to meal prep without spending my entire Sunday stuck in the kitchen?

Stop treating meal prep like a marathon. If you try to cook five full recipes on Sunday, you’ll burn out by Tuesday. Instead, I use “component prepping.” I’ll roast two trays of veggies, cook a big batch of grains, and prep one protein. That’s it. You aren’t building finished meals; you’re building a library of building blocks. It’s much faster, keeps the food from getting soggy, and actually lets you enjoy your Sunday.

How can I keep my workspace clean and organized while I'm actually in the middle of cooking?

The secret isn’t a deep clean at the end; it’s “clean as you go” integration. I treat my kitchen like a system: every time a pot simmers or the oven preheats, that’s your window. Don’t just stand there waiting. Use those three-minute gaps to scrub the cutting board or load the dishwasher. If you wait until the meal is finished to face the mess, you’ve already lost the battle to burnout.

Posted on

The Secret to Fluffy, Perfect Rice Every Time

How to cook rice perfectly and fluffy.

I spent most of my early twenties thinking that if I just bought a $200 high-tech rice cooker or followed some overly complex recipe from a food blog, I’d finally master the basics. I was wrong. I wasted countless bags of grain and even more time dealing with that dreaded, gummy texture that ruins a decent meal. The truth is, most “expert” advice is just noise designed to make a simple process feel like a science experiment. Learning how to cook rice perfectly isn’t about expensive gadgets or esoteric techniques; it’s about understanding the basic mechanics of water, heat, and timing.

I’m not here to give you a lecture or a list of ingredients you can’t find at a standard grocery store. Instead, I’m going to give you the streamlined, repeatable system I use to ensure every batch comes out fluffy and distinct. We’re going to strip away the fluff and focus on the small, actionable adjustments—like the exact way you rinse the starch away—that actually move the needle. We aren’t aiming for a culinary masterpiece here; we’re just aiming for a reliable result every single time you hit the stove.

Table of Contents

The Rinsing White Rice Importance You Cant Ignore

The Rinsing White Rice Importance You Cant Ignore

Look, I know it feels like an extra, tedious step when you’re already hungry, but if you skip this, you’re essentially setting yourself up for failure. Most people think the white powder in the bag is just part of the grain, but it’s actually excess surface starch. If you don’t wash that away, that starch turns into a literal glue once heat hits the pot. This is the primary reason most home cooks end up with a gummy, clumping mess instead of distinct, fluffy grains. Understanding the rinsing white rice importance is the difference between a meal that feels premium and one that feels like a heavy, starchy chore.

I usually grab a fine-mesh strainer—never use the big colander, or you’ll lose half your grains down the drain—and run cold water over the rice until the water runs clear. It’s not about being a perfectionist; it’s about removing the friction of a bad texture. When you get that starch off, you’re significantly better at avoiding mushy rice later in the process. It’s a small, thirty-second investment in your future self that ensures the grains stay separate and light, regardless of whether you’re using a stovetop or your best rice cooker settings.

Mastering Your Rice to Water Ratio Guide

Mastering Your Rice to Water Ratio Guide.

Look, if you’re still eyeballing your water levels, you’re playing a dangerous game with your dinner. I spent years treating rice like a “vibe” rather than a process, only to end up with a pot of gummy, unpalatable starch every single time. To stop the cycle of avoiding mushy rice through sheer luck, you need to treat your rice-to-water ratio like a system. Most people think a standard 2:1 ratio is the golden rule, but that’s a simplification that often leads to disaster depending on the grain you’re using.

If you’re working with long-grain varieties, I’ve found that a slightly tighter ratio—closer to 1:1.5—is the sweet spot for keeping those grains distinct and firm. When I’m utilizing specific cooking basmati rice tips, I always lean toward slightly less water to ensure that signature floral aroma doesn’t get drowned out by excess moisture. It’s all about the math. If you’re using a machine, don’t just rely on the default presets; check your manual to see if your specific model prefers a different calibration. Once you nail the ratio, the rest of the process becomes a predictable, low-friction task rather than a stressful guessing game.

Five Small Adjustments for a Better Pot of Rice

Five Small Adjustments for a Better Pot of Rice
  • Stop rushing the steam. Once the water is absorbed, kill the heat but leave the lid on for at least ten minutes. If you rush this part, you’re just going to end up with unevenly cooked grains that are hard on the outside and gummy in the middle.
  • Use the right tool for the job. If you’re still using a pot with a loose-fitting lid, you’re losing precious moisture to evaporation. A tight seal is the difference between fluffy rice and a dry, frustrating mess.
  • Don’t touch it. I know the urge to stir the rice while it’s cooking is strong, but resist it. Stirring breaks the delicate starch structures and turns your meal into a bowl of paste. Let the heat do the work in silence.
  • Upgrade your fat source. If you want a little extra texture and a richer mouthfeel, sauté your dry rice in a teaspoon of butter or oil for a minute before adding the water. It coats the grains and prevents them from clumping together.
  • Fluff, don’t mash. When the timer finally goes off, use a fork or a rice paddle to gently lift and aerate the grains. You want to introduce air into the pot to separate the grains, not smash them into a heavy block.

## The Philosophy of the Grain

“Cooking rice isn’t some mystical culinary art; it’s just a simple system of ratios and patience. Once you stop treating it like a guessing game and start respecting the variables, you stop wasting ingredients and start actually enjoying your meal.”

Nathaniel 'Nate' Brooks

Getting It Right Every Time

Getting It Right Every Time with rice.

At the end of the day, cooking great rice isn’t about some secret culinary technique; it’s about managing the variables. If you take the time to rinse that starch away and actually respect the water ratio instead of just eyeballing it, you’ve already won half the battle. It’s these tiny, repeatable adjustments—the kind of small optimizations I live for—that turn a kitchen frustration into a reliable, automated win. Once you stop guessing and start following a consistent system, you’ll stop wasting expensive grains and start enjoying a side dish that actually complements your meal rather than dragging it down.

I know it might feel like overkill to treat a simple pot of rice with this much precision, but that’s the point. When you streamline the small things, you remove the mental friction that makes cooking feel like a chore. You aren’t just making dinner; you’re building a reliable routine that works for you. Don’t aim for a Michelin-star masterpiece every single night—just aim for a version that’s better than the last time you failed. Once you master the system, the results will speak for themselves, leaving you more time to focus on the stuff that actually matters, like enjoying the meal.

Frequently Asked Questions

What’s the best way to handle different types of rice, like jasmine or basmati, if the standard ratio isn't working?

Look, if the standard 1:2 ratio is giving you mush, stop forcing it. Jasmine and Basmati are temperamental; they need precision. For Jasmine, I usually lean toward a slightly tighter 1:1.5 ratio to keep those grains distinct and fragrant. Basmati often prefers a bit more breathing room—try 1:1.75. The real trick, though, is the rest period. Let it sit, covered, for ten minutes after the heat is off. That’s where the magic happens.

How can I tell if my rice is actually done without overcooking it into a mushy mess?

The “tooth test” is your best friend here. Don’t just poke it with a fork; take a single grain, let it cool for a second, and bite down. You’re looking for a slight resistance in the center—what we call al dente. If it’s crunchy, it needs more time; if it’s soft all the way through, you’ve hit the sweet spot. If you’re still unsure, check the bottom; if the water is gone and it’s steaming, let it rest.

Is it worth it to use a rice cooker, or am I better off sticking to the stovetop method?

Look, if you’re asking me, it’s a question of friction versus control. If you want to set it and forget it—meaning you can walk away to work on a project or tend to a brisket without hovering over a pot—get a rice cooker. It’s the ultimate system for consistency. But if you’re a purist who wants total control over the texture and the exact moment the steam hits, stick to the stovetop.

What should I do if I accidentally end up with rice that's too dry or too sticky?

If you’ve already hit the “serve” stage and realized you’ve botched it, don’t panic. If it’s too dry, sprinkle a tablespoon of hot water over the top, cover it tightly, and let it steam for five minutes off the heat. If it’s a sticky, gummy mess, your best bet is to embrace the failure: spread it on a tray to cool quickly, or better yet, pivot and turn it into fried rice.

Posted on

How to Brew Cafe-quality Coffee in Your Own Kitchen

How to make coffee at home guide.

Look, we need to stop pretending that you need a $2,000 espresso machine and a degree in chemistry just to figure out how to make coffee at home. I spent my entire twenties chasing that high—buying every shiny gadget on the market, thinking the gear would fix my morning fog—only to realize I was just creating more friction in my routine. Most of the “expert” advice out there is designed to sell you more hardware you don’t need, turning a simple ritual into a stressful, over-engineered chore that feels more like work than a way to start your day.
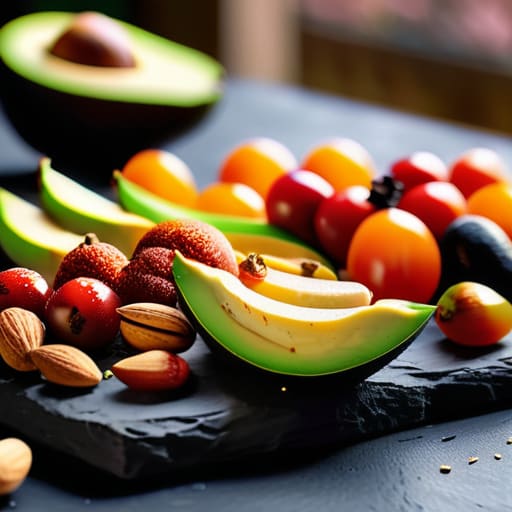
I’m not here to turn your kitchen into a laboratory or blow your monthly budget on boutique beans. My goal is to show you how to build a reliable system that delivers a great cup every single morning without the headache. We’re going to strip away the pretension and focus on the few variables that actually matter: water, heat, and timing. I’ll give you the straightforward, no-nonsense setup that works for real people with real schedules, so you can stop wrestling with your brewer and start actually enjoying your caffeine.

Table of Contents

Essential Coffee Brewing Equipment for Beginners

Look, you don’t need a $2,000 espresso machine sitting on your counter to get a decent cup. In fact, for most people starting out, that’s just a massive, expensive way to create more friction in your morning routine. If you’re looking for the right coffee brewing equipment for beginners, my advice is to keep it lean. Start with a reliable burr grinder and a simple manual brewer. The grinder is actually more important than the brewer itself; if you aren’t using freshly ground coffee beans, you’re essentially fighting a losing battle against stale flavors before you even start.

If you want to keep things low-maintenance, a French press is your best friend. It’s rugged, easy to clean, and hard to mess up. However, if you find yourself craving something cleaner and more nuanced, I’d suggest looking into a basic pour over coffee technique. It requires a bit more attention to detail—specifically monitoring your water temperature—but the payoff in terms of clarity is worth the extra thirty seconds of effort. The goal here isn’t to turn your kitchen into a laboratory; it’s about selecting a few reliable tools that actually improve your coffee flavor profile without turning your morning into a chore.

The Magic of Using Freshly Ground Coffee Beans

The Magic of Using Freshly Ground Coffee Beans

Look, I know the temptation to grab a pre-ground bag from the supermarket is real. It’s convenient, it’s cheap, and it fits perfectly into a “low-friction” lifestyle. But if you’re serious about improving coffee flavor profile without spending a fortune on fancy gadgets, this is the one area where you can’t cut corners. The moment those beans are ground, they start oxidizing. You’re essentially watching the soul of your coffee evaporate into the air. By the time that pre-ground bag hits your mug, most of the aromatic oils—the stuff that actually makes it taste good—are already gone.

If you want to stop drinking bitter, flat sludge, you need to invest in a decent burr grinder and start using freshly ground coffee beans. It’s a small change in your morning routine, but the difference is night and day. When you grind right before you brew, you’re capturing those volatile compounds that provide the brightness and complexity you’d usually only find in a high-end cafe. Whether you’re leaning into a pour over coffee technique or just making a standard drip, the freshness of the grind is the single biggest lever you have to control the output. It’s not about being a snob; it’s just about getting better results from the ingredients you’ve already bought.

Five Small Tweaks to Stop Ruining Your Morning Cup

Five Small Tweaks to Stop Ruining Your Morning Cup
  • Watch your water temperature. If you’re pouring boiling water straight from the kettle onto your grounds, you’re likely scorching them and creating that bitter, ashy taste. Let the kettle sit for about a minute after it hits a boil, or aim for roughly 200°F (93°C). It’s a small pause that makes a massive difference in flavor.
  • Use a scale, not a spoon. Measuring coffee by “scoops” is a recipe for inconsistency. One day your coffee is weak, the next it’s battery acid, all because your scoops aren’t precise. Get a cheap digital kitchen scale and stick to a weight-based ratio. It removes the guesswork and ensures your coffee tastes the same every single morning.
  • Clean your gear like you actually care about the taste. Old coffee oils build up in your carafe, your filter basket, and your grinder, eventually turning rancid. If you aren’t rinsing your equipment after every use, you’re essentially brewing fresh coffee through a layer of old, bitter sludge.
  • Master the “bloom.” When you first start brewing, pour just enough water to saturate the grounds and then stop. Wait about 30 seconds. You’ll see the coffee bubble and swell—that’s the CO2 escaping. If you skip this, the gas gets in the way of the water, and you end up with an uneven, underwhelming extraction.
  • Store your beans properly (and keep them out of the freezer). Coffee is sensitive to light, heat, and moisture. Keep your beans in an airtight container in a cool, dark pantry. Don’t be tempted by that “freshness” hack of putting them in the freezer; the moisture fluctuations in a home freezer can actually ruin the bean structure faster than they help.

## The Philosophy of the Pour

The Philosophy of the Pour photograph.

“Making great coffee at home isn’t about mastering some complex chemistry degree; it’s about building a simple, reliable system that rewards you with a better morning every single time.”

Nathaniel 'Nate' Brooks

Stop Overthinking and Start Brewing

Stop Overthinking and Start Brewing coffee.

Look, we’ve covered a lot of ground here, from picking the right gear to why you shouldn’t settle for pre-ground dust. At the end of the day, making great coffee at home isn’t about owning a $2,000 espresso machine or mastering every niche chemistry variable known to man. It’s about the basics: getting a reliable brewer, investing in quality beans, and—most importantly—grinding them right before you hit the water. If you get those three pillars right, you’ve already bypassed 90% of the mistakes that turn a morning ritual into a chore. It’s about building a system that works for your schedule, not fighting against it.

My advice? Don’t let the fear of a “sub-optimal” brew keep you stuck in a cycle of expensive, mediocre cafe runs. Start with one decent setup, find a bean you actually enjoy, and let the process become a part of your morning flow. You don’t need to be a professional barista to enjoy a better cup; you just need to remove the friction between you and a good caffeine kick. Life is messy enough as it is—your morning coffee shouldn’t be. Once you dial in your routine, you’ll realize that the best part isn’t just the taste, but the quiet moment of control you claim before the rest of the world starts demanding your attention.

Frequently Asked Questions

How much should I actually spend on a grinder versus a decent brewer?

If you’re looking to optimize your budget, here’s the hard truth: prioritize the grinder. I’ve seen people drop $300 on a high-end pour-over setup only to use pre-ground, stale beans, and it’s a total waste of capital. A decent, consistent burr grinder is the backbone of your system. Spend 60-70% of your budget there. You can make an incredible cup with a cheap French press, but you can’t fix bad grounds with an expensive machine.

Is there a specific water temperature I need to hit, or does tap water work fine?

Look, if you’re using tap water that tastes like a swimming pool, your coffee is going to taste like a swimming pool. Use filtered water. As for temperature, you don’t need a lab-grade thermometer, but avoid boiling water—it scorches the grounds and leaves you with a bitter mess. Aim for just off the boil, around 195°F to 205°F. If you don’t have a thermometer, let the kettle sit for a minute after it whistles.

How long do those expensive beans actually stay fresh once the bag is open?

Look, I’m not going to give you some arbitrary date, but here’s the reality: once that seal is broken, the clock is ticking. For the best flavor, you’ve got about two weeks. After that, you’re mostly just drinking expensive, stale water. If you store them in a cool, dark place in an airtight container—and please, skip the fridge—you might stretch it to a month, but the nuance will be gone. Use it or lose it.

How do I know if I'm using the right ratio of coffee to water so it doesn't taste like battery acid?

The “battery acid” taste usually means you’re under-extracting—basically, you didn’t get enough flavor out of the grounds. To fix this, stop eyeballing it. Use a digital scale and aim for a 1:16 ratio. That’s 1 gram of coffee for every 16 grams of water. It sounds nerdy, but once you dial in that baseline, you can tweak it by a few grams until the strength feels exactly right for you.

Posted on

Deliciously Healthy Snacks That Don’t Taste Like Diet Food

Delicious and tasty healthy snack ideas.

We’ve all been there: it’s 3:00 PM, your focus is cratering, and your brain is screaming for anything with a high sugar content just to survive the final stretch of the workday. I used to fall into that trap constantly, thinking I could power through on black coffee alone, only to end up crashing hard and making terrible decisions at the vending machine. The problem isn’t your willpower; it’s that you lack a reliable system for refueling. When you don’t have a plan, you default to whatever is easiest, which is rarely what your body actually needs to stay sharp.
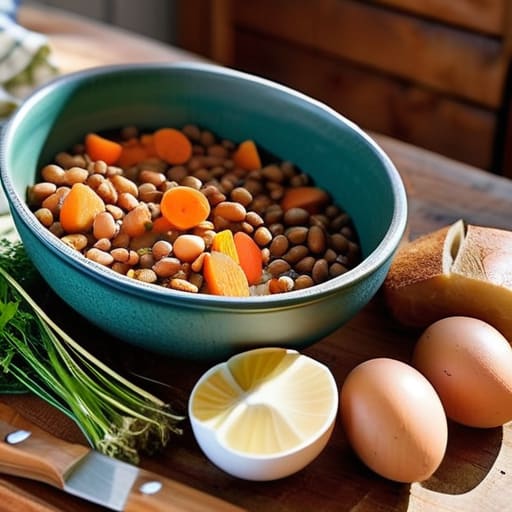
I’ve spent a lot of time auditing my own habits to find healthy snack ideas that actually work for a busy lifestyle—meaning they require minimal prep and don’t leave you feeling sluggish. I’m not interested in complicated recipes or “superfoods” that cost a fortune and take an hour to assemble. Instead, I’ve narrowed it down to eight practical, low-friction options that provide steady energy without the mid-afternoon slump. Here is how you can stop the cycle of energy crashes and start snacking with intention.

Table of Contents

Greek Yogurt with a Nutty Twist

Greek Yogurt with a Nutty Twist snack.

I used to reach for those sugary fruit cups when I felt a slump coming on, but I quickly realized I was just setting myself up for a massive insulin spike and an even harder crash. Switching to plain Greek yogurt changed the game for me. It’s packed with protein, which is the secret weapon for staying full when you’re deep in a spreadsheet rabbit hole.

Apple Slices and Almond Butter

Healthy Apple Slices and Almond Butter snack.

This is my go-to when I’m working from home and need something that requires almost zero prep time. An apple and a spoonful of nut butter is a classic pairing for a reason: it hits that perfect balance of natural sweetness and healthy fats. It’s a low-friction snack that keeps my brain fueled without making me feel heavy or sluggish.

Hard-Boiled Eggs: The Ultimate Prep

Hard-Boiled Eggs: The Ultimate Prep protein.

If you’re like me and prefer to optimize your week in one go, hard-boiled eggs are a non-negotiable. I usually boil a half-dozen on Sunday night so they’re sitting in the fridge, ready to go. They are the ultimate portable protein source, and you can eat them anywhere—at your desk, in the car, or even while you’re tinkering with your vintage synths.

Hummus and Crunchy Veggies

Hummus and Crunchy Veggies for healthy snacking.

I’ve found that a lot of people fail at healthy snacking because they miss the “crunch factor.” When you’re stressed, your brain craves texture. Instead of reaching for a bag of chips, I grab some sliced cucumbers, bell peppers, or carrots and dip them into a decent hummus. It’s satisfying, hydrating, and keeps the mid-afternoon brain fog at bay.

Handful of Raw Almonds or Walnuts

Sometimes, the best system is the simplest one. When I’m traveling or running between meetings, I don’t have time to play chef. A small container of raw nuts is my fallback. They are calorie-dense in a good way, providing the sustained energy required to power through a long afternoon without needing a caffeine reload.

Cottage Cheese and Berries

If you need something that feels a bit more substantial, cottage cheese is an underrated powerhouse. It’s incredibly high in casein protein, which digests slowly and keeps you satiated for a long stretch. I like to top mine with some blueberries or raspberries to add a bit of natural sweetness and some antioxidant benefits to the mix.

Edamame with Sea Salt

There is something weirdly meditative about shelling edamame, and it’s a great way to force yourself to slow down during a hectic day. It’s a fantastic source of plant-based protein and fiber, making it a nutrient-dense option that actually fills you up. I usually keep a bag of frozen, pre-shelled edamame in the freezer for maximum convenience.

Dark Chocolate and Sea Salt

Let’s be real: sometimes you just want something sweet, and trying to fight that urge entirely is a losing battle. Instead of reaching for a candy bar loaded with corn syrup, I keep a bar of high-quality dark chocolate (at least 70% cocoa) in the pantry. It satisfies the craving while providing a bit of actual nutritional value in the form of flavonoids.

The Philosophy of Fueling

“Stop treating snacking like a reward for surviving a bad day and start treating it like the fuel that prevents the day from falling apart in the first place. It’s not about restrictive dieting; it’s about choosing high-leverage inputs so you don’t crash when you actually need to be productive.”

Nathaniel 'Nate' Brooks

Don't Overthink the Process

At the end of the day, the goal isn’t to transform into a nutritionist or spend your entire Sunday meal prepping elaborate trays of organic kale. It’s really just about reducing the friction between feeling hungry and making a poor decision. Whether you’re grabbing a handful of almonds, some Greek yogurt, or slicing up an apple, the common thread here is simplicity. If you have these basic, low-effort options readily available, you stop the mid-afternoon energy crash before it even starts. The key is to build a reliable system of staples so you aren’t forced to rely on willpower when your brain is already fried from a long day of work.

I know how easy it is to get caught up in the idea that healthy living requires a massive, sweeping overhaul of your entire lifestyle. It doesn’t. Real, sustainable change usually happens in the small, quiet moments—like choosing a piece of fruit over a bag of processed chips because it was already sitting on your counter. Don’t aim for a perfect diet; just aim for better decisions than you made yesterday. Once you automate these small wins, you’ll find you have a lot more mental bandwidth left over for the things that actually matter.

Frequently Asked Questions

How do I keep these snacks from going bad if I'm prepping them all on a Sunday?

The key here is modularity. Don’t pre-mix anything that can get soggy. Keep your dry stuff—nuts, seeds, or granola—in airtight glass jars, and keep the moisture-heavy items like berries or yogurt in separate, sealed containers. If you’re prepping veggie sticks, put a damp paper towel in the container to keep them crisp. Basically, treat your fridge like a well-organized server rack: keep the components separate until they’re ready to be deployed.

Are there ways to make these even quicker when I'm stuck in back-to-back meetings?

When you’re stuck in back-to-back meetings, you can’t afford a “prep session.” My rule is simple: if it takes more than thirty seconds to grab, it’s not a meeting snack. Keep a “emergency stash” of single-serve packs—think individual almond packets or jerky sticks—right in your desk drawer or laptop bag. If you’re working from home, pre-portion your nuts or yogurt into small containers on Sunday. Eliminate the decision fatigue before the calendar invites even hit.

What are some better options if I'm looking for something savory instead of sweet?

If you’re leaning toward savory, I get it—sometimes fruit just feels like eating dessert for lunch. For me, the goal is high protein or healthy fats to avoid that blood sugar spike. Try some roasted chickpeas for a crunch that actually fills you up, or keep some hard-boiled eggs in the fridge for a zero-effort option. If you need something more substantial, a few slices of turkey rolled around some avocado is a total game-changer.

How much of these should I actually be eating without accidentally blowing my calorie budget?

Look, I’m a big believer in systems, not restriction. If you’re counting calories, don’t guess—that’s how you end up accidentally eating a whole bag of almonds. Stick to the “handful rule.” A handful of nuts, a single piece of fruit, or half a cup of yogurt. If it fits in your palm, you’re usually in the safe zone. Treat snacks as bridges between meals, not as full-blown dining events.

Posted on

How to Eat Well While Sticking to a Tight Budget

Tips on how to cook on a budget.

I spent most of my early twenties thinking that learning how to cook on a budget meant living on a sad, repetitive cycle of instant noodles and unseasoned rice. I used to see those “extreme savings” influencers online—the ones claiming you can thrive on five dollars a day—and honestly, it just felt like a recipe for burnout. To me, that wasn’t efficiency; it was just another bad system that made life harder instead of easier. I realized pretty quickly that if your meal prep feels like a second job or a punishment, you’re going to fail, no matter how much money you save.
I’m not here to give you a list of impossible dietary restrictions or tell you to spend four hours prepping kale every Sunday. Instead, I want to show you how to apply a little bit of systems thinking to your kitchen to eliminate the friction of mealtime. We’re going to focus on small, actionable adjustments—like smarter grocery sequencing and high-yield staples—that keep your bank account intact without turning dinner into a chore. We aren’t aiming for some Pinterest-perfect pantry; we’re just aiming to make your daily routine actually work.

Table of Contents

Mastering Meal Planning for Savings Without the Stress

Mastering Meal Planning for Savings Without the Stress

Look, I used to treat meal planning like a massive, daunting project that required a PhD in logistics. I’d spend my Sunday afternoons staring at a blank notebook, feeling overwhelmed by the sheer number of decisions I had to make. That’s where the friction starts. To actually make this work, you have to stop treating it like a chore and start treating it like a systematic workflow. Instead of trying to invent new recipes every week, I focus on meal planning for savings by building a rotating framework. I pick three core proteins and two versatile vegetables, then find ways to pivot them across different meals. It’s about creating a repeatable loop that minimizes decision fatigue.

The real secret to keeping your sanity—and your bank account—is leaning heavily on pantry staple recipes. Before you even touch a grocery app, audit what you already have. If you’ve got half a bag of lentils and some rice in the back of the cupboard, that’s a meal that’s already paid for. By building your weekly plan around what’s already in your kitchen, you aren’t just saving money; you’re drastically reducing food waste. This isn’t about eating the same bland meal five days in a row; it’s about being smart with your inventory so you aren’t throwing money in the trash every Sunday night.

Grocery Shopping on a Budget to End Decision Fatigue

Grocery Shopping on a Budget to End Decision Fatigue

If you’ve ever stood in the middle of a grocery aisle, staring blankly at twenty different brands of pasta sauce while your mental battery hits zero, you’ve experienced decision fatigue. It’s a productivity killer. When we shop without a system, we don’t just spend more money; we burn through the mental energy we need for the rest of our day. To fix this, I treat my grocery trips like a deployment: everything needs a pre-defined path. Stop wandering the aisles and start sticking to a strict, list-based protocol. By leaning into grocery shopping on a budget through a disciplined list, you eliminate those impulse buys that quietly bleed your bank account dry.

The real secret to streamlining this process is building a rotation around your pantry staple recipes. I’m talking about the stuff that never expires and costs pennies—lentils, rice, canned tomatoes, and oats. When you have a foundation of reliable ingredients, you aren’t reinventing the wheel every Tuesday night. Instead, you’re just assembling high-quality meals from a predictable inventory. This approach doesn’t just save cash; it’s one of the most effective ways of reducing food waste because you’re actually using what you buy rather than letting it rot in the crisper drawer.

Five High-Impact Swaps to Trim Your Food Expenses

Five High-Impact Swaps to Trim Your Food Expenses
  • Stop buying pre-cut veggies and individual snack packs. You’re essentially paying a “convenience tax” for someone else to do the knife work. Buy the whole head of broccoli or the large bag of carrots and spend ten minutes on Sunday prepping them; your bank account will thank you.
  • Lean heavily on “modular” ingredients like grains, legumes, and frozen vegetables. A big bag of dried lentils or a bulk box of quinoa serves as a foundation you can pivot between different flavor profiles—tacos one night, a grain bowl the next—without needing expensive, specialized ingredients for every single meal.
  • Treat your freezer like a secondary pantry. Frozen produce is often more nutrient-dense than the “fresh” stuff that’s been sitting on a truck for a week, and it won’t turn into a science experiment in the bottom of your crisper drawer if you forget about it.
  • Audit your spice cabinet before you shop. There is nothing more frustrating than getting halfway through a recipe only to realize you’re out of cumin, or worse, realizing you’ve spent $40 on spices you only use once a year. Build a core kit of versatile seasonings and stick to them.
  • Master the art of the “repurposed leftover.” Instead of seeing yesterday’s roasted chicken as a finished meal, view it as a component. Shred it into a salad, toss it into a pasta, or fold it into an omelet. It eliminates food waste and slashes the time you spend standing over a stove.

## The Philosophy of the Low-Friction Kitchen

“Cooking on a budget isn’t about deprivation or eating bland leftovers; it’s about building a better system. When you stop treating every meal like a high-stakes decision and start treating your kitchen like an optimized workflow, you stop wasting money and start reclaiming your time.”

Nathaniel 'Nate' Brooks

Streamlining Your Kitchen Routine

Streamlining Your Kitchen Routine through meal planning.

At the end of the day, cooking on a budget isn’t about deprivation or eating bland, repetitive meals. It’s about building a reliable system that works for you, rather than against you. We’ve looked at how intentional meal planning can strip away the mental load, and how a structured grocery run can stop those impulse buys from draining your checking account. When you stop treating every dinner as a brand-new logistical problem and start seeing it as a series of small, repeatable wins, the friction starts to disappear. You aren’t just saving money; you’re reclaiming the time and mental energy you used to waste on decision fatigue.

Don’t feel like you have to overhaul your entire kitchen overnight. If you try to implement every single optimization at once, you’re just going to burn out—and we both know how that ends. Start with one small tweak this week. Maybe it’s just committing to a single grocery list or choosing one night to cook from what’s already in your pantry. The goal isn’t to become a master chef or a financial wizard; it’s to create a lifestyle that is sustainable and efficient. Focus on the progress, not the perfection, and eventually, these small adjustments will become your new, effortless baseline.

Frequently Asked Questions

How do I keep my meals varied so I don't end up eating the exact same three things every single week?

The trick is to stop thinking in terms of entire recipes and start thinking in terms of “modular ingredients.” I keep a rotation of three proteins, three grains, and five versatile veggies in my pantry and freezer. Instead of a new meal, I just swap the flavor profile. One week it’s a Mediterranean bowl with chickpeas and lemon; the next, it’s a spicy taco bowl with the same base. It’s low friction, high variety.

Is it actually cheaper to buy in bulk, or am I just wasting money on stuff that sits in my pantry forever?

It depends entirely on your consumption velocity. If you’re buying a five-pound bag of lentils because they’re cheap, but they sit there for eighteen months gathering dust, you haven’t saved money—you’ve just converted cash into pantry clutter. I use a simple rule: only buy in bulk if it’s a non-perishable staple you use weekly. If it’s a “maybe” item, stick to the smaller, more expensive unit. Don’t let a “deal” trick you into overspending.

What are some high-protein, low-cost staples I should always keep on hand to avoid expensive takeout?

If you want to stop the “I’m too tired, let’s just order DoorDash” cycle, you need protein that’s ready to go. Keep dried lentils and canned beans in the pantry; they’re dirt cheap and shelf-stable. For the fridge, grab a carton of eggs and some Greek yogurt. If you can swing it, frozen chicken breasts are a lifesaver. These are my go-to building blocks for quick, high-protein meals that don’t break the bank.

How do I manage food waste so I’m not literally throwing money into the trash at the end of the week?

The easiest way to stop the bleeding is to treat your fridge like a high-priority inventory system. I started using the “Eat Me First” bin—a dedicated container for anything nearing its expiration date. If it’s in there, it’s the priority for tonight’s dinner. Also, stop overbuying produce; buy what you actually need for your plan, not what looks good on sale. If you can’t finish it, freeze it. Don’t let good money rot.

Posted on

Grab-and-go Breakfasts for When You’re Running Late

Quick breakfast for busy mornings grab-and-go.

I used to think that “breakfast” meant sitting down with a steaming cup of coffee and a plated meal, but my twenties taught me otherwise. Between back-to-back meetings and the sheer friction of trying to get out the door on time, I realized that my morning routine was a system failure waiting to happen. Most people treat the most important meal of the day as an afterthought or, worse, an obstacle to overcome. We end up grabbing a sugary granola bar from a gas station or skipping it entirely, which is just setting ourselves up for a mid-morning crash. If you’re tired of feeling like you’re constantly playing catch-up before 9:00 AM, you need a quick breakfast for busy mornings that actually fuels you without demanding an hour of your time.
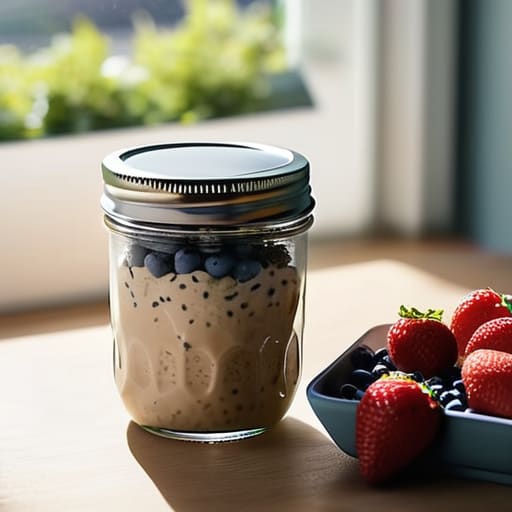
I’ve spent years testing, failing, and refining my own morning workflow to find the sweet spot between nutrition and speed. In this guide, I’m breaking down eight specific, high-efficiency options that I personally rely on when my schedule gets tight. You aren’t going to find any complicated recipes here; instead, I’m sharing streamlined, low-friction solutions designed to work with your chaos, not against it. Let’s get your mornings back on track.

Table of Contents

The Overnight Oats System

Preparing The Overnight Oats System in jars.

If you’re like me, your morning brain isn’t exactly wired for complex decision-making. This is where overnight oats come in as a total game changer. You just throw oats, milk (or a dairy alternative), and some chia seeds into a jar the night before, give it a quick shake, and shove it in the fridge. By the time your alarm goes off, the texture is perfect and the heavy lifting is already done.

Protein-Packed Egg Bites

Batch-cooked Protein-Packed Egg Bites with spinach.

I used to think making eggs in the morning was a luxury I couldn’t afford during the work week, but that was a massive mistake. Once I started using a muffin tin to make batch-cooked egg bites, my mornings transformed. You whisk up a bunch of eggs, throw in some spinach and feta, and bake them all at once. They stay good in the fridge for days and take about sixty seconds to reheat.

The High-Speed Smoothie Setup

The High-Speed Smoothie Setup with pre-portioned bags.

Smoothies are great, but let’s be honest: cleaning a blender at 7:00 AM is a recipe for a bad mood. To make this actually viable for a busy person, you need to implement a pre-portion system. I use reusable silicone bags to hold my frozen fruit, greens, and seeds. When it’s time to eat, you just dump the bag into the blender, add your liquid, and hit the button.

Greek Yogurt and Granola Bowls

Quick Greek Yogurt and Granola Bowls.

This is my go-to when I have exactly three minutes before I need to be on a Zoom call. Greek yogurt is a nutritional powerhouse, and it requires zero preparation time. You grab a container, scoop it into a bowl, and top it with whatever is within arm’s reach. It’s a simple, modular approach to eating that minimizes the friction of cooking.

Nut Butter Toast Upgrades

Toast is the ultimate “low-tech” breakfast, but if you’re just eating plain bread, you’re missing a massive opportunity. I like to treat toast as a base layer for more complex flavors. A thick slice of whole-grain sourdough with almond butter and sliced bananas is a solid, reliable setup that hits all the right notes without requiring a single pan.

Breakfast Burritos on Autopilot

If you prefer a warm, savory breakfast, you need to embrace the art of the bulk-prep burrito. Spend about forty minutes on a Sunday morning rolling a dozen burritos with scrambled eggs, black beans, and cheese, then wrap them individually in foil. You can keep a handful in the freezer and just pop one in the microwave whenever you need a real meal.

Chia Seed Pudding

Chia pudding is essentially the “set it and forget it” version of breakfast. It’s incredibly efficient because it requires almost no active labor. You just mix chia seeds with a liquid of your choice and let it sit. The seeds absorb the liquid and create a texture that’s surprisingly satisfying, almost like a healthy version of tapioca pudding.

The "Grab-and-Go" Nut and Fruit Mix

Sometimes, “breakfast” isn’t even a sit-down event; it’s just something you consume while commuting or walking to the train. For those days, I keep a curated stash of high-quality nuts and dried fruit. This isn’t just about grabbing a bag of trail mix from a gas station—that’s a recipe for a sugar crash.

The Breakfast Philosophy

“A breakfast shouldn’t be another high-stakes project on your to-do list; it’s just the fuel you need to stop reacting to your day and start actually running it.”

Nathaniel 'Nate' Brooks

Streamlining Your Morning Routine

At the end of the day, the goal isn’t to become a gourmet chef at 6:00 AM; it’s about choosing a system that actually sticks. Whether you’re leaning into the grab-and-go simplicity of overnight oats, the protein-packed efficiency of hard-boiled eggs, or the low-effort reliability of a smoothie, the common thread is reducing decision fatigue. You don’t need a complex culinary repertoire to fuel your body; you just need a few reliable, repeatable options that require minimal mental energy when your brain is still trying to boot up. By prepping ahead or keeping your pantry stocked with these staples, you’re effectively removing the friction that usually leads to skipping a meal or hitting the drive-thru out of desperation.

I know how it feels to start the day already feeling behind because you spent twenty minutes staring into an empty fridge. But once you implement these small adjustments, you’ll notice that the morning feels less like a race and more like a controlled launch. We aren’t aiming for a perfect, Instagram-worthy breakfast spread every single day. We are just aiming to eliminate the chaos so you can walk out the door feeling composed and ready to tackle whatever the workday throws at you. Take it one small tweak at a time, and let the system do the heavy lifting for you.

Frequently Asked Questions

How do I meal prep these options without everything getting soggy or unappetizing by Thursday?

The secret is separating your textures. I never mix wet ingredients with dry ones until I’m actually eating. If you’re prepping overnight oats, keep your seeds or nuts in a separate small container. For anything savory, store your sauces or dressings on the side. I also swear by glass containers; they keep things crisper than plastic and don’t hold onto old smells. Think of it as modular assembly—keep the components independent until the moment of impact.

Are there ways to make these even faster if I’m literally running out the door with five minutes to spare?

If you’re down to a five-minute window, you have to stop thinking about “preparing” and start thinking about “grabbing.” This is where the “grab-and-go” system wins. Keep pre-portioned overnight oats or hard-boiled eggs in the fridge, or literally keep a stash of high-quality protein bars by your keys. If you can’t eat it while walking to your car, it’s too complicated for a crisis morning. Minimize the friction; just grab and move.

I’m trying to watch my sugar intake—how can I swap out the sweeter options for something more savory and protein-heavy?

Look, I get it. The sugar crash mid-morning is a productivity killer. If you want to ditch the sweetness without feeling like you’re starving by 10:00 AM, you need to pivot to fats and proteins. Swap that sweetened yogurt for Greek yogurt topped with hemp seeds and salt, or trade the fruit smoothie for a savory egg muffin. Focus on salt, spices, and protein—it stabilizes your blood sugar and keeps the brain fog at bay.

What are the best low-maintenance tools or containers I should invest in to make this routine actually stick?

Don’t overcomplicate this. You don’t need a gourmet kitchen; you need gear that doesn’t create more work. Start with a set of high-quality, glass meal prep containers—they’re easier to clean, don’t stain like plastic, and go straight from fridge to microwave. I also swear by a heavy-duty insulated shaker bottle for those grab-and-go smoothies. If your tools are easy to clean and durable, you’re much more likely to actually use them.

Posted on

Effortless Sheet-pan Dinners With Minimal Cleanup

Easy simple sheet pan dinners recipe.

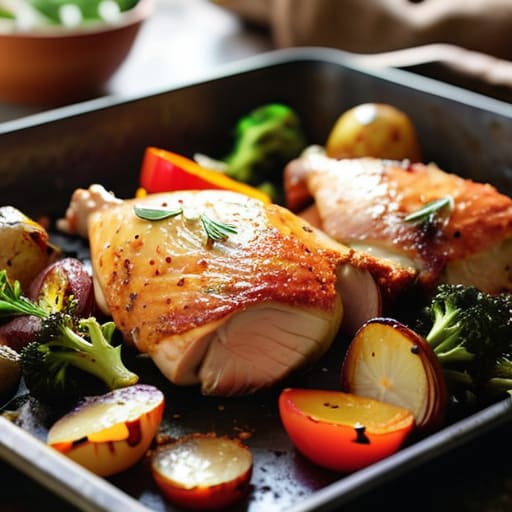
I spent most of my twenties treating my kitchen like a high-stakes debugging session, usually ending in a pile of greasy dishes and a takeout bag that cost me way too much. We’ve all been there—staring into a fridge full of ingredients but feeling too drained to actually build a meal. The friction of prepping multiple pots and pans is often the reason we default to expensive, unhealthy habits. That’s why I’ve become obsessed with perfecting simple sheet pan dinners; they are the ultimate hack for reclaiming your evening without sacrificing actual flavor.
In this guide, I’m breaking down eight of my go-to configurations that I’ve tested, tweaked, and optimized for maximum efficiency. You aren’t just getting a list of recipes; you’re getting a system for eating well even when your brain is fried from a long day of troubleshooting. I’ll show you exactly how to balance proteins, fats, and veggies so you can stop wrestling with the kitchen and start enjoying your downtime. Let’s get your weeknight routine streamlined and stress-free.

Table of Contents

Lemon Herb Chicken and Root Veggies

Roasted Lemon Herb Chicken and Root Veggies.

This is my go-to when I realize I haven’t been to the grocery store in four days and my energy levels are hitting a wall. You just chop up some chicken thighs, carrots, and baby potatoes, toss them in olive oil, dried oregano, and plenty of lemon zest, and let the oven do the heavy lifting. It’s a low-friction meal that actually tastes like you put in effort, even if you were actually just scrolling through tech forums.

Sausage and Bell Pepper Medley

Roasted Sausage and Bell Pepper Medley.

If you want to minimize prep time even further, buy a pack of high-quality pre-cooked sausages—I usually go for spicy Italian or smoked kielbasa. Slice them into rounds along with some colorful bell peppers and red onions. It’s a minimalist approach to flavor; the fat from the sausage renders out during the roast, essentially seasoning the vegetables for you without any extra work.

Pesto Salmon and Asparagus

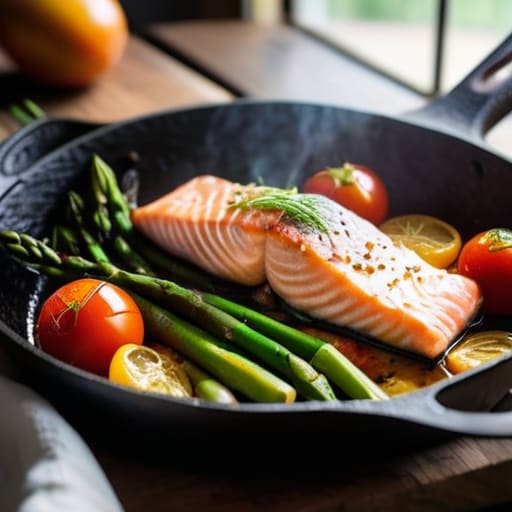
Baked Pesto Salmon and Asparagus on tray.

When I’m feeling a bit more “wellness-focused” but still don’t want to deal with a sink full of dishes, I go for salmon. Slather a few fillets in store-bought pesto—get the good stuff, not the cheap watery kind—and surround them with a bunch of trimmed asparagus. It’s a high-reward system because the cooking time is incredibly short, usually under fifteen minutes if your oven is already up to temp.

Beef and Broccoli Stir-Fry Style

Sheet pan Beef and Broccoli Stir-Fry Style.

Most people think stir-fry requires a wok and constant standing over a hot stove, but you can cheat the system using a sheet pan. Thinly slice some flank steak and toss it with broccoli florets, soy sauce, ginger, and garlic. By roasting them at a high temperature, you get a charred, savory finish that mimics a restaurant meal but with significantly less cleanup.

Mediterranean Halloumi and Chickpea Bake

For the nights when I’m not in the mood for heavy meat, this vegetarian option is a total lifesaver. You take a can of drained chickpeas, some halved cherry tomatoes, cucumber slices (add these fresh after), and thick slabs of halloumi cheese. The cheese gets this amazing, salty crust in the oven that makes the whole dish feel unexpectedly gourmet.

Shrimp Scampi Sheet Pan

Shrimp is the ultimate “fast food” for anyone who values their time. Because they cook so incredibly quickly, this is my favorite meal for those nights when I’m working late and need to eat immediately. Toss jumbo shrimp with melted butter, garlic, lemon juice, and a pinch of red pepper flakes on a pan with some thin zucchini ribbons.

Honey Mustard Pork Chops and Apples

This one is a bit of a nostalgic comfort meal for me. You take bone-in pork chops, slice up some tart apples (like Granny Smith), and toss them with sliced red onions in a simple honey mustard glaze. The sweetness of the apple and the tang of the mustard create a flavor profile that works every single time without needing complex techniques.

Crispy Tofu and Sweet Potato Cubes

I know, I know—tofu can be a nightmare if you don’t know what you’re doing. But if you press the moisture out of it first and toss it with cornstarch and your favorite seasoning, it becomes incredibly crispy in the oven. Pair it with small cubes of sweet potato, and you have a nutritious, filling meal that keeps you full for hours.

The Philosophy of the Pan

“I don’t care about gourmet plating or complex culinary techniques; I care about the thirty minutes of peace I get back when I’m not scrubbing three different pots and a cutting board after a long day of troubleshooting systems.”

Nathaniel 'Nate' Brooks

Reclaim Your Evenings

At the end of the day, these sheet pan dinners aren’t just about the food; they are about optimizing your limited bandwidth. We’ve looked at how a single tray can handle everything from protein-heavy salmon to hearty roasted vegetables, proving that you don’t need a sink full of dishes to eat well. By leaning into these streamlined methods, you’re essentially removing the friction between “being hungry” and “being fed.” Whether you’re choosing a quick Mediterranean mix or a heavy-duty steak and potato combo, the goal remains the same: minimizing the mess while maximizing the nutritional payoff.

I know how it feels when the workday runs long and the last thing you want to do is navigate a complex recipe. But you don’t need to be a gourmet chef to have a successful evening; you just need a better system. Stop treating dinner like a high-stakes project and start seeing it as a simple, repeatable process that works for you, not against you. Life is messy enough as it is, so let’s stop making the kitchen part of the chaos. Pick one of these recipes tonight, throw it in the oven, and just breathe while you wait.

Frequently Asked Questions

How do I make sure the vegetables don't turn into mush while the meat is still cooking?

This is the classic sheet pan dilemma. If you throw broccoli in with a thick chicken breast from minute one, you’re eating sludge. To fix this, I use “staggered timing.” I check my internal timer; if the meat needs 25 minutes but the veggies only need 15, I wait. Toss the vegetables onto the pan halfway through. It keeps the textures distinct and ensures nothing gets lost in the mush.

Are there specific types of pans I should avoid to prevent everything from sticking?

Honestly, stay away from cheap, thin aluminum pans. They develop hot spots that scorch your food in one corner while the rest stays raw, and they’re a nightmare to clean. If you’re using old, scratched-up non-stick pans, toss them; those coatings are just going to flake into your dinner. I swear by heavy-duty rimmed baking sheets. They hold heat evenly and can actually handle the high temps you need for a good sear.

Can I prep these ingredients ahead of time in the fridge, or will they get soggy?

You can definitely prep ahead, but there’s a strategy to it. I usually chop my veggies and proteins a day or two early, but I keep them in separate containers. If you toss everything in the marinade too soon, the salt can draw out moisture and turn your veggies into mush. My rule of thumb: prep the components, but wait until you’re actually ready to roast to combine them and hit the oven.

What’s the best way to scale these recipes up if I’m suddenly cooking for more people?

Scaling up isn’t as simple as just doubling the ingredients—if you crowd the pan, you’ll end up steaming your food instead of roasting it. To keep that texture, use multiple sheet pans and leave space between the items. I usually check my oven’s airflow, too; if I’m running two racks, I rotate them halfway through. It’s a minor tweak, but it ensures the last person in line gets a meal as good as the first.

Posted on

15-minute Dinner Ideas for When You’re Exhausted

Quick 15 minute meals for exhausted dinners.

We’ve all been there: it’s 6:30 PM, your brain is fried from a day of troubleshooting systems, and the last thing you want to do is stare at a pile of groceries wondering how to turn them into something edible. Usually, this is the exact moment when the “decision fatigue” hits, and you end up settling for expensive, overpriced takeout that leaves you feeling sluggish. I used to let these chaotic evenings dictate my entire routine, but I’ve learned that the secret to a sustainable lifestyle isn’t gourmet cooking—it’s about implementing quick 15 minute meals that actually work. You don’t need a culinary degree to eat well; you just need a better operating system for your kitchen.
In this guide, I’ve stripped away the fluff to bring you 15 high-efficiency meal ideas that prioritize both flavor and speed. I’m talking about real, actionable options that minimize cleanup and maximize your downtime. By the end of this list, you’ll have a curated toolkit of recipes designed to help you reclaim your evening without the stress of a long prep time. Let’s stop wrestling with the kitchen and start streamlining your dinner routine.

Table of Contents

The Pantry Pasta Pivot

The Pantry Pasta Pivot aglio e olio.

When I’m staring at a mountain of unread emails, the last thing I want to do is chop vegetables for forty minutes. This is where the classic aglio e olio style pasta saves my sanity. You just need spaghetti, garlic, olive oil, and some red pepper flakes. It’s a system that relies on high-quality staples rather than complex prep work.

Gourmet Quesadillas

Delicious Gourmet Quesadillas with black beans.

I used to think quesadillas were just for late-night snacks, but they are actually an incredible tool for efficient nutrition. If you have tortillas, cheese, and a can of black beans, you’re essentially halfway to a balanced dinner. I usually keep a bag of pre-shredded Mexican blend cheese in the freezer just for these moments.

The Mediterranean Power Bowl

The Mediterranean Power Bowl with chickpeas.

This is my go-to when I want to feel like I actually have my life together. You aren’t really “cooking” so much as you are assembling components. I keep a stash of canned chickpeas, cucumber, feta cheese, and olives in the fridge. It’s a modular system that works every single time.

Loaded Avocado Toast 2.0

Loaded Avocado Toast 2.0 with soft-boiled egg.

We’ve all seen the photos, but let’s be honest: avocado toast is a legitimate lifesaver when your brain is fried. To make it a proper dinner, you have to move beyond just smashed fruit on bread. I like to top mine with a jammy soft-boiled egg and a sprinkle of everything bagel seasoning.

Rapid Shrimp Scampi

Frozen shrimp is one of the best investments you can make for your kitchen’s efficiency. Because they thaw so incredibly fast in a bowl of cool water, they are the perfect protein for a 15-minute window. I just sauté them with plenty of garlic, lemon juice, and a knob of butter.

The Rotisserie Chicken Hack

If you aren’t buying a rotisserie chicken from the grocery store once a week, you are leaving time on the table. I treat that bird like a modular component for my entire week. On night one, it’s the star of the show; on night two, it’s shredded into a quick taco or a salad.

Black Bean Street Tacos

Tacos are the ultimate expression of “assembly required” cooking. You don’t need to sear meat for twenty minutes when a can of seasoned black beans can do the heavy lifting. I keep corn tortillas in the pantry because they are cheap, shelf-stable, and incredibly fast to warm up.

One-Pan Sausage and Veggies

I know, I know—usually “one pan” implies a long time in the oven. But if you use pre-cooked smoked sausages and a bag of frozen stir-fry vegetables, you can do this in a skillet in record time. The sausage provides the fat and seasoning, so you don’t have to overcomplicate the pantry.

Caprese Naan Pizzas

Forget the delivery driver; you can have a much better pizza in a fraction of the time using naan bread as your base. It’s the perfect structural foundation because it’s already cooked and holds up well under heat. I just spread some pesto or marinara on top and add fresh mozzarella.

The Egg Scramble Upgrade

Sometimes, the most efficient way to end a day is to lean into the simplicity of eggs. A scramble isn’t just for breakfast; it’s a blank canvas for whatever is left in your crisper drawer. I usually throw in some spinach and a bit of goat cheese to give it some textural interest.

Smoked Salmon Bagels

This might sound like brunch, but when you’re deep in a project and need brain food, it’s perfect. Smoked salmon is a high-density nutrient source that requires absolutely no cooking. I just toast a bagel, spread some cream cheese, and layer on the salmon and capers.

Pesto Tortellini Toss

Refrigerated tortellini is my secret weapon for rapid dining. Unlike dried pasta, these little pockets of cheese cook in about four to five minutes. When you combine that with a high-quality jarred pesto, you’ve essentially automated your dinner.

Tuna Melt Meltdown

We need to talk about the humble canned tuna. If you mix it with a little mayo, Dijon mustard, and some diced celery, you have a base that is ready for anything. I put the mixture on thick slices of bread, top it with sharp cheddar, and toast it in a pan.

Mediterranean Couscous Salad

Couscous is the unsung hero of the “fast food” world because it doesn’t actually require boiling; you just pour hot water over it and let it sit. It’s the ultimate time-optimization tool for a grain-based meal. I mix mine with chopped cucumbers, tomatoes, and a squeeze of lemon.

Beef and Broccoli Stir-Fry Lite

You don’t need to spend an hour prepping a traditional stir-fry. If you buy pre-sliced beef strips and a bag of frozen broccoli florets, you can cut the process down significantly. The secret is a high-heat sear and a simple sauce of soy sauce, ginger, and a dash of honey.

The Philosophy of the 15-Minute Meal

A quick meal isn’t about cutting corners or settling for junk; it’s about building a better system so you can stop spending your limited evening energy on the stove and start spending it on yourself.

Nathaniel 'Nate' Brooks

Reclaiming Your Evenings

At the end of the day, these fifteen recipes aren’t about becoming a gourmet chef or mastering complex culinary techniques. They are about eliminating the decision fatigue that usually hits right around 6:00 PM when your brain is fried. Whether you’re leaning on a high-quality jarred pesto, utilizing the speed of a shrimp sauté, or just keeping a stash of seasoned rotisserie chicken in the fridge, the goal is the same: getting food on the table without the mental overhead. By keeping these few staples in your pantry and a handful of versatile proteins on hand, you turn dinner from a chaotic chore into a predictable, manageable system that works for you, not against you.

I know how it feels to stare at a cluttered fridge and feel that rising sense of dread because you just don’t have the bandwidth for a “real” meal. But remember, we aren’t aiming for a Michelin star here; we are just aiming to stop the bleed of wasted time and expensive, last-minute takeout orders. Small, intentional shifts in how you approach your kitchen can create a massive ripple effect in your overall well-being. Take the win where you can find it. Feed yourself, clear the mental clutter, and get back to the things that actually matter—whether that’s finally relaxing on the couch or catching up on a project you actually enjoy.

Frequently Asked Questions

How can I make sure these 15-minute meals are actually healthy and not just quick junk food?

Look, speed shouldn’t be an excuse for junk. My rule of thumb is the “protein and green” framework. If your 15-minute meal is just carbs, you’re going to crash by 3 PM. Always aim to pair a quick protein—like canned chickpeas, rotisserie chicken, or eggs—with something high-fiber, even if it’s just a handful of pre-washed spinach or frozen peas. It’s about adding nutritional density without adding complexity to the system.

Is it worth investing in specific kitchen tools to hit these time targets, or can I do this with what I already have?

Look, I’m a big believer in optimizing systems, but don’t go out and buy a specialized gadget just because an ad tells you to. Most of these 15-minute wins are about technique, not gear. If you have a decent chef’s knife and a heavy skillet, you’re already 90% there. Save your money for high-quality ingredients; a sharp knife is the only “investment” that actually pays dividends in speed and safety.

What’s the best way to prep ahead of time so I'm not starting from zero every single night?

Don’t fall into the trap of “meal prepping” entire massive containers of food on Sunday; that’s how you end up eating the same lukewarm chicken for five days straight. Instead, focus on component prepping. Chop your onions, mince your garlic, and roast a big batch of versatile veggies while you’re already in the kitchen. If you have the building blocks ready in the fridge, you’re never actually starting from zero—you’re just assembling.

How do I keep my grocery bill from skyrocketing if I'm constantly buying specialized ingredients for these quick recipes?

That’s the classic “efficiency tax”—you save time on cooking but pay for it at the register. To fix this, I treat my pantry like a modular system. Instead of buying a niche spice or sauce for one meal, I pick a “flavor profile” for the week. If I buy miso, I’m committing to three recipes that use it. Buy versatile staples that bridge multiple dishes, and never let a single-use ingredient sit in your cupboard gathering dust.

Posted on

Turning Fridge Scraps Into a Delicious Soup

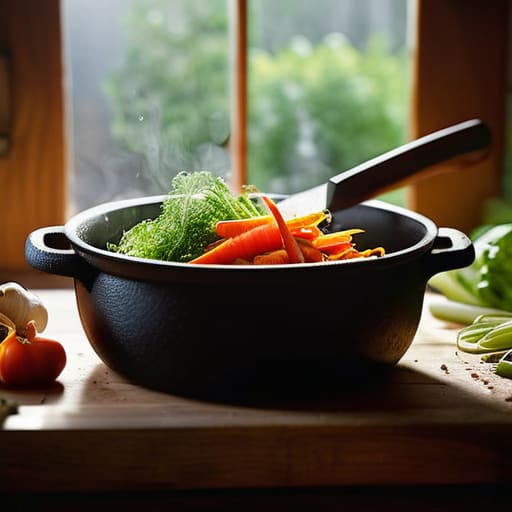
Learning how to make soup from scraps.

Look, we need to stop pretending that making a decent meal requires a twenty-step recipe involving rare, expensive herbs you’ll only use once before they rot in the back of your pantry. Most online guides on how to make soup treat it like a high-stakes chemistry experiment, complete with “chef secrets” that are really just ways to make you spend more money at the grocery store. I spent my early twenties thinking I needed a professional-grade stockpot and a culinary degree just to avoid another night of sad, lukewarm canned noodles. It’s a complete waste of mental bandwidth.
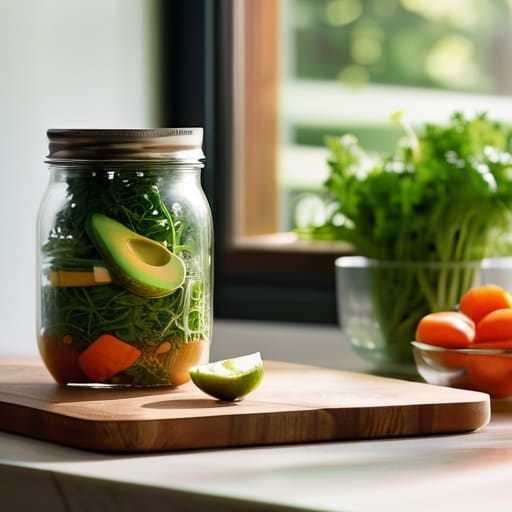
I’m not here to teach you how to be a Michelin-star chef; I’m here to help you build a system that actually works for a busy life. I’ve spent years refining a modular approach that lets you turn whatever random vegetables are lingering in your crisper drawer into something genuinely nourishing. My goal is to show you the core logic behind great flavor so you can stop following rigid instructions and start making decisions. We’re going to strip away the fluff and focus on a streamlined process that delivers maximum results with minimal friction.

Table of Contents

Mastering the Essentials Choosing Your Soup Base Ingredients

Look, if you want to stop eating liquid that tastes like nothing, you have to start with the foundation. Most people make the mistake of thinking any liquid in a carton will do, but there is a massive difference between stock vs broth for soup. If you’re looking for something thin and light, go with broth. But if you want a soup that actually has some body and depth, you need stock—it’s got more gelatin and collagen, which gives the liquid that silky mouthfeel that makes a meal feel substantial.

Once you have your liquid, don’t just throw in random spices and hope for the best. You need a core set of essential soup seasonings to build a profile. I usually start with the “holy trinity” of aromatics: onions, carrots, and celery. Sauté these in a bit of fat before you add your liquid; it’s a small step, but it’s the difference between a flat flavor and something that actually sings. If you’re working on a plant-based version, focus on your vegetable soup fundamentals by using roasted bones or heavy-duty veggie scraps to ensure you aren’t just drinking flavored water. Get the base right, and the rest is just assembly.

Stock vs Broth for Soup Making the Efficient Choice

Stock vs Broth for Soup Making the Efficient Choice

This is where most people get tripped up, and honestly, it’s a distinction that matters more than the internet leads you to believe. When you’re looking at stock vs broth for soup, the difference isn’t just semantics; it’s about the structural integrity of your meal. Think of stock as your foundation. It’s usually made by simmering bones, which pulls out collagen and creates a richer, more viscous mouthfeel. If you’re looking into thickening soup naturally without relying on heavy creams or flour, a high-quality bone stock is your best friend.

Broth, on the other hand, is much lighter. It’s typically made from meat or vegetables and is designed to be consumed as a liquid on its own. If I’m making a light, clear consommé or a quick weekday meal, I’ll grab a carton of broth to keep things moving. But if I’m aiming for something hearty—the kind of meal that feels like a warm hug after a long shift—I’m leaning on stock. Choosing the right one is one of those small, actionable adjustments that separates a mediocre bowl of liquid from a truly restorative meal. Don’t overcomplicate it, just pick the one that matches the “weight” of the dish you’re building.

The Efficiency Playbook: 5 Ways to Stop Overcomplicating Your Soup

The Efficiency Playbook: 5 Ways to Stop Overcomplicating Your Soup
  • Prep your aromatics in bulk. Don’t chop a single onion just because a recipe calls for it; chop three or four on a Sunday, freeze them in small portions, and you’ve just eliminated the most annoying part of the weekday prep.
  • Sauté your vegetables first to build a foundation. If you just toss everything into boiling liquid, you’re getting boiled vegetables, not soup. Getting that initial sear in the pot develops the depth of flavor that makes the difference between “sad liquid” and a real meal.
  • Use the “Acid Finish” trick. If your soup tastes flat or “heavy” even after adding salt, it usually needs acid, not more seasoning. A quick squeeze of lemon or a teaspoon of apple cider vinegar right before serving brightens everything up instantly.
  • Don’t fear the freezer. If you realize you’ve made too much, don’t let it sit in the fridge until it becomes a science project. Portion it into airtight containers immediately; soup freezes beautifully and saves you from the “what’s for dinner” panic on a Tuesday night.
  • Layer your seasoning. Salt early, salt often, but don’t go overboard until the very end. As the liquid reduces, the salt concentration increases, so if you season perfectly at the start, you’ll likely end up with a salt bomb by the time it’s finished.

The Philosophy of the Pot

The Philosophy of the Pot photograph.

“Good soup isn’t about following a rigid recipe to the letter; it’s about building a reliable system of flavors that you can tweak on the fly when you’re tired, hungry, and just need something that works.”

Nathaniel 'Nate' Brooks

Streamlining Your Soup Strategy

Streamlining Your Soup Strategy with efficient ingredients.

At the end of the day, making great soup isn’t about following a rigid, complicated recipe; it’s about understanding the underlying system. We’ve covered how to select a solid base, the nuances between stock and broth, and how to layer your ingredients to build depth without spending five hours at the stove. Once you grasp the logic of how flavors interact and how to choose your components efficiently, you stop being a slave to the cookbook. You start making informed decisions based on what’s in your pantry and how much time you actually have on a Tuesday night. It’s about minimizing the guesswork so you can get to the part that actually matters: eating something real.

Don’t let the idea of “cooking from scratch” intimidate you into reaching for a can of processed sodium every time you’re tired. Perfection is the enemy of progress, and in my experience, a slightly imperfect homemade soup is infinitely better for your body and your wallet than a mediocre store-bought version. Start small, use the systems we discussed, and let the process become a part of your routine rather than a chore on your to-do list. You aren’t just making a meal; you’re optimizing your fuel for the days ahead. Now, go get a pot on the stove and see what you can build.

Frequently Asked Questions

Can I prep the ingredients ahead of time without them getting soggy?

You absolutely can, but you have to be smart about it. If you toss everything into one container, you’re asking for a soggy mess. My rule of thumb: keep your aromatics—onions, carrots, celery—in one airtight container, and keep your harder veggies or proteins separate. If you’re prepping greens like spinach, wait until the very last minute. Think of it like modular systems: keep the components independent until you’re ready to integrate them.

How do I fix a soup that turned out way too salty or watery?

If your soup is a salt bomb, don’t panic. Don’t just add water—that’s a recipe for blandness. Instead, try adding an acid like lemon juice or a splash of vinegar to cut through the salt, or toss in a peeled, halved potato to absorb some of it. If it’s too watery, you need reduction. Simmer it uncovered to concentrate the flavors, or stir in a bit of heavy cream or a cornstarch slurry to give it some actual body.

What’s the best way to freeze homemade soup so it actually tastes good when I reheat it?

Freeze it in small, single-serving portions—don’t commit to a massive tub you’ll struggle to defrost. Use airtight, freezer-safe containers, leaving about an inch of headspace because liquids expand as they freeze. If you’re making something creamy, skip the dairy before freezing; add it fresh when you reheat. For everything else, let the soup cool completely first. It’s a simple step that prevents ice crystals from ruining the texture.

Do I really need to sauté my vegetables first, or can I just throw everything in the pot?

Look, if you’re in a massive rush, you can just dump everything in, but you’re sacrificing depth of flavor for speed. Sautéing isn’t just a culinary ritual; it’s about building a foundation. When you hit those aromatics—onions, carrots, celery—in a bit of fat, you’re triggering the Maillard reaction. It creates a complexity that boiling alone can’t touch. If you want a soup that actually tastes like a meal rather than just flavored water, take the five minutes to sauté.

Posted on

Smart Ways to Minimize Food Waste in Your Home

Tips on how to reduce food waste.

I used to think that being “eco-friendly” meant buying expensive glass canisters and following some complex, aesthetic meal-prepping ritual that looked great on Instagram but failed by Wednesday. Honestly, that’s just another way to waste time and money. I spent years treating my fridge like a graveyard for expensive organic spinach and forgotten avocados, thinking I was doing my part by buying “better” ingredients. But the truth is, if your system is broken, it doesn’t matter how high-end your produce is—you’re still just throwing cash into the bin. I realized that learning how to reduce food waste isn’t about buying fancy gadgets; it’s about fixing the glitchy systems in your kitchen that cause the rot in the first place.

I’m not here to give you a lecture on saving the planet or a list of complicated lifestyle changes that won’t stick. Instead, I want to share the specific, low-friction adjustments I’ve made to my own routine to stop the bleed. We’re going to look at a few practical, spreadsheet-tested tweaks to your shopping and storage habits that actually work for real life. No hype, no expensive gear—just better ways to manage what you already have.

Table of Contents

Mastering Sustainable Grocery Shopping Habits

Mastering Sustainable Grocery Shopping Habits through planning.

The biggest mistake I see people make isn’t what they do with their leftovers; it’s what they do in the grocery store aisles. Most of us shop on autopilot, grabbing whatever looks good in the moment, only to realize three days later that we have a wilted bag of spinach and a carton of heavy cream staring us down. To fix this, you need to treat your shopping trips like a system. I’ve found that meal planning for efficiency is the only way to stop the cycle of impulse buys. Before you even leave the house, check your inventory and write a literal list. If it’s not on the list, it doesn’t go in the cart. It sounds rigid, but it’s actually the ultimate way to reclaim your time and your budget.

Once you’re actually at the store, focus on buying for the week, not the month. It’s tempting to stock up on bulk deals, but if you aren’t eating that much protein or produce in a seven-day window, you’re just pre-ordering trash. I also make it a point to prioritize minimizing single-use packaging wherever possible. By choosing loose vegetables over those plastic-wrapped trays, you’re doing more than just reducing your household food footprint; you’re making your post-shop cleanup much easier. It’s about building a workflow that works for you, rather than fighting against your own habits.

Meal Planning for Efficiency and Less Stress

Meal Planning for Efficiency and Less Stress

If there’s one thing my background in systems analysis has taught me, it’s that chaos usually stems from a lack of a reliable framework. Most people treat meal planning like a creative chore, but I view it as a way to eliminate decision fatigue. Instead of staring blankly at a fridge full of random ingredients on a Tuesday night, I build a repeatable loop. I start by auditing what I already have, then I build my weekly menu around those existing items. This approach to meal planning for efficiency ensures that every single ingredient has a clear purpose and a deadline, rather than just sitting in a vegetable drawer waiting for its inevitable demise.

I’m not talking about those rigid, Pinterest-perfect meal plans that require three hours of prep every Sunday—that’s a recipe for burnout. I’m talking about a “modular” system. I prep a few versatile components—like a big batch of roasted grains or a versatile protein—and then rotate them through different flavor profiles throughout the week. This keeps things interesting without requiring a massive grocery haul every time. When you treat your kitchen like a streamlined workflow, you aren’t just saving time; you’re actively reducing your household food footprint by making sure nothing is bought without a concrete plan for its consumption.

The "Inventory First" Approach: 5 Small Tweaks to Save Your Groceries

The "Inventory First" Approach: 5 Small Tweaks to Save Your Groceries
  • Stop the “Double-Buy” Cycle: Before you even step foot in the store, take a quick photo of your fridge and pantry. It sounds simple, but it prevents that moment of realization halfway through the aisle where you realize you already have three jars of mayo and a bag of spinach that’s about to turn into sludge.
  • Audit Your “Forgotten” Zones: We all have that one crisper drawer or the back corner of the pantry where ingredients go to die. Once a week—maybe while you’re waiting for a slow-cooker to hit temperature—do a quick sweep of those dark corners. If something is looking a little sad, move it to the front or cook it immediately.
  • Master the Art of the “Eat Me First” Box: I keep a small, clear bin in my fridge specifically for items that are nearing their expiration date. When I’m hungry and looking for a snack, if it’s in the bin, it’s the priority. It removes the decision fatigue and ensures nothing gets lost in the shuffle.
  • Freeze Everything (Seriously): Most people think freezing is just for meat, but it’s a lifesaver for produce. If your herbs are wilting, chop them up and toss them in an ice cube tray with olive oil. If your fruit is getting soft, throw it in a bag for smoothies. It’s about extending the lifecycle of your investment.
  • Treat Your Leftovers Like a Resource, Not an Afterthought: Instead of just shoving a Tupperware into the fridge and hoping for the best, treat leftovers as a “pre-made” component for your next meal. That leftover roasted chicken isn’t just a meal; it’s the foundation for tomorrow’s tacos or a quick salad. It turns cooking into a streamlined process rather than a daily chore.

The Real Cost of a Messy Fridge

“Food waste isn’t just a sustainability issue; it’s a system failure. When we let produce rot in the back of the crisper, we aren’t just tossing groceries—we’re tossing the time, money, and energy we spent to get them there. Fixing it isn’t about being a perfect chef; it’s about building better workflows for your kitchen.”

Nathaniel 'Nate' Brooks

Streamlining Your Kitchen for the Long Haul

Streamlining Your Kitchen for the Long Haul

At the end of the day, reducing food waste isn’t about following a rigid, perfect set of rules; it’s about building a better system. We’ve talked about how a more intentional grocery run, a solid meal plan, and a little more awareness of what’s actually sitting in your fridge can change everything. It’s about moving away from reactive eating—where you’re constantly scrambling to save something before it turns—and moving toward a proactive routine that actually works for your lifestyle. By applying these small, tactical adjustments, you aren’t just saving a few bucks on your weekly bill; you are eliminating the mental friction of a chaotic kitchen.

Look, I know how it goes. Some weeks you’ll nail it, and other weeks, that bag of spinach will still end up as a science experiment in the crisper drawer. That’s fine. Don’t let the pursuit of a perfect zero-waste lifestyle become another source of burnout. The goal here isn’t perfection; it’s simply about making better decisions than you were making last month. Start with one tweak, master it, and let the efficiency build from there. Once you stop fighting your kitchen and start managing it, you’ll realize that a streamlined home is one of the best investments you can make for your sanity.

Frequently Asked Questions

How do I actually know which items in my fridge are about to expire before it's too late?

The “eye test” isn’t enough, and by the time things look bad, it’s usually too late. I started using a simple “Eat Me First” bin—a clear container right at eye level in the fridge. If it goes in there, it’s on the menu within 48 hours. I also keep a small dry-erase board on the door to jot down dates for high-stakes items like meat or opened dairy. It takes ten seconds, but it stops the guesswork.

Is it worth investing in specific storage containers, or is that just more clutter?

Look, I’m all about minimizing friction, and nothing creates more mental clutter than a mismatched drawer of Tupperware lids that don’t fit anything. My take? Don’t buy a massive 50-piece set just because it’s on sale. Instead, invest in a few high-quality, uniform glass containers. They stack perfectly, they don’t stain, and they’re microwave-safe. If they serve a functional purpose and save space, they aren’t clutter—they’re part of a better system.

What are some realistic ways to use up leftovers without eating the same meal three days in a row?

The trick is to stop viewing leftovers as “the meal” and start seeing them as “components.” If you have leftover roasted chicken, don’t just reheat it; shred it for tacos or toss it into a quick pesto pasta. Same for grains—that extra quinoa is just a base for a Mediterranean bowl the next day. Treat your fridge like a pantry of modular parts, and you’ll never feel like you’re eating yesterday’s leftovers.

How do I handle food scraps that aren't edible without making my kitchen smell?

The smell is usually the result of trapped moisture and heat. To fix this, I recommend a two-pronged approach: first, get a small, airtight compost bin with a charcoal filter—it’s a game changer for keeping odors contained. Second, don’t let scraps sit in a warm bin overnight. If you can, toss them in a sealed bag in the freezer until your collection day. It’s a bit unconventional, but it keeps your kitchen smelling clean and eliminates the fruit fly problem entirely.