
Posted on

How to Recognize Phishing Emails Before Clicking

Learn how to spot a phishing email.

I remember sitting at my desk at 7:00 PM, halfway through a brisket trim and nursing a lukewarm coffee, when a notification popped up that looked exactly like a legitimate alert from my bank. My heart did that annoying little skip, and for a split second, I actually considered clicking the link. It wasn’t some obvious, misspelled mess; it was surgical. That’s the problem with most advice on how to spot a phishing email—people tell you to look for bad grammar or weird fonts, but modern scammers aren’t playing by those amateur rules anymore. They’re targeting your fatigue and your desire to just get things done.

I’m not here to sell you on some expensive enterprise-grade security suite or a twenty-step checklist that takes longer than the actual task. Instead, I want to give you the practical mental filters I use to vet my own inbox without losing my mind. We’re going to strip away the technical jargon and focus on the small, repeatable habits that help you identify a trap before you even touch your mouse. My goal isn’t to turn you into a cybersecurity expert; it’s to help you eliminate the friction of digital paranoia so you can get back to your real life.

Table of Contents

Recognizing the Common Phishing Red Flags

Recognizing the Common Phishing Red Flags.

Most scammers aren’t hackers in dark rooms; they’re just people playing on your emotions. The first thing I always look for are the classic signs of a fraudulent email that try to manufacture a sense of panic. They’ll tell you your bank account is locked, or your tax refund is waiting, or some other high-stakes nonsense that makes you want to act before you think. If an email feels like it’s trying to bully you into a quick decision, that’s your first red flag. Take a breath. Real institutions aren’t going to threaten you with immediate consequences via a random inbox.

Next, you need to get comfortable with a little bit of malicious link identification. Before you click anything, hover your mouse over the button or the link. A small preview of the actual URL will pop up in the corner of your browser. If the text says “Update Your Password” but the link points to some gibberish string of numbers or a domain you’ve never heard of, close the tab. I also keep a close eye on email spoofing techniques, where the sender’s name looks legit, but the actual address behind it is a mess of random characters. If the “From” field doesn’t match the brand perfectly, it’s a trap.

Unmasking Deceptive Email Spoofing Techniques

Unmasking Deceptive Email Spoofing Techniques illustration.

This is where things get a little more technical, but don’t let that intimidate you. The most common way scammers get past your initial defenses is through email spoofing techniques designed to make a message look like it’s coming from a source you actually trust. They aren’t just guessing; they are mimicking the exact visual style of your bank, your boss, or even a service like Netflix. They rely on the fact that most of us are scanning our inboxes at 8:00 AM while half-asleep, not performing a deep forensic audit on every sender.

To catch these, you have to look past the “Display Name.” Anyone can set their name to “PayPal Support,” but if you hover your cursor over that name or tap the sender’s address on your phone, the actual email address often reveals the truth. It might look like `[email protected]`, but a closer look might show `[email protected]`. It’s a subtle discrepancy, but it’s one of the most reliable signs of a fraudulent email. If the domain—the part after the @ symbol—looks even slightly “off” or misspelled, trust your gut and hit delete. It’s much easier to deal with a missed notification than a compromised bank account.

Five Quick Checks to Run Before You Click

Five Quick Checks to Run Before You Click
  • Hover, don’t click. If an email claims to be from your bank but the link points to some random string of characters or a domain you’ve never heard of, trust your gut and walk away.
  • Watch for the “Urgency Trap.” Scammers love to manufacture a crisis—like saying your account will be deleted in two hours—to make you panic and skip the logic check.
  • Check the greeting. If a “security alert” addresses you as “Dear Valued Customer” or just “User” instead of your actual name, it’s a massive red flag that they’re just casting a wide net.
  • Look for the subtle typos. I’ve learned that legitimate companies have entire departments for copyediting; if you see weird grammar or awkward phrasing, it’s probably a scam.
  • Verify through a separate channel. If you get a suspicious request from your boss or a service you use, don’t reply to that email. Open a new tab, go to the official site directly, or send a fresh message to confirm it’s real.

The Golden Rule of Inbox Defense

“In a world of automated scams, your best defense isn’t a fancy piece of software; it’s a five-second pause to ask yourself if that ‘urgent’ request actually makes sense.”

Nathaniel 'Nate' Brooks

Cutting Through the Noise

Cutting Through the Noise of phishing attempts.

At the end of the day, spotting a phishing attempt isn’t about being a cybersecurity expert; it’s about building a simple, repeatable mental checklist. We’ve covered how to look past the flashy logos, how to scrutinize those suspicious sender addresses, and why that sudden sense of urgency is almost always a red flag. If you can train yourself to pause for just five seconds when an email feels slightly “off,” you’ve already won half the battle. Remember, the goal isn’t to become paranoid about every notification, but to develop a healthy layer of skepticism that protects your time, your data, and your sanity from people trying to exploit your busy schedule.

I know it can feel overwhelming to keep up with how fast these scams evolve, but don’t let the complexity of the digital world paralyze you. Technology is a tool meant to serve us, not a minefield designed to trip us up. By implementing these small, structural habits into your daily digital routine, you’re essentially optimizing your personal security system. We aren’t aiming for a perfect, unhackable life—that’s an impossible standard. We’re just aiming to be smarter, more intentional, and a lot harder to fool. Stay sharp, keep your systems clean, and don’t let the scammers win.

Frequently Asked Questions

What should I actually do if I realize I've already clicked a suspicious link or entered my password?

If you realize you’ve slipped up, don’t panic—just move fast. First, change your password immediately on that site and any other account where you reuse it. If you entered credit card info, call your bank to freeze the card. Next, enable multi-factor authentication (MFA) everywhere; it’s the single best way to stop a thief even if they have your login. Finally, run a malware scan on your device just to be safe.

Can these scams happen through text messages or WhatsApp, or is it strictly an email thing?

Short answer: Absolutely. In fact, it’s becoming even more common. Whether it’s a random text (smishing) or a weirdly urgent WhatsApp message from a “bank” or a “delivery service,” the goal is the same: to trigger panic so you stop thinking clearly. I’ve seen plenty of these pop up on my own phone. The platform changes, but the psychology doesn’t. If a link feels off, treat it with the same suspicion as a sketchy email.

How can I tell if a "security alert" from my bank is actually legitimate or just a very good fake?

Here’s my rule of thumb: if a “security alert” feels urgent or threatening, treat it like a red flag. Never click the link in the email. Instead, close your inbox, open a fresh browser tab, and log in to your bank’s official site manually—or better yet, use their actual app. If there’s a real problem, the notification will be waiting for you in your secure dashboard. Don’t let their manufactured panic bypass your logic.

Is there a way to set up my inbox so these things don't even reach me in the first place?

Look, I’d love to tell you there’s a “magic button” to delete them all, but the reality is a bit more hands-on. You can tighten your filters and use aggressive spam settings, but the best move is to train your inbox. When a scam hits, don’t just delete it—mark it as spam. It teaches your provider’s algorithm what to block next time. It’s a small friction point now for a much cleaner inbox later.

Posted on

Hidden Smartphone Features You Should Be Using

Useful smartphone tips and tricks guide.

I remember sitting at my desk three years ago, staring at a phone that felt less like a tool and more like a digital parasite. I was drowning in notifications, my battery was dying by noon, and I was spending more time managing my device than actually using it to get things done. Most of the advice you find online about smartphone tips and tricks is absolute nonsense—either it’s some bloated, paid app that promises to “clean” your memory, or it’s a list of features you’ll never actually use. I’m tired of seeing people pay for “optimization” when the real solution is just cutting out the noise.
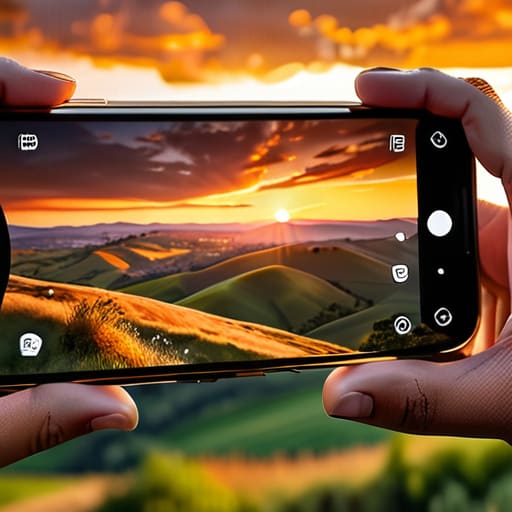
I’m not here to sell you on a new gadget or a subscription service. My goal is to share the exact, low-friction adjustments I’ve made to my own setup to turn my phone back into a streamlined instrument for productivity. We’re going to look at the settings that actually matter and the habits that actually save time. This isn’t about chasing every new update; it’s about building a system that works for you, rather than you working for it.

Table of Contents

Master Ios Hidden Settings for a Smoother Day

Master Ios Hidden Settings for a Smoother Day

First, let’s talk about the stuff Apple doesn’t scream about in their commercials. Most people just accept the default settings, but if you want to actually optimize mobile battery life, you need to get surgical with your background activity. Start by heading into Settings > General > Background App Refresh. My rule of thumb? If an app doesn’t need to ping you the second something happens—like a game or a retail app—turn it off. It stops the constant, invisible drain that kills your phone by 4:00 PM.

Next, let’s look at how you actually interact with the device. I’m a big believer in reducing the number of taps required to finish a task. You can leverage some incredibly useful mobile app shortcuts by utilizing the “Back Tap” feature under Accessibility. I’ve mapped a double-tap on the back of my iPhone to trigger the flashlight and a triple-tap to take a screenshot. It sounds like a minor tweak, but when you’re navigating a busy day, these tiny mechanical efficiencies add up. It’s about making the hardware feel like an extension of your intent rather than a barrier you have to fight through.

Android Productivity Hacks to Kill the Chaos

Android Productivity Hacks to Kill the Chaos

If you’re running an Android device, you aren’t just a user; you’re an administrator. While iOS is a walled garden, Android is more like a workshop—if you don’t organize your tools, you’re going to spend half your day digging through menus. My first move is always to lean into useful mobile app shortcuts through gestures and custom launchers. I personally use a minimalist launcher to strip away the visual noise of colorful icons that are just begging for a dopamine hit. By limiting your home screen to only the essentials, you stop the mindless scrolling and start actually completing tasks.

Beyond the interface, you need to look at how the OS handles your resources. If you feel like your hardware is dragging, it’s time for some serious mobile device performance optimization. I’m a big believer in disabling “background process limits” for apps that don’t need to be constantly pinging a server. This doesn’t just make the UI feel snappier; it’s one of the most effective ways to optimize mobile battery life without constantly hunting for a charger. It’s about setting up the system to work for you in the background, rather than you constantly babysitting the device.

Beyond the Basics: Five Small Tweaks for a Cleaner Digital Life

Beyond the Basics: Five Small Tweaks for a Cleaner Digital Life
  • Audit your notifications like you audit a budget. If an app isn’t providing immediate, actionable value, it doesn’t deserve a buzz in your pocket. Go into your settings and kill every non-human notification—no more “someone liked your photo” or “sale starting now” pings. If it’s not a person or a calendar event, it’s just digital noise.
  • Set up a “Grayscale” shortcut for when you’re spiraling into a doomscroll. Most of us don’t realize how much dopamine is tied to those bright, saturated app icons. Turning your screen black and white makes Instagram look incredibly boring, which is exactly the friction you need to put the phone down and actually get something done.
  • Clean up your home screen using the “One Page Rule.” I try to keep only my absolute essentials—the stuff I need for utility, not distraction—on the first page. Everything else gets tucked away in the App Library or a folder on the second page. If you have to swipe to find a social media app, you’ve already won a small battle against mindless usage.
  • Automate your “Wind Down” routine. Don’t rely on willpower to stop using your phone at 10 PM; use your phone’s built-in Focus modes to do it for you. Set a schedule that automatically triggers Do Not Disturb and dims your screen brightness at a specific time. Let the system enforce the boundaries so your brain can actually start to decompress.
  • Manage your background app refresh. It’s a silent battery killer and a data hog. Most apps don’t need to be checking for updates while they’re sitting idle in your pocket. Go into your settings and toggle off background refresh for everything except the essentials like Maps or your email. Your battery life—and your sanity—will thank you.

The Philosophy of the Pocket Tool

“Your smartphone shouldn’t be a slot machine designed to steal your attention; it should be a precision instrument that serves your schedule, not the other way around.”

Nathaniel 'Nate' Brooks

Reclaim Your Digital Space

Reclaim Your Digital Space from device chaos.

At the end of the day, whether you’re digging through iOS’s hidden menus or fine-tuning your Android notifications, the goal isn’t to become a tech wizard. It’s about reducing the cognitive load that these devices dump on us every single hour. We’ve covered how to silence the noise, automate the repetitive stuff, and finally stop fighting your hardware just to get through a basic task. By implementing even just two or three of these tweaks, you’re essentially building a buffer between your focus and the digital chaos that’s constantly trying to steal it.

I know it can feel overwhelming to keep up with every update and every new notification setting, but remember: you own the phone; the phone doesn’t own you. Don’t feel like you have to overhaul your entire digital life in one afternoon. Start small. Pick one setting that’s been annoying you for months and fix it today. Life is far too short to spend it wrestling with a device that’s supposed to be making things easier. We aren’t aiming for a perfectly optimized existence, just a slightly more streamlined one that leaves you with more time for the things that actually matter.

Frequently Asked Questions

Will these setting tweaks significantly impact my battery life, or am I just trading power for convenience?

Look, I’m a systems guy, so I don’t believe in arbitrary trade-offs. Most of these tweaks—like killing background refresh or managing notification density—actually work in your favor. You’re not just trading power for convenience; you’re cutting out the digital noise that forces your processor to work overtime for no reason. You’ll likely see a slight bump in battery life because your phone is finally doing less “busy work” in the background.

How do I implement these changes without accidentally breaking my existing workflows or losing data?

Look, I get it. The last thing you want is to spend three hours “optimizing” only to realize you can’t find your calendar or, worse, lost your photos. Don’t go changing everything at once. Treat it like a system deployment: one tweak at a time. Pick one setting, test it for a day, and make sure it actually helps. And please, for the love of all things organized, back up your data before you touch anything deep in the settings.

Are there specific apps that are notorious for bypassing these productivity settings and causing distractions?

Honestly, it’s usually the “infinite scroll” culprits. Apps like TikTok, Instagram, and X (Twitter) are engineered specifically to bypass your willpower. They use variable reward loops that make them feel almost impossible to put down, even if you’ve set a timer. Even Slack or WhatsApp can be sneaky; they use “urgent” notifications to hijack your focus. If an app feels like it’s pulling you into a rabbit hole, it’s probably doing it on purpose.

For someone who isn't particularly tech-savvy, which one of these adjustments provides the biggest "bang for my buck" right away?

If you’re looking for the biggest win without needing a degree in computer science, go straight for “Do Not Disturb” or “Focus Modes.” It’s the single most effective way to stop your phone from hijacking your attention. Set it to trigger automatically during your work hours or at night. You’ll immediately stop the constant pinging and reclaim your mental space. It’s low effort, high reward, and keeps the chaos at bay.

Posted on

How to Level Up Your Smartphone Photography

Tips on how to take better phone photos.

I used to think that if I wanted to capture a moment that actually felt real, I needed to drop two grand on a mirrorless camera and a bag of heavy glass lenses. It’s a total lie designed to separate you from your paycheck. I spent years lugging around gear that felt like a chore, only to realize I was missing the actual moment because I was too busy fiddling with manual ISO settings. The truth is, if you want to learn how to take better phone photos, you don’t need a studio setup or a degree in digital imaging; you just need to stop fighting the device in your pocket and start working with its logic.
I’m not here to give you a lecture on the physics of light or suggest some bloated, subscription-based editing app that eats your storage. Instead, I’m going to show you the small, actionable adjustments—the kind of system optimizations I use in my professional life—to clean up your shots and make them look intentional. We’re going to focus on lighting, composition, and a few hidden settings that actually matter. No fluff, no hype, just a straightforward blueprint to help you capture the good stuff without the friction.

Table of Contents

Mastering the Best Mobile Camera Settings for Instant Clarity

Mastering the Best Mobile Camera Settings for Instant Clarity

Look, you don’t need a $2,000 DSLR to get a shot that actually looks intentional. Most people just point, shoot, and pray, but if you want to start improving mobile image quality immediately, you need to stop letting the software make every single decision for you. Start by cleaning your lens—I know it sounds basic, but a quick wipe with your shirt removes that oily smudge that makes every photo look like a dream sequence. Once you’ve done that, tap your subject on the screen to lock the focus. This tells the sensor exactly what matters, preventing that awkward blur when you’re trying to capture something specific.

Next, let’s talk about the exposure slider. When you tap to focus, a little sun icon usually pops up next to the box; slide that down slightly to underexpose your shot. Modern sensors tend to overcompensate in bright light, which kills the texture in your subject. By pulling that slider down, you preserve the highlights and get much richer colors. If you’re dealing with tricky shadows, experimenting with these best mobile camera settings is far more effective than trying to fix a blown-out sky later during post-processing. It’s all about catching the data correctly the first time.

Smart Smartphone Lighting Techniques to Kill the Chaos

Smart Smartphone Lighting Techniques to Kill the Chaos

Look, you don’t need a $2,000 lighting kit to fix a muddy-looking shot. Most of the time, the “chaos” in a bad photo comes from harsh, direct light that washes out your subject or creates those ugly, deep shadows under people’s eyes. My rule of thumb is to hunt for diffused light. If you’re outdoors, find some light shade or wait for a cloud to pass over the sun; it acts like a giant, natural softbox. If you’re stuck inside, move your subject closer to a window. Natural side-lighting is one of the most effective smartphone lighting techniques for adding depth and texture without making everything look flat and clinical.

When you’re dealing with low-light scenarios, resist the urge to turn on your flash immediately. That tiny LED bulb is a blunt instrument—it flattens features and makes skin look oily. Instead, try to find a nearby lamp or even a shop window to catch some ambient glow. If you’re using smartphone portrait mode tips to get that creamy background blur, remember that the software relies heavily on light to distinguish your subject from the environment. If it’s too dark, the sensor will struggle, the edges will look jagged, and the whole effect falls apart. Aim for enough light to see the details, and let the software do the heavy lifting.

The Small Adjustments That Make a Massive Difference

The Small Adjustments That Make a Massive Difference
  • Clean your lens. I know it sounds stupidly simple, but most of my “hazy” or “dreamy” looking shots were just because I had a fingerprint smudge on the glass. Give it a quick wipe with your shirt before you pull it out; it’s the fastest way to get instant clarity.
  • Stop using digital zoom. If you pinch the screen to zoom in, you’re basically just stretching pixels and killing your resolution. If you can’t get close physically, just take the shot wide and crop it later in your editor. You’ll keep way more detail.
  • Use the grid lines to fix your composition. Go into your camera settings and turn on the 3×3 grid. Instead of centering everything like a default setting, try placing your subject on one of those intersecting lines. It immediately makes the photo look intentional rather than accidental.
  • Tap to lock your focus and exposure. Don’t just point and shoot. Tap the specific part of the screen you want sharp, then hold your finger down until you see the “AE/AF Lock” notification. Once it’s locked, you can slide your finger up or down to manually adjust the brightness before you hit the shutter.
  • Get low to the ground. We spend our whole lives looking at the world from five or six feet up. If you want a photo to actually feel interesting, crouch down or even sit on the pavement. Changing your perspective by just a few feet can turn a boring snapshot into something that actually has some depth.

The Philosophy of the Shot

“You don’t need a $3,000 DSLR to capture something meaningful; you just need to stop letting your hardware dictate your vision and start using the tools you actually have in your pocket.”

Nathaniel 'Nate' Brooks

Stop Overthinking the Gear

Stop Overthinking the Gear for better photos.

At the end of the day, getting better shots isn’t about buying the newest Pro Max model or carrying around a heavy DSLR. It’s about the small, intentional shifts in how you approach the moment. We’ve covered the essentials: dialing in your settings to stop the blur, mastering your lighting so you aren’t fighting shadows, and learning to see the world through a more structured lens. Once you stop letting your phone make all the decisions for you and start taking control of the technical basics, the quality of your images will jump almost instantly. It’s really just about eliminating the friction between what you see and what the sensor captures.

My advice? Don’t get caught up in the pursuit of the “perfect” shot. I’ve spent way too many hours tweaking spreadsheets and gear settings only to realize that the best memories usually happen when you aren’t staring at a screen. Use these tweaks to sharpen your skills, but don’t let the tech get in the way of the experience. The goal isn’t to become a professional photographer; it’s to ensure that when you look back at your digital library in five years, you actually remember how it felt rather than just seeing a grainy, poorly lit mess. Keep it simple, keep shooting, and just aim for better than yesterday.

Frequently Asked Questions

Do I actually need to pay for those expensive editing apps, or can I get the job done with free tools?

Look, I’m a big fan of optimization, but I’m also a big fan of not wasting money on things you don’t need. Short answer: No. You don’t need a monthly subscription to a pro-grade editing suite to make your photos pop. Most of the heavy lifting can be done with free tools like Snapseed or even the built-in editors on your phone. Save your cash for something better—like a decent brisket rub or a new synth component.

How do I stop my photos from looking blurry when I'm trying to capture something moving?

The blur happens because your shutter speed is too slow to “freeze” the action. To fix this, stop using Auto mode. Switch to Pro or Manual mode and crank up your shutter speed—aim for at least 1/500th of a second for moving subjects. It’ll make the image darker, so you might need to bump up your ISO or find more light, but it’ll kill that motion blur instantly.

Is there a way to take decent photos at night without a massive tripod or a flash that washes everything out?

Look, I get it. You want that moody, nighttime vibe, but the flash turns everyone into a ghost and a tripod is just too much gear to carry. My go-to is leaning into “Night Mode,” but here’s the trick: find a physical anchor. Lean your phone against a lamp, a trash can, or even a brick wall. That tiny bit of stability prevents the blur, letting the sensor actually do its job without the artificial glare.

When should I actually bother using Portrait Mode versus just sticking to the standard lens?

Look, Portrait Mode isn’t a magic wand; it’s a tool for specific scenarios. Use it when you want to isolate a subject—like a person or a single dish of food—and create that soft, blurred background (bokeh) that screams “intentional.” It’s great for depth. But if you’re shooting a landscape, a wide group shot, or something moving fast, stick to the standard lens. Portrait Mode can get messy with edges, and honestly, sometimes the natural clarity of the main lens is just better.

Posted on

The Easiest Ways to Move Files Between Different Devices

How to transfer files between devices easily.

I remember sitting at my desk three years ago, staring at a spinning loading icon that felt like it was mocking my very existence. I had a massive folder of project assets that needed to move from my old workstation to my new setup, and instead of a seamless transition, I was stuck in a loop of failed cloud syncs and tangled USB cables that seemed to lose connection every time I blinked. It’s incredibly frustrating how much time we waste just trying to figure out how to transfer files between devices when the technology is supposed to be making our lives easier, not adding more friction to our workflows.
I’m not here to sell you on some bloated, subscription-based software that promises magic but delivers nothing but more clutter. I’ve spent years testing the most efficient, low-friction methods—from old-school hardware shortcuts to streamlined cloud workflows—so you don’t have to. I’m going to show you the exact, no-nonsense ways to move your data without losing your mind or wasting your entire afternoon. Let’s get your systems running the way they should.

Table of Contents

The Fastest Way to Move Large Files Without the Wait

The Fastest Way to Move Large Files Without the Wait

If you’re trying to move a massive 4K video project or a bloated folder of high-res RAW photos, skip the cloud for a second. I’ve learned the hard way that relying on cloud storage synchronization for massive files is a recipe for frustration; you end up staring at a progress bar while your upload speed chokes on the bandwidth. Instead, if you want the absolute fastest way to move large files, you need to go physical. A high-quality USB cable file transfer is still king. By plugging your device directly into your workstation, you bypass the instability of Wi-Fi entirely and leverage the raw speed of the hardware connection.

For those of us who hate the clutter of cables, setting up a local network bridge is the next best thing. If you’re working within the same home or office network, using certain network file sharing protocols allows you to move data at much higher speeds than a standard wireless transfer. It’s essentially creating a private highway between your machines. It takes a few extra minutes to configure the permissions initially, but once it’s set up, you’re moving gigabytes in seconds rather than waiting for a slow upload to finish. It’s all about reducing that friction.

Wireless File Sharing Methods for a Cordless Life

Wireless File Sharing Methods for a Cordless Life.

If you’re like me, your desk is already a graveyard of tangled cables, so the last thing you want to do is hunt for a specific USB cord just to move a few photos. Wireless file sharing methods are the real winners here if you want to keep your workspace clean and your workflow moving. For anyone living in the Apple ecosystem, AirDrop is basically magic—it’s fast, it’s reliable, and it just works. However, if you’re dealing with the headache of transferring data between Android and iOS, you’re going to need something more platform-agnostic. Tools like Snapdrop or even just setting up a local shared folder can bridge that gap without needing a physical connection.

For a more “set it and forget it” approach, I usually lean on cloud storage synchronization. Services like Google Drive, Dropbox, or iCloud are great for small-to-medium files because they handle the heavy lifting in the background. You just save a file to a specific folder on your laptop, and a few seconds later, it’s sitting there on your phone. It’s not the absolute fastest way to move massive 4K video files, but for your daily documents and casual media, it’s the most seamless way to eliminate friction.

Five Pro-Tips to Keep Your Data Moving Smoothly

Five Pro-Tips to Keep Your Data Moving Smoothly
  • Check your connection speed before you start. There’s nothing more frustrating than starting a massive transfer only to realize you’re on a spotty guest Wi-Fi network instead of your high-speed home setup.
  • Organize your files into a single folder first. If you try to drag and drop a thousand individual files one by one, you’re just inviting errors and massive headaches. Zip them up, move the folder, then unzip them on the other side.
  • Mind your storage limits. I’ve lost count of how many times I’ve tried to sync a massive library to a cloud service only to get that “Storage Full” notification halfway through. Check your destination space before you hit send.
  • Use physical cables for the heavy lifting. Cloud services and wireless transfers are great for convenience, but if you’re moving hundreds of gigabytes, a high-quality USB-C cable will always beat a wireless connection for sheer reliability and speed.
  • Verify the transfer with a quick spot check. Once the progress bar hits 100%, don’t just close the window. Open a few random files on the new device to make sure nothing got corrupted during the handoff.

## The Philosophy of Frictionless Data

“We spend way too much time wrestling with incompatible cables and ‘transferring’ progress bars. The goal shouldn’t be just moving data; it should be making the technology disappear so you can actually get back to your real life.”

Nathaniel 'Nate' Brooks

Finding Your Flow

Finding Your Flow with seamless data transfers.

At the end of the day, there isn’t a single “best” way to move your data; there is only the method that works best for your specific setup. Whether you’re plugging in a physical drive to move a massive 4K video project or using a wireless handshake to send a quick PDF to your tablet, the goal is the same: minimizing the friction. You’ve seen that high-speed cables win for raw volume, while wireless tools are the kings of convenience. Once you’ve mapped out which tool fits which task, you stop treating file transfers like a chore and start treating them like a seamless part of your workflow.

My philosophy has always been that we shouldn’t let small technical hurdles dictate how much we actually get done. We spend way too much time fighting our tools instead of using them to build something meaningful. Don’t aim to have the most complex setup or the most expensive hardware; just aim to have a system that doesn’t get in your way. Get your files where they need to be, clear the digital clutter, and then get back to what actually matters. Life is far too short to spend it staring at a progress bar.

Frequently Asked Questions

Is it actually safe to use cloud services for sensitive or private documents?

Look, I get the hesitation. When you’re looking at a folder full of tax returns or private scans, “the cloud” can feel a bit too abstract and exposed. The short answer? It’s safe, provided you aren’t leaving the front door unlocked. If you use a reputable provider and—this is non-negotiable—enable two-factor authentication, you’re already ahead of most people. For the really sensitive stuff, I always recommend a little extra encryption before you even hit upload.

What’s the best way to move files if I’m working between a Mac and a PC?

This is where most people hit a wall, because macOS and Windows just don’t play nice by default. If you’re moving a few documents, a cloud service like Dropbox or Google Drive is the path of least resistance. But if you’re dealing with massive folders, skip the cloud and grab an external SSD formatted to ExFAT. It’s the only way to ensure both systems can read and write to the drive without a headache.

Will transferring large video files over Wi-Fi mess up my internet speed for everyone else?

The short answer is: yes, it can. Think of your Wi-Fi like a water pipe; if you’re running a massive hose to move a 50GB video file, there’s less pressure left for everyone else to shower or stream Netflix. If you notice your roommates complaining about lag, try limiting your transfer speed in the app settings or, better yet, plug in an Ethernet cable. It keeps the airwaves clear and the speeds consistent.

Are there any physical tools or drives I should keep on hand for when the wireless stuff fails?

Look, wireless is great until your Wi-Fi decides to take a nap or you’re trying to move a massive 4K video file that’s choking your bandwidth. When the cloud fails, go physical. I always keep a high-speed USB-C flash drive and a rugged external SSD in my desk drawer. If you’re moving stuff between a phone and a laptop, a dedicated thumb drive is a lifesaver. It’s manual, but it’s foolproof.

Posted on

How to Maintain a Clean and Organized Email Inbox

Tips on how to declutter your inbox.

I remember sitting at my desk three years ago, staring at a notification badge that read “4,287 unread messages,” feeling a genuine sense of physical dread. It wasn’t just digital clutter; it felt like a personal failure of my own systems. I tried the “productivity gurus” approach—buying expensive subscription-based organizers and setting up complex nested folders—but all I did was add more layers of friction to an already broken process. Learning how to declutter your inbox isn’t about finding a magic piece of software or a complex filing system that takes three hours to maintain; it’s about stopping the bleeding and reclaiming your mental bandwidth from the noise.
I’m not here to sell you on a complicated workflow that requires a degree in information systems to execute. Instead, I want to share the practical, low-friction tweaks I’ve used to turn my own digital chaos into something manageable. We’re going to focus on a few straightforward, actionable shifts that actually stick, moving away from the hype and toward a system that works for your real life. My goal is to help you clear the clutter so you can finally stop reacting to pings and start focusing on what actually matters.

Table of Contents

Embracing the Zero Inbox Methodology for Sanity

Embracing the Zero Inbox Methodology for Sanity.

I used to think “Inbox Zero” was just some obsessive productivity myth designed to make people feel guilty. For a long time, my inbox was a graveyard of unread notifications and “urgent” threads that weren’t actually urgent at all. But after years of treating my email like a digital junk drawer, I realized that the mental weight of those unread numbers was actually draining my focus. I had to shift my perspective: the goal isn’t to have an empty screen every second of the day, but to use the zero inbox methodology as a way to clear the mental clutter so I can actually think.

The trick isn’t to work harder, but to implement better email management strategies that do the heavy lifting for you. Instead of manually sorting every single message, I started leaning heavily on automated email filtering rules. If it’s a receipt, it goes to Finance; if it’s a social notification, it goes to a “Read Later” folder. By automating the trivial stuff, I stopped treating my inbox like a to-do list and started treating it like a transit station—things come in, they get processed, and they move out. It’s about reclaiming your headspace.

Small Shifts to Manage Email Overload Daily

Small Shifts to Manage Email Overload Daily

The biggest mistake I see people make is treating their inbox like a real-time chat room. If you’re reacting to every notification the second it hits your screen, you aren’t working; you’re just being distracted by design. To fix this, you need to implement some basic email filtering rules. I like to set up automated folders that catch anything non-essential—receipts, social media alerts, or industry newsletters—and move them out of my primary view immediately. This way, when I actually sit down to work, I’m only seeing the stuff that requires my direct attention.

Beyond automation, you have to be ruthless about what you allow into your digital space. We’ve all been there: you have a folder with 4,000 unread promotional emails from brands you haven’t shopped at in three years. It’s time to unsubscribe from newsletters that no longer provide value. Think of it as a digital audit. Every time a piece of junk hits your inbox, don’t just delete it—kill the source. Developing these small digital organization habits might feel tedious for the first week, but once the noise subsides, the mental clarity you get in return is well worth the effort.

Five Low-Friction Tactics to Reclaim Your Digital Space

Five Low-Friction Tactics to Reclaim Your Digital Space
  • Kill the noise at the source by aggressively unsubscribing. If you haven’t opened a newsletter in three weeks, it’s not “information”—it’s clutter. Use the search bar to find the word “unsubscribe,” go down the list, and prune everything that doesn’t add actual value to your day.
  • Stop using your inbox as a to-do list. When an email requires an action, move it to a dedicated task manager or a calendar slot, then archive the thread. Your inbox should be a landing strip, not a storage unit for pending chores.
  • Implement the “Two-Minute Rule” for incoming mail. If a reply or a quick task takes less than 120 seconds, do it immediately and archive it. If it takes longer, it needs to be scheduled or moved to a system designed for deep work, not left sitting in your face.
  • Set up automated filters to do the heavy lifting. I use rules to automatically shunt receipts, CC’d notifications, and social updates into specific folders. They stay out of my primary view, but I know exactly where to find them when I actually need to look.
  • Batch your processing time. Checking email every time a notification pings is a recipe for fractured focus. Instead, schedule three specific blocks throughout the day to process your messages. Outside of those windows, close the tab and get back to what matters.

The Philosophy of the Inbox

“Your inbox isn’t a to-do list; it’s just a waiting room. If you don’t start setting boundaries on who gets to sit there, you’ll spend your whole life managing other people’s priorities instead of your own.”

Nathaniel 'Nate' Brooks

The Path to a Quieter Inbox

The Path to a Quieter Inbox.

At the end of the day, decluttering your inbox isn’t about achieving some mythical state of digital nirvana where nothing ever arrives. It’s about implementing the small, sustainable shifts we discussed—moving toward a zero-inbox mindset, setting boundaries with notifications, and using filters to do the heavy lifting for you. We’ve covered how to stop reacting to every ping and start curating your digital environment instead. By applying these systems, you aren’t just cleaning up a list of messages; you are reclaiming your cognitive bandwidth from the constant, low-level anxiety that a bloated inbox creates.

Don’t feel like you have to overhaul your entire workflow by Monday morning. If you try to fix everything at once, you’ll just end up with another system that feels like a chore. Start with one small tweak—maybe it’s unsubscribing from those three junk newsletters that clutter your view every morning—and build from there. Remember, the goal isn’t to spend your life managing email; it’s to manage your email so you can get back to the things that actually matter. Let’s stop letting the noise win and start building a life that runs smoother, one click at a time.

Frequently Asked Questions

What if I’m afraid of deleting something important and losing it forever?

Look, I get it. That “fear of missing out” on a crucial attachment or a client request is real. But here’s the truth: your inbox isn’t an archive; it’s a transit hub. If you’re terrified of deleting, stop trying to purge and start archiving. Move everything older than 30 days into a single “Archive [Year]” folder. It stays searchable, but it’s out of your sight. Out of sight, out of mind, but never truly lost.

How do I handle the constant stream of new newsletters and promotional junk that keeps coming in?

The trick isn’t to work harder; it’s to cut the source. Every time a promotional email hits your inbox, don’t just delete it—search for the “unsubscribe” link immediately. If you’re feeling bold, I use a tool like Unroll.me or just a simple filter to shunt newsletters into a “Read Later” folder. If you aren’t opening it within a week, you don’t need it. Stop feeding the noise.

Is it actually sustainable to maintain a zero-inbox lifestyle long-term, or is it just a temporary fix?

Look, if you treat “Inbox Zero” as a rigid, perfectionist goal, you’re going to burn out in a week. It’s not sustainable that way. I see it as a system, not a destination. For me, it’s about maintaining a low level of friction. It’s sustainable only if you stop chasing a perfect number and start focusing on the process: quick triage, aggressive unsubscribing, and keeping the noise out. Aim for “Inbox Manageable” instead.

Which tools or filters should I actually use to automate the boring stuff without overcomplicating my setup?

Look, don’t go downloading a dozen new productivity apps; that’s just adding more friction. Stick to what you have. Start with simple keyword filters—set anything with “Unsubscribe” or “No-reply” to skip the inbox and hit a “Read Later” folder. If you’re feeling brave, use a tool like Unroll.me to mass-unsubscribe, but honestly? Just setting up three basic rules in Gmail or Outlook to divert the noise is usually enough to reclaim your focus.

Posted on

Ways to Minimize Eye Strain From Prolonged Screen Use

Tips on how to reduce eye strain from screens.

I remember sitting at my desk three years ago, staring at a spreadsheet that felt like it was literally burning my retinas. It was 9:00 PM, my head was throbbing, and I was halfway through a systems audit that felt like it would never end. I had already tried those overpriced blue-light glasses that promised a miracle, but they did nothing but make everything look slightly yellow and depressing. I realized then that most of the “solutions” out there are just expensive distractions. If you’re searching for how to reduce eye strain from screens, you don’t need a $200 gadget or a complete lifestyle overhaul; you just need to stop fighting your hardware and start optimizing your environment.

I’m not here to sell you on some wellness fad or a complicated setup that takes hours to configure. Instead, I’m going to give you the actual adjustments I use to keep my eyes from feeling like sandpaper by the end of a workday. We’re going to look at small, high-impact tweaks to your lighting, your monitor settings, and your physical habits that actually work. My goal is to help you reclaim your focus and eliminate that mid-afternoon headache without adding more friction to your life.

Table of Contents

Spotting Computer Vision Syndrome Symptoms Early

Spotting Computer Vision Syndrome Symptoms Early.

The thing about eye strain is that it’s a slow creep. It rarely hits you like a lightning bolt; instead, it’s a subtle, nagging discomfort that you eventually just learn to live with. You might notice your eyes feeling gritty, like there’s a tiny piece of sand stuck under your lid, or perhaps you’re finding yourself squinting at a spreadsheet more than usual. These are the classic computer vision syndrome symptoms that most of us ignore until we’re halfway through a massive headache.

I used to brush off that heavy, “sandpaper” feeling in my eyes, thinking I was just tired. In reality, I was preventing dry eyes from computer use by forgetting to blink. When we stare at a monitor, our blink rate drops significantly, which is a recipe for irritation. If you find yourself rubbing your eyes every twenty minutes or noticing that your vision gets slightly blurry toward the end of the workday, your body is sending you a flare signal. Don’t wait for the full-blown migraine to kick in; pay attention to those early warning signs so you can adjust your setup before the damage—or at least the discomfort—becomes your new normal.

The 20 20 20 Rule for Eye Health Made Simple

The 20 20 20 Rule for Eye Health Made Simple.

If you’ve ever spent eight hours straight staring at a spreadsheet only to realize you haven’t blinked in what feels like an eternity, you know the feeling. Your eyes feel heavy, gritty, and just plain tired. This is where the 20-20-20 rule for eye health becomes your best friend. It’s a dead-simple system designed to break that hypnotic, unblinking stare we all fall into when we’re deep in a flow state.

The logic is straightforward: every 20 minutes, look at something at least 20 feet away for at least 20 seconds. I started doing this a few months ago, and it’s been a total game-changer for preventing dry eyes from computer use. It sounds almost too easy to work, but it’s essentially just a manual reset for your eye muscles. Instead of letting them lock into a fixed focal distance all day, you’re giving them a much-needed moment to relax.

To make this actually stick, don’t rely on your willpower—it’ll fail you when a deadline hits. I use a simple, low-profile timer on my desktop to trigger these breaks. Think of it as a micro-maintenance routine for your vision. You aren’t trying to overhaul your entire life; you’re just building a small, automated buffer against the fatigue that usually hits by 3:00 PM.

Small System Tweaks for a Better Workspace

Small System Tweaks for a Better Workspace
  • Fix your lighting situation. If you’re working in a pitch-black room with a glowing monitor, you’re asking for a headache. Aim for soft, ambient light that matches your screen’s brightness so your pupils aren’t constantly fighting to adjust.
  • Switch everything to dark mode. As someone who refuses to use any app that doesn’t have a dark option, I can tell you it’s a game changer. It reduces the sheer amount of white light hitting your retinas, which makes those long afternoon stretches a lot more manageable.
  • Optimize your screen positioning. Your monitor shouldn’t be staring you down like an interrogator. Position it so the center of the screen is about 15 to 20 degrees below eye level. This allows your eyelids to cover more of your eye, reducing tear evaporation and dryness.
  • Dial in your text size. Stop squinting. If you find yourself leaning forward to read a line of code or an email, your font size is too small. Increase the scaling in your OS settings; your neck and your eyes will thank you.
  • Keep some eye drops nearby. Sometimes, even with the best systems, the environment wins. Keeping a bottle of preservative-free artificial tears at your desk can help reset things when you feel that familiar gritty, dry sensation creeping in.

The Cost of Friction

“We treat eye strain like an inevitable tax on our digital lives, but it doesn’t have to be. You aren’t broken; your setup is just inefficient. Stop trying to power through the headache and start fixing the environment that’s causing it.”

Nathaniel 'Nate' Brooks

Making It Stick

Making It Stick with eye strain habits.

At the end of the day, reducing eye strain isn’t about finding some magic piece of hardware or a revolutionary new software update. It’s about the small, intentional shifts in how you interact with your workspace. We’ve talked about recognizing the early warning signs of Computer Vision Syndrome, implementing the 20-20-20 rule to give your ocular muscles a break, and optimizing your environment to work with your eyes rather than against them. If you can commit to just two or three of these adjustments—like finally enabling that dark mode you’ve been eyeing or setting a recurring timer for breaks—you’ll notice a massive difference in how you feel by 5:00 PM. It’s about eliminating the friction between your work and your physical well-being.

I know how easy it is to fall into the trap of “just one more email” or “just five more minutes of research,” only to realize later that you’ve spent the last hour squinting at a glowing rectangle. But remember, your focus is your most valuable asset, and you can’t use it effectively if you’re constantly fighting a headache. Don’t aim for a perfect, sterile setup overnight; just aim to be slightly more mindful of your habits today than you were yesterday. Build better systems for your eyes, and you’ll find you have much more energy left for the things that actually matter once the laptop finally closes.

Frequently Asked Questions

Does using a blue light filter actually work, or is it just marketing hype?

Look, I’ll give it to you straight: it’s a bit of both. The idea that blue light is “damaging” your retinas is largely marketing hype, but the way it messes with your sleep cycle is real. If you’re staring at a screen at 11 PM, a blue light filter helps signal to your brain that it’s actually nighttime. Use it for sleep hygiene, but don’t expect it to be a magic cure for eye fatigue.

Should I be wearing blue light glasses all day, or is that overkill?

Honestly? For most of us, wearing them all day is overkill. I used to think they were a silver bullet, but they aren’t. If you’re working in a well-lit room, your eyes aren’t struggling against blue light; they’re struggling against glare and poor posture. Save the glasses for late-night sessions when you’re winding down, or use software like f.lux to warm up your display. Focus on lighting and breaks first—they actually move the needle.

How much does my desk setup and monitor height actually impact my eye fatigue?

It impacts your eyes more than you realize. If your monitor is too high, you’re constantly tilting your head back, which strains your neck and forces your eyes into an unnatural position. If it’s too low, you’re hunching. I learned the hard way that your eyes should ideally be level with the top third of the screen. When you look slightly downward, your eyelids cover more of your eyeball, which actually helps keep them moist and reduces that dry, gritty feeling by the end of the day.

Is dark mode really better for my eyes, or does it just make the text harder to read?

Here’s the truth: dark mode isn’t a magic fix, and for some, it actually makes things worse. If you have astigmatism, white text on a black background can cause “halation,” where the letters seem to bleed or blur. If you find yourself squinting more, stick to a light mode with a soft, warm tint. Personally, I use dark mode for everything—provided it’s a true dark mode—but if it’s causing friction, ditch it.

Posted on

How to Improve Your Video Call Quality and Appearance

Tips on how to look better on video calls.

I spent three years thinking I needed a $300 ring light and a professional-grade DSLR to stop looking like a grainy, washed-out ghost during my weekly sprint reviews. I fell for the hype, thinking that “professionalism” meant building a studio in my spare bedroom, when in reality, I was just adding more clutter to a desk that was already drowning in cables. Most of the advice you see online about how to look better on video calls is designed to sell you hardware you don’t need; you don’t need a cinematic setup, you just need to stop fighting your environment.
I’m not here to give you a shopping list of expensive gadgets or tell you to buy a dedicated studio lamp. Instead, I want to show you how to audit your current space and make a few small, logical adjustments that actually work. We’re going to focus on the low-effort, high-impact tweaks—things like light positioning and camera angles—that turn a chaotic, shadowy mess into a clean, professional presence. My goal isn’t to make you look like a YouTuber; it’s to help you eliminate the visual friction so you can just get on with your day.

Table of Contents

Small Tweaks for Improving Webcam Video Quality

Small Tweaks for Improving Webcam Video Quality

First, let’s talk about light. You don’t need to go out and buy a professional video call lighting setup or a ring light that looks like a prop from a sci-fi movie. Most of the time, you just need to stop sitting with a bright window directly behind you, which turns you into a dark, grainy silhouette. Instead, face the window or move a desk lamp behind your monitor so the light hits your face directly. It’s a tiny shift, but improving webcam video quality usually starts with just making sure you aren’t fighting against your own shadows.

Next, fix your line of sight. I spent way too long in my early twenties looking like I was staring up at a giant from a low-angle perspective because my laptop was sitting flat on my desk. It’s an unflattering angle that screams “unorganized.” Grab a stack of old hardcovers or a dedicated laptop stand to get the lens at eye level. Finding the best camera angles for remote meetings is really just about ensuring you aren’t looking down at your colleagues. It makes you look more engaged and, frankly, much more composed.

Finding the Best Camera Angles for Remote Meetings

Finding the Best Camera Angles for Remote Meetings.

Once you’ve sorted out your lighting, the next hurdle is the angle. Most people default to the “laptop on the desk” position, which is a mistake. It forces you to look down into the lens, creating that unflattering chin-heavy view that makes you look like you’re perpetually judging your coworkers. To find the best camera angles for remote meetings, you need to get that lens at eye level. If you’re on a laptop, grab a stack of old textbooks or a dedicated laptop riser. You want the camera to meet your gaze directly, not look up your nostrils.

It’s also about how much of your environment we’re seeing. I’ve found that tilting the camera slightly downward—rather than upward—helps frame your face and shoulders more naturally, which goes a long way in maintaining a remote work professional appearance. You aren’t trying to film a cinematic masterpiece here; you’re just trying to avoid looking like a hostage in a basement. Keep the tilt subtle. If you go too high, you look like a child in a school portrait; too low, and you’re back to the “chin-first” problem. Just aim for that sweet spot where you feel like you’re actually sitting across a table from someone.

The Final Layer: Audio and Environment

The Final Layer: Audio and Environment.
  • Stop using your laptop’s built-in mic. It picks up every click of your mechanical keyboard and the hum of your AC. Grab a decent pair of earbuds or a dedicated USB mic; if you sound like you’re underwater, people stop listening to your ideas.
  • Check your background for “visual noise.” You don’t need a professional studio, but a pile of laundry or a cluttered bookshelf behind you is a distraction. Aim for a clean corner or a simple wall so the focus stays on your face, not your mess.
  • Use the “Eye Contact Illusion.” It feels weird, but try to position your window or your main light source so it’s near the camera lens. If you’re constantly looking at the people on your screen, it looks like you’re staring at your own chin.
  • Manage your digital clutter. If you’re sharing your screen, close those twenty tabs you have open and hide your desktop icons. There is nothing more unprofessional than a client seeing your “Tax Prep 2022” folder or a messy desktop during a presentation.
  • Don’t forget the “Mute Habit.” Get into the rhythm of hitting that mute button the second you stop talking. It prevents those awkward, accidental outbursts of heavy breathing or background noise that break the flow of a good meeting.

## The Philosophy of the Setup

“You don’t need a professional studio or a thousand-dollar lens to look competent; you just need to stop fighting your environment and start making small, intentional adjustments to the light and the angle.”

Nathaniel 'Nate' Brooks

Stop Overthinking the Setup

Stop Overthinking the Setup for better photos.

At the end of the day, looking good on camera isn’t about buying a $300 ring light or owning a professional-grade DSLR. It really comes down to a few fundamental adjustments: getting your lighting right so you aren’t a shadowy silhouette, finding an angle that doesn’t make you look like you’re staring down from a mountain, and ensuring your background isn’t a chaotic mess of laundry and cables. If you can nail the lighting and the lens height, you’ve already won 90% of the battle. These are small, low-effort systems that yield high returns, allowing you to stop worrying about your reflection and start focusing on the actual conversation.

My philosophy has always been that we shouldn’t let the tools get in the way of the task. You don’t need a studio-quality broadcast to be effective; you just need to eliminate the visual friction that distracts people from what you’re saying. Once you’ve dialed in these basic tweaks, let the tech fade into the background. The goal isn’t to look like a polished influencer—it’s to look like a capable, composed professional who has their life under control. Now, go close those unnecessary tabs, check your light, and get back to the work that actually matters.

Frequently Asked Questions

What if my room is naturally dark and I don't want to buy a professional ring light?

Look, I get it. You don’t need a $100 ring light cluttering up your desk. If your room is a cave, stop fighting the shadows and just repurpose what you have. Grab a desk lamp, take the shade off if you can, and aim it at the wall behind your monitor rather than directly at your face. It bounces the light back more softly, kills the harsh glare, and makes you look way less like a grainy silhouette.

How much of a difference does a decent microphone actually make compared to just using my laptop's built-in one?

It makes a massive difference. Honestly, people will forgive a grainy video, but they’ll tune out immediately if your audio sounds like you’re broadcasting from inside a tin can. Laptop mics are notorious for picking up every hum from your AC and making your voice sound thin and hollow. A decent USB mic or even a solid pair of headphones gives you that warmth and clarity that actually makes people want to listen.

Is there a way to hide a messy background without having to do a full deep clean every single morning?

Look, I get it. Some mornings, the “deep clean” isn’t happening. If your room looks like a disaster zone, don’t waste energy fighting it. Just use a subtle blur effect—most platforms have it built-in, and it looks more natural than those fake tropical beach backgrounds. If you want to go a step further, invest in a cheap, neutral folding screen. You can just pop it up behind your chair, hide the chaos, and get back to work.

Should I be worried about using virtual backgrounds, or do they just make me look like a floating head?

Look, I get it. Virtual backgrounds can feel a bit “uncanny valley” if they aren’t dialed in. If you’re sitting in a messy room or a distracting environment, use one—it’s better to have a clean digital office than a pile of laundry in the frame. But if you want to avoid the “floating head” effect, stick to a subtle blur instead. It keeps the focus on you without the glitchy edges.

Posted on

Preventative Measures to Stop Your Laptop From Overheating

Tips on how to keep your laptop cool.

I remember sitting in my home office three years ago, mid-way through a complex systems audit, when my laptop fans suddenly kicked into a high-pitched, desperate whine that sounded like a jet engine preparing for takeoff. The chassis was so hot I could actually feel the heat radiating against my wrists, and within minutes, the entire system throttled into a sluggish, stuttering mess. It’s a specific kind of tech-induced rage when your hardware fails you right in the middle of a flow state, and honestly, most of the “solutions” you’ll find online—like buying those overpriced, neon-lit cooling pads—are just expensive Band-Aids for a much deeper problem. If you’re looking for how to keep your laptop cool without wasting money on useless gadgets, you’re in the right place.

I’m not here to sell you on miracle products or complex liquid cooling setups that belong in a server room. Instead, I’m going to share the practical, low-friction adjustments I’ve learned through years of troubleshooting hardware and optimizing my own workspace. We’re going to focus on real-world fixes—from airflow management to software tweaks—that actually work. My goal is to help you stop fighting your hardware so you can get back to what actually matters.

Table of Contents

Spotting the Signs of Laptop Overheating Early

Spotting the Signs of Laptop Overheating Early.

You don’t need a degree in thermal dynamics to know when your machine is struggling, but you do need to pay attention to the subtle cues it sends before it completely shuts down. The most obvious giveaway is the noise. If your fans sound like a jet engine taking off just because you opened a few Chrome tabs, that’s a red flag. Beyond the sound, keep an eye out for unexplained performance drops. This is often where you’ll encounter preventing laptop thermal throttling in real-time; your system intentionally slows down your processor to prevent permanent hardware damage. If your mouse cursor starts stuttering or your video calls begin to lag, your laptop is likely trying to save itself from melting.

Another subtle sign is the physical heat you feel on the chassis. If the underside of your device feels like a hot plate, you aren’t just dealing with a warm machine—you’re dealing with poor heat dissipation. I’ve found that a bit of laptop CPU temperature monitoring can take the guesswork out of this. Instead of relying on “feel,” using a simple software tool lets you see exactly when those spikes happen. If you notice temperatures climbing steadily even during light tasks, it’s time to stop ignoring the warning signs and start looking at your airflow.

Preventing Laptop Thermal Throttling Before It Kills Productivity

Preventing Laptop Thermal Throttling Before It Kills Productivity

If you’re waiting until your fans sound like a jet engine taking off before you take action, you’ve already lost the battle. The real trick to preventing laptop thermal throttling is being proactive rather than reactive. I’ve learned the hard way that once your system starts aggressively slowing down your processes to save itself from melting, your productivity has already tanked. Start by auditing your physical setup. If you’re working with your machine resting on a duvet or a plush rug, you’re essentially suffocating it. I always tell people to prioritize improving laptop airflow by using a hard, flat surface—even a simple book propped under the back edge can make a noticeable difference in how much air actually reaches those intake vents.

If you want to get serious about long-term stability, you need to look at the hardware level. Dust is the silent killer of efficiency; it builds up in the fins and creates a thermal blanket that no amount of software tweaking can fix. I eventually had to sit down and follow a proper laptop fan cleaning guide just to get my old workstation back to factory specs. If you’re running heavy workloads—like video editing or heavy data processing—it might also be worth investing in some of the best laptop cooling pads on the market. They aren’t just gimmicks; they provide a consistent, external source of cool air that helps maintain a stable baseline.

Five Low-Effort Fixes to Stop the Heat

Five Low-Effort Fixes to Stop the Heat
  • Stop using your laptop on your lap or a soft blanket. I know it’s tempting when you’re lounging, but soft surfaces act like insulation and choke off your intake vents. Keep it on a flat, hard surface—a desk or even a large hardcover book—to let the air actually move.
  • Invest in a decent cooling pad or a simple laptop stand. If you’re doing heavy lifting like video editing or running complex simulations, you need that physical gap between the chassis and the desk to facilitate airflow. It’s a small upfront cost that pays off in hardware longevity.
  • Do a quick audit of your background processes. I’ve learned the hard way that having twenty Chrome tabs and a dozen “helpful” utility apps running in the background is a recipe for thermal disaster. If you aren’t using it, kill the process. It lowers the CPU load and, by extension, the temperature.
  • Give your fans a little love with some compressed air. Over time, dust builds up in the heatsinks like a physical barrier to cooling. Every few months, give the vents a quick blast to clear out the debris. It’s a five-minute task that prevents a massive headache later.
  • Manage your power settings instead of just cranking them to max. Most of us don’t need peak performance while we’re just answering emails or browsing. Switching to a “Balanced” power plan keeps the voltage lower and prevents the fans from spinning up unnecessarily.

## The High Cost of Heat

“Treating your laptop like a furnace isn’t just a way to slow down your workflow; it’s a slow-motion wrecking ball for your hardware. A little bit of preventative maintenance today is a lot cheaper than a replacement bill tomorrow.”

Nathaniel 'Nate' Brooks

Keeping Your Cool

Keeping Your Cool: laptop temperature management tips.

At the end of the day, managing your laptop’s temperature isn’t about becoming a hardware expert; it’s about implementing a few low-effort, high-impact habits. Whether you’re clearing out dust from your vents, ditching the soft blankets that choke your airflow, or finally investing in a decent cooling pad, these small adjustments prevent the dreaded thermal throttling that kills your momentum. Remember, the goal isn’t to achieve some impossible level of technical perfection, but to eliminate the friction between you and your work so your hardware stays as reliable as your workflow needs it to be.

We spend so much of our lives working alongside these machines, yet we often ignore the simple maintenance that keeps them running smoothly. Don’t wait for your fans to start screaming or for your system to crawl to a halt before you take action. By taking five minutes today to optimize your setup, you’re actually buying yourself more time and less frustration tomorrow. Life is complicated enough as it is; don’t let a overheating processor be the thing that slows you down. Build better systems, keep your gear cool, and get back to the work that actually matters.

Frequently Asked Questions

Is it actually worth spending money on a cooling pad, or is that just marketing fluff?

Look, I’ve run the numbers on this, and the answer isn’t a simple yes or no. If you’re working in a temperature-controlled office and your laptop is already breathing fine, a cooling pad is mostly marketing fluff. But, if you’re a power user running heavy builds or editing video in a warm room, it’s a legitimate investment. It provides extra airflow and, more importantly, lifts the chassis to prevent that dreaded heat soak.

Can I safely open up my laptop to clean the fans myself, or am I going to void my warranty?

Look, I get the urge to just crack it open and get to work, but proceed with caution. Technically, most manufacturers claim opening the chassis voids your warranty, though they rarely enforce it unless you actually break something during the process. If you’re comfortable with a precision screwdriver and have a steady hand, go for it. If you’re nervous about snapping a delicate ribbon cable, just take it to a pro. Better safe than sorry.

How much of the heat issue is just my software running too many background processes?

Honestly? A huge chunk of it. It’s easy to blame the hardware, but your CPU is often working overtime just to keep up with the digital clutter in the background. Every unnecessary startup app and rogue browser tab is essentially a tiny heater running inside your chassis. If you haven’t audited your Task Manager lately, you’re likely fighting a battle against software you don’t even realize is running. Clean up the bloat, and the heat usually follows.

At what point does overheating move from a nuisance to actual permanent hardware damage?

Look, there’s a line between “annoying slowdowns” and “expensive paperweight.” Most modern laptops have built-in failsafes to shut down before they melt, but you shouldn’t rely on that. If you’re seeing constant thermal throttling or your fans are screaming 24/7, you’re redlining. Repeatedly hitting those high temps can degrade your battery life or, worse, cause solder joints to fail. If it feels hot enough to be uncomfortable on your lap, you’re already in the danger zone.

Posted on

Simple Steps to Enhance Your Online Privacy

Tips on how to protect your online privacy.

I spent three hours last Tuesday reading a white paper on “advanced encryption protocols” for a friend, only to realize the guy was essentially selling a $50-a-month subscription to a service that does what a basic browser setting can do for free. It’s exhausting. Most of the advice out there about how to protect your online privacy is either written by people trying to sell you a “security suite” or by tech enthusiasts who make simple tasks feel like you’re trying to hack into the Pentagon. I’m tired of the gatekeeping and the unnecessary complexity that turns a simple digital chore into a weekend-long headache.

I’m not here to sell you a lifestyle or a complicated setup that requires a degree in computer science to maintain. Instead, I’m going to give you the streamlined, high-impact adjustments that actually move the needle without draining your time or your bank account. We’re going to focus on the small, systemic shifts—like managing your digital footprint and tightening your settings—that allow you to secure your data and finally stop worrying about it. We aren’t aiming for total digital invisibility; we’re just aiming to build a better, more efficient defense.

Table of Contents

Cleaning Up Your Digital Trail Without the Headache

Cleaning Up Your Digital Trail Without the Headache

Look, I get it. The idea of “cleaning up” your digital trail sounds like a weekend-long chore involving a spreadsheet and a lot of regret. But you don’t need to go on a scorched-earth mission to fix this. Start by tackling the low-hanging fruit: your browser and your search history. Most of us are essentially broadcasting our interests to every advertiser on the planet without even realizing it. A simple way to start avoiding online tracking is to switch your default search engine to something that doesn’t profile you, and for heaven’s sake, stop using the same browser for everything. Using a privacy-focused browser isn’t just for tech enthusiasts; it’s a baseline for digital footprint management that keeps your data from being sold to the highest bidder.

Next, let’s talk about the apps that live in your pocket. We all have those old accounts from five years ago that we haven’t touched since college, but they’re still sitting there, holding your data like a digital time capsule. I make it a habit to do a quick audit once a quarter—delete the apps you don’t use and, more importantly, revoke their permissions. If a flashlight app wants access to your contacts and location, hit deny or just delete the thing. It’s about reducing the surface area available for a leak. Small, consistent tweaks are much more effective than trying to overhaul your entire existence in one afternoon.

Simple Habits to Stop Constant Online Tracking

Simple Habits to Stop Constant Online Tracking

Most people think they need to become a ghost to stay safe, but that’s a recipe for burnout. You don’t need to disappear; you just need to stop being so predictable. Start by auditing your browser settings. Most of us just click “Accept All” on those cookie banners because we want to read the article and move on, but that’s exactly how the data trail starts. I’ve found that switching to a privacy-focused browser or simply using strict tracking protection makes a massive difference in avoiding online tracking without slowing down your workflow.

Another easy win is being more intentional about the tools you use daily. If you’re frequently jumping on public Wi-Fi at a coffee shop to get some work done, it’s worth looking into VPN and privacy tools to layer some protection over your connection. It’s not about being paranoid; it’s about creating a buffer between your personal life and the advertisers lurking in the background. If you can automate these small shifts—like setting your phone to limit ad tracking in the privacy settings—you’re essentially building a passive defense system that works while you’re busy doing actual work.

The Low-Effort Toolkit for Digital Boundaries

The Low-Effort Toolkit for Digital Boundaries.
  • Stop reusing passwords. I know, it’s a pain, but using the same login for your bank and your random recipe blog is asking for trouble. Get a password manager—something like Bitwarden or 1Password—and let it do the heavy lifting. It’s one less thing for your brain to track.
  • Audit your app permissions. Every few months, go through your phone settings and see which apps are asking for your location or microphone. If that flashlight app needs to know where you sleep, revoke that access immediately. If it doesn’t need it to function, it shouldn’t have it.
  • Switch to a privacy-focused search engine. Google is great, but it’s also a massive data vacuum. Try DuckDuckGo or Brave Search. You’ll get the results you need without feeling like every search query is being logged into a permanent dossier on your interests.
  • Use a VPN when you’re out and about. Public Wi-Fi at coffee shops is convenient, but it’s also incredibly insecure. A reliable VPN adds a layer of encryption that keeps your data from being intercepted by anyone else on the same network.
  • Tighten your social media settings. Most platforms default to “public” or “friends of friends,” which is way too open. Take ten minutes to go through your privacy settings and lock things down. You don’t need the entire internet knowing your location or your family’s names.

The Core Philosophy

“Privacy isn’t about having something to hide; it’s about having something to protect. You don’t need to go off the grid or live like a ghost—you just need to stop letting every corner of the internet treat your personal life like public property.”

Nathaniel 'Nate' Brooks

Reclaiming Your Digital Peace

Reclaiming Your Digital Peace through cybersecurity.

Look, I know this can feel like a massive undertaking, but you don’t need to become a cybersecurity expert to make a difference. It really comes down to the fundamentals we’ve talked about: cleaning up your old accounts, tightening your browser settings, and building a few small, sustainable habits that keep trackers at bay. You aren’t trying to disappear from the face of the earth; you’re just trying to stop the constant, unnecessary leak of your personal data. If you implement even half of these tweaks, you’ll already be ahead of the vast majority of people out there.

At the end of the day, digital privacy isn’t about being paranoid—it’s about intentionality. It’s about deciding that your information is yours to manage, not something for a corporation to harvest and sell without your permission. We aren’t aiming for a perfect, impenetrable fortress; we’re just aiming to build a better system that works for us, rather than against us. Take it one step at a time, keep your systems simple, and reclaim your digital headspace so you can focus on the things that actually matter in the real world.

Frequently Asked Questions

Does using a VPN actually make a difference for my daily browsing, or is it just overkill?

Look, if you’re just scrolling Reddit on your home Wi-Fi, a VPN isn’t a magic shield, but it’s far from overkill if you work from cafes or use public airport networks. It’s about adding a layer of friction for anyone trying to sniff your data on unencrypted connections. Think of it as a digital privacy baseline. It won’t make you invisible, but it stops the low-hanging fruit from grabbing your info.

I'm worried about my smart home devices—how much of my private life are they actually leaking?

Look, I get it. I love my smart lights and my automated coffee maker as much as the next guy, but they can feel like little spies in your living room. The reality is they’re leaking metadata—when you’re home, what you eat, even your sleep patterns. Don’t go ripping everything out of the wall, though. Just move your smart devices to a guest Wi-Fi network. It creates a digital firewall between your sensitive data and your gadgets.

Is it worth the effort to switch to encrypted messaging apps, or am I just making things more complicated for myself?

Look, I get it. Adding another app to your home screen feels like adding more friction to an already cluttered life. But here’s my take: if you’re just sending memes to your brother, don’t sweat it. But for anything personal or professional, it’s worth the five minutes of setup. Switching to something like Signal isn’t about being a conspiracy theorist; it’s just about closing a massive, unnecessary door to your private data. It’s a small tweak for much better peace of mind.

How do I know if a "privacy-focused" browser is actually doing what it says it's doing?

Look, don’t just take their marketing at face value. I always run a quick audit myself. The easiest way is to use a tool like Privacy Badger or a tracker blocker to see what’s actually being blocked in real-time. If you see a constant stream of third-party scripts firing off while you’re just browsing a news site, that browser is lying to you. If the “blocked” count stays near zero, it’s just window dressing.

Posted on

Keeping Your Children Safe While They Browse the Internet

Tips on how to protect your kids online.

I’m going to be blunt: most of the advice you see about how to protect your kids online is absolute nonsense designed to sell you a monthly subscription to some “all-in-one” parental control suite. I spent years as a systems analyst, and I can tell you that no piece of expensive, bloated software is going to act as a magic shield against the chaos of the internet. You don’t need a high-priced digital bodyguard or a degree in cybersecurity to keep your family safe; you just need to stop chasing the perfect solution and start building better habits.

I’m not here to sell you a miracle app or lecture you with fear-mongering headlines. Instead, I want to share the practical, low-friction adjustments I’ve implemented in my own home to minimize digital risk without turning my living room into a high-security prison. We’re going to focus on small, actionable tweaks—from router settings to simple conversation frameworks—that actually work in the real world. My goal is to help you cut through the noise and find a system that actually sticks, so you can get back to focusing on what matters.

Table of Contents

Smart Parental Control Software Reviews That Actually Work

Smart Parental Control Software Reviews That Actually Work

Look, I’ve spent enough time digging through technical specs and reading endless parental control software reviews to know that most of them are just marketing fluff. You don’t need a massive, expensive suite that turns your kid’s device into a digital prison; you just need something that provides visibility without constant friction. I generally look for tools that offer a balance of automated filtering and meaningful screen time management tips that you can actually implement without a fight every single evening.

If you’re looking for a starting point, Qustodio and Bark are the heavy hitters for a reason. Qustodio is great if you want granular control over specific apps and web categories, which helps in setting healthy boundaries before they become habits. Bark, on the other hand, takes a slightly different approach by focusing on monitoring communication for red flags like self-harm or bullying. It doesn’t let you micromanage every single keystroke, but it alerts you when something actually looks wrong. Personally, I prefer the “alert-based” model because it allows for more trust while still providing a safety net when things get dicey.

Simple Screen Time Management Tips for Better Balance

Simple Screen Time Management Tips for Better Balance

Look, I’m a big believer in systems, but I also know that trying to police every single second of a kid’s digital life is a losing battle. If you try to turn your house into a digital prison, they’ll just find a way to bypass your rules the second you turn your back. Instead of constant surveillance, I’ve found that the most effective screen time management tips revolve around creating predictable boundaries. Think of it like a scheduled maintenance window for a server; it’s not about restriction for the sake of it, it’s about stability.

Start by establishing “tech-free zones”—like the dining table or bedrooms after 9 PM—and stick to them. It’s much easier to manage expectations when the rules are baked into the daily routine rather than being a reactionary response to an argument. Beyond just setting timers, we really need to focus on teaching digital citizenship to kids so they understand the why behind the limits. When they grasp that balance isn’t just a rule imposed by a parent, but a way to keep their brains from feeling fried, they’re much more likely to self-regulate. It’s about moving from constant enforcement to building long-term habits.

Five Low-Friction Habits to Secure Their Digital World

Five Low-Friction Habits to Secure Their Digital World
  • Audit your router settings once a month. Most people set up their Wi-Fi and forget it, but most modern routers have built-in parental controls that let you pause the internet for specific devices or block sketchy sites at the source. It’s much more effective than trying to police every single tablet and phone individually.
  • Turn on “SafeSearch” and restricted modes on every search engine and video platform you use. It’s not a silver bullet, but it acts as a decent first line of defense to filter out the most egregious content before it even hits their screen.
  • Set up a “Digital Charging Station” in a common area like the kitchen. I learned the hard way that devices left in bedrooms overnight are a recipe for midnight scrolling and exposure to things they aren’t ready for. If the tech sleeps in the kitchen, the boundaries stay intact.
  • Use the “Two-Factor Authentication” (2FA) rule for every family account. Whether it’s their gaming profile or a school email, adding that extra layer of security means even if they accidentally click a phishing link, a stranger isn’t walking away with their entire digital identity.
  • Build a “No-Judgment” policy for digital mistakes. If they see something weird or get a strange message, they need to know they can come to you without you immediately snatching their phone away. If the punishment is too high, they’ll just get better at hiding their tracks, and that’s when things actually get dangerous.

The Real Goal of Digital Safety

“Digital safety isn’t about building a high-tech fortress around your kids; it’s about setting up the right systems today so they have the intuition to navigate the chaos tomorrow.”

Nathaniel 'Nate' Brooks

Finding Your Digital Equilibrium

Finding Your Digital Equilibrium through parental controls.

At the end of the day, protecting your kids online isn’t about building a digital fortress that’s impossible to breach; it’s about creating a manageable framework. We’ve looked at how the right parental control software can act as a first line of defense, and how setting intentional screen time boundaries helps prevent that mindless, endless scrolling that drains everyone’s energy. It’s about layering these small, systematic adjustments—software, schedules, and settings—to create a safety net that works in the background. You don’t need to be a cybersecurity expert to get this right; you just need to set the foundation so the chaos doesn’t take over your household.

But if there is one thing I’ve learned from years of optimizing systems, it’s that no piece of software can ever replace the human element. The most effective “firewall” you have is the open, honest conversation you have with your kids when the screens are off. Tech will always evolve, and new risks will always pop up, but if you build a relationship based on trust and transparency, they’ll come to you when things get weird online. Don’t aim for a perfect, risk-free digital life—that doesn’t exist. Just aim for a better, more intentional way of navigating the digital world together.

Frequently Asked Questions

How do I balance keeping them safe without feeling like I'm constantly spying on their privacy?

This is the classic tension, isn’t it? You want to be a safety net, not a surveillance state. I look at it like system permissions: you aren’t monitoring their every keystroke; you’re just setting the guardrails. Focus on “macro” settings—filtering explicit content or setting hard shut-off times—rather than “micro” spying on individual chats. It’s about building a secure environment, not a digital prison. Trust is the goal; the tech is just the backup.

At what age should I actually start giving them more digital freedom and less supervision?

There isn’t a magic birthday where you just flip a switch, but I look at it like a gradual rollout of permissions. Instead of a hard cutoff, I prefer a “tiered access” approach. As they show they can handle small responsibilities—like managing their own homework schedule—you loosen the digital leash. Aim to increase autonomy as their critical thinking matures, usually around 12 or 13, moving from strict monitoring to open, trust-based conversations.

Are there specific red flags I should look for in their browsing habits that indicate something is actually wrong?

Look, you don’t need to be a private investigator, but you do need to trust your gut. I always look for sudden shifts in baseline behavior. If a kid who’s usually open suddenly becomes hyper-defensive or starts hiding their screen when you walk in, that’s a red flag. Watch for drastic changes in sleep patterns, irritability, or a sudden withdrawal from real-world hobbies. It’s not about spying; it’s about noticing when the system feels “off.”

How can I teach them about online safety without making it sound like a boring lecture they'll just tune out?

Look, if you sit them down for a formal lecture, they’ve already checked out before you even finish the first sentence. Instead, try “sideways” teaching. When you see something weird or a weird ad pop up while you’re browsing together, ask them, “Hey, does that look legit to you?” Treat them like a junior analyst. By making it a collaborative investigation rather than a sermon, you’re building their intuition instead of just their resentment.